
What to Pack for the Camino de Santiago: Advice from a Woman Who’s Walked It Twice

In the latest Travel Tuesday Interview, I chat with experienced hiker and retired educator Chris Rufflo who trekked the Camino de Santiago for the second time last fall and has plans for a third trip. Rufflo is an expert at packing light and my go-to source for minimalistic packing tips. She shares her hiking experience on both the French and Portuguese routes along with her detailed packing list for the Camino de Santiago.
Affiliate links are used in this post. If you make a purchase, I earn a small commission at no cost to you, which goes toward the cost of maintaining this blog.
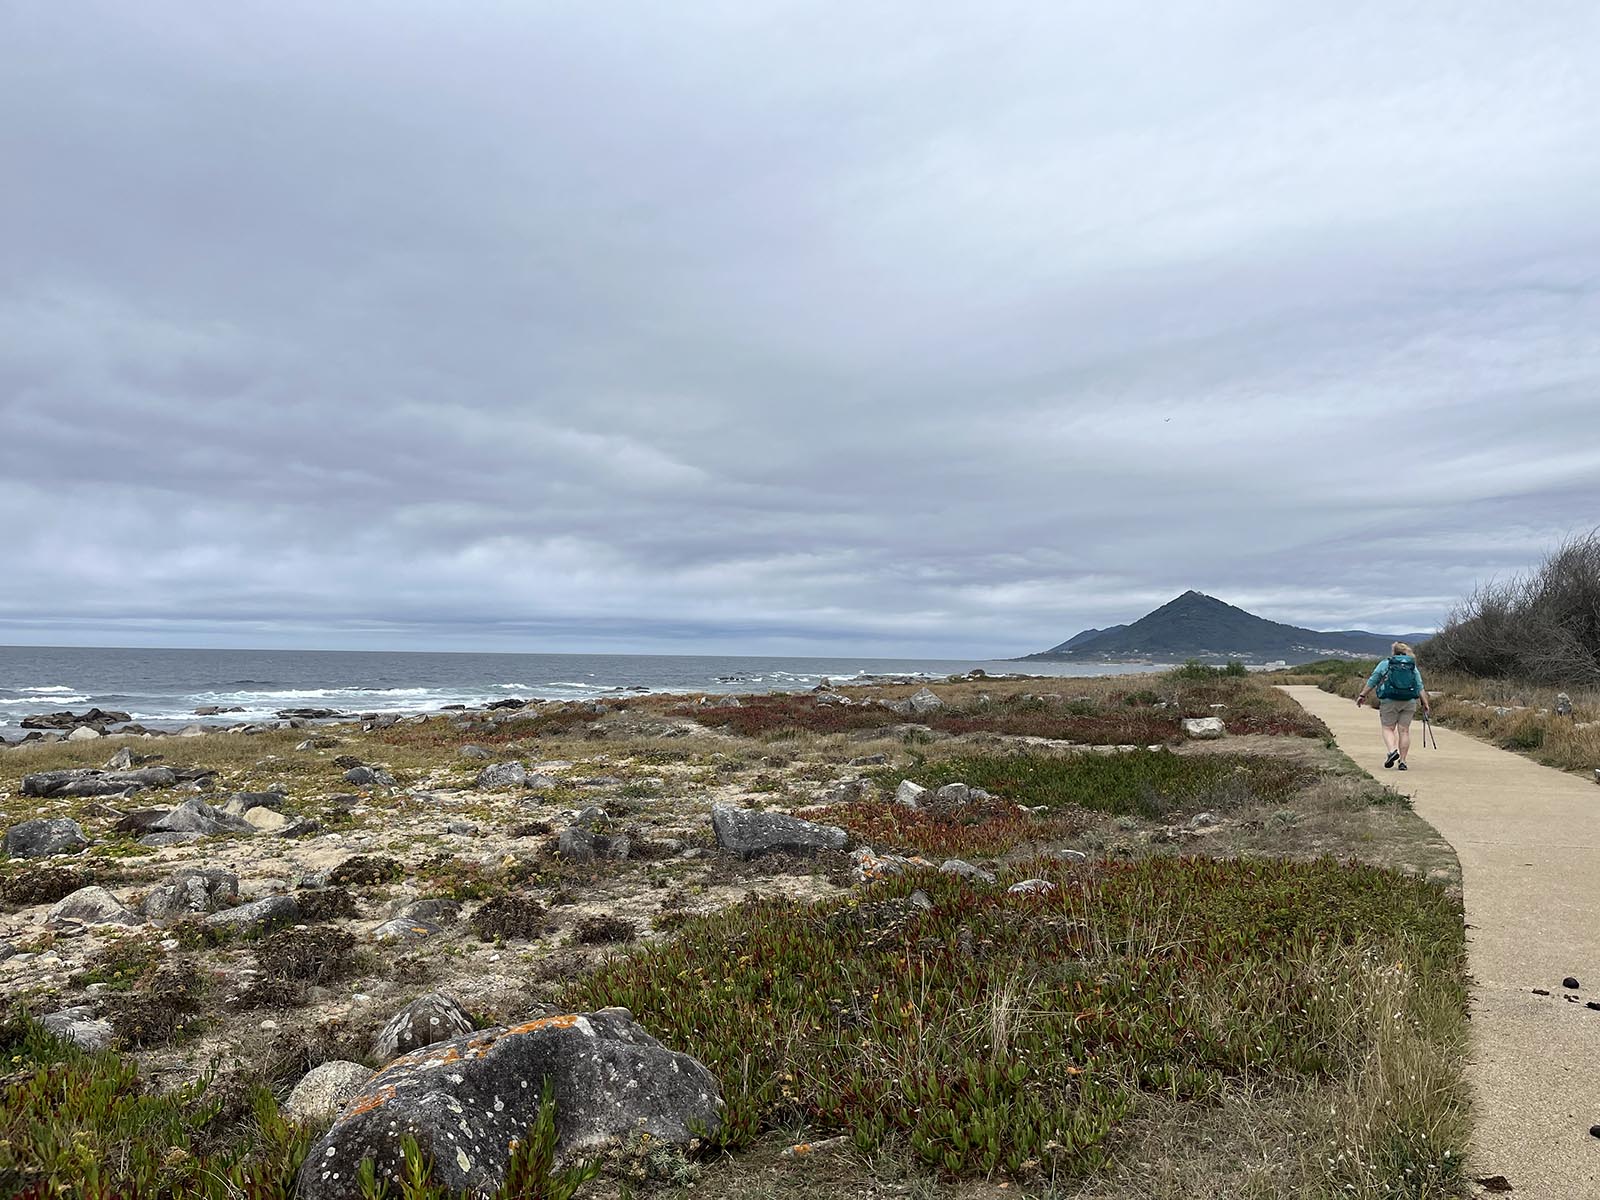
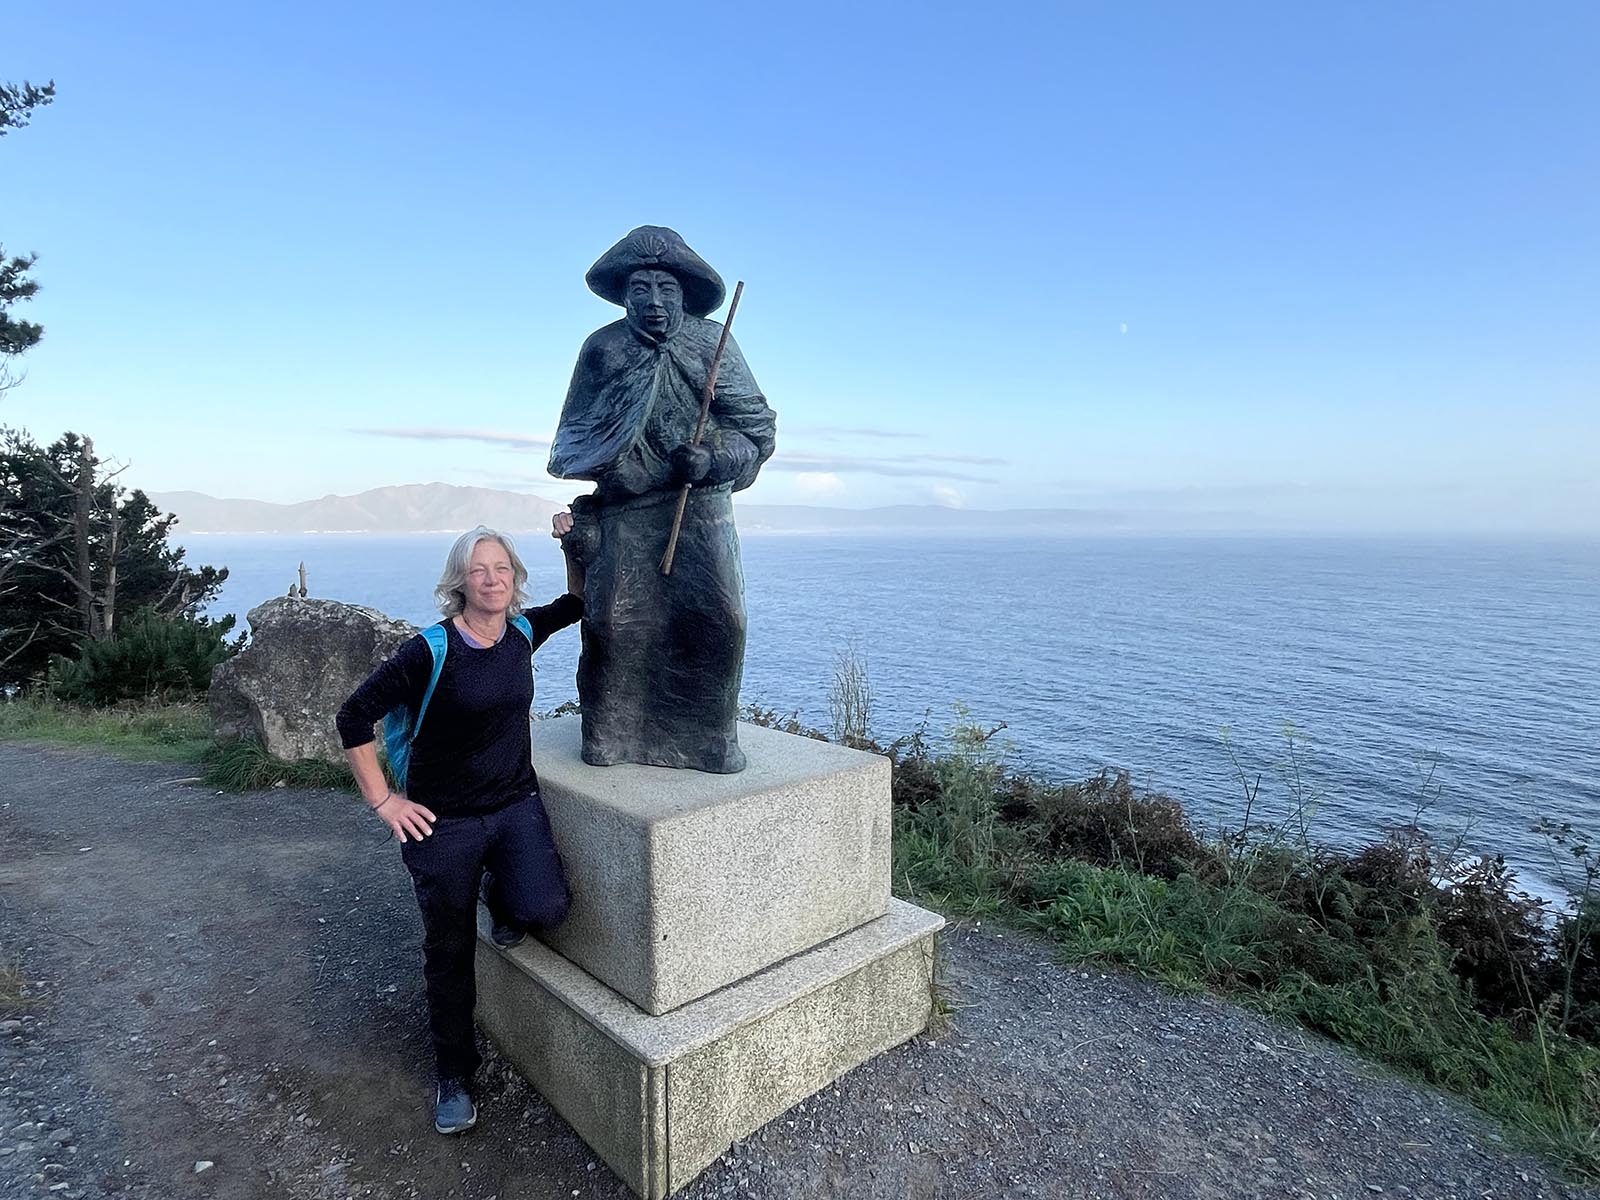 Texan Chris Rufflo at Finisterre, which is on the Camino de Santiago Portuguese and French Route. She has hiked both routes, nearly a decade apart. Photo by Chris Rufflo.
Name: Chris Rufflo
Age: 61
Home Base: Austin, Texas
Country Count: 30
What made you decide to do the Camino de Santiago twice?
That’s a tough one. I mean what compels a person to walk from one side of a country to the other?! I walked the French route in September 2018. I was in a huge transitional time in my life: my sister had recently died from esophageal cancer, which really knocked me off my feet. But there is something about the experience of losing someone close to you that shifts everything…death has a way of clarifying life. I had many tremendous life changes that year and felt the pull of the Camino as a way of clearing my head. Roughly seven years later, I retired [from a career in education] and again feeling the need to reset and clear my head, headed again to the Camino, this time the Portuguese [Sendera Literal Route in September 2024.]
How did you train for the Camino de Santiago? How far in advance should people train?
That depends on how active you are in your day-to-day life and what Camino you are planning to hike. The Portuguese is much easier to walk as there is virtually no altitude gain. The French route, however, does require strength and stamina. You should be able to walk 10 miles without it killing you, and you should be able to do that with altitude gain and loss! There will be some steep climbing days [on the French route].
When is the best time to hike the Camino?
You can hike the Camino all year, but if you are to avoid crowds, it’s best to go in the early spring or late fall. (April or Oct.) Summer is beautiful but will be more crowded with many other hikers.
How many miles were you hiking daily?
On the French route, I think I averaged about 15 miles a day. On the Portuguese route, I averaged around 18 miles a day. Typically, on the French route, I began walking at daybreak or a little before and walked until midday roughly 3 p.m. Many people begin later in the day and walk until later in the day. This is true, especially if the Portuguese route.
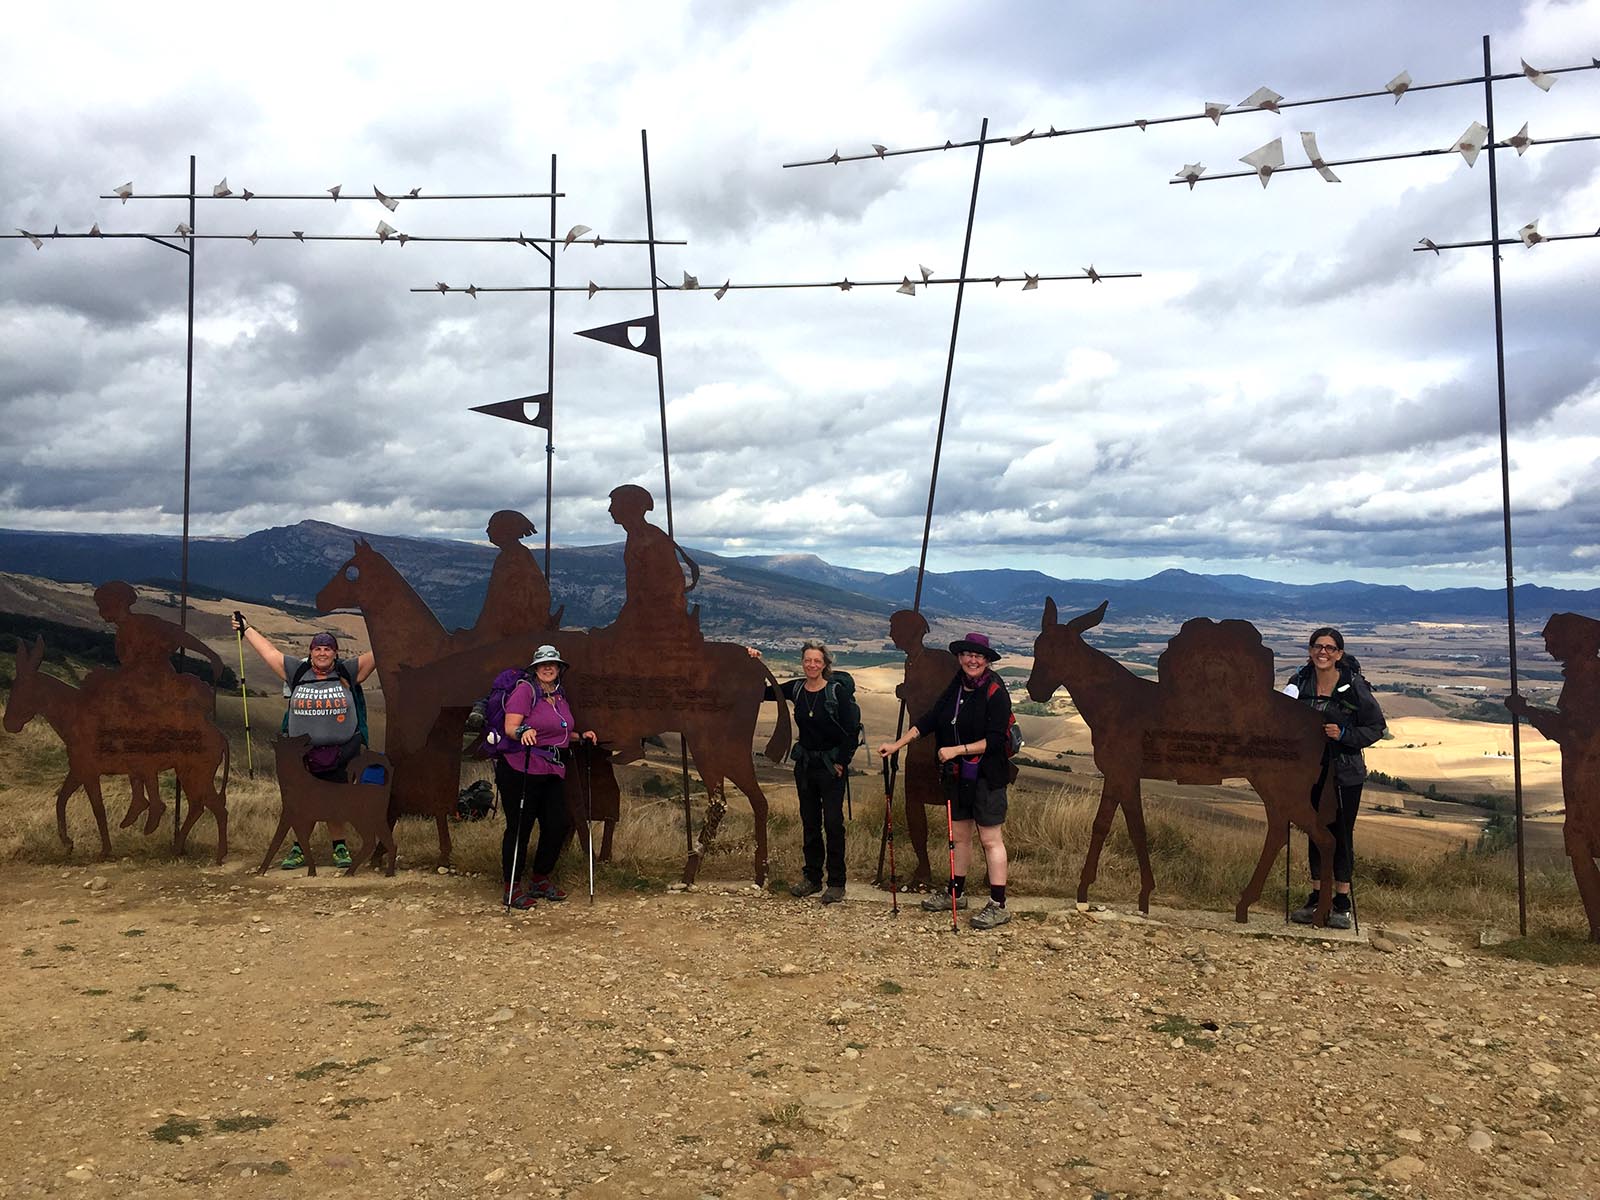 Rufflo, center, poses with friends she met on the trail at Monumento al Camino de Santiago in the El Perdon Mountain range, the site of a former pilgrim hospital. All who make it to this place are considered blessed for the remainder of the journey. Photo by Chris Rufflo.
Did you hike the Camino de Santiago alone? Is it easy to meet people?
I started off on the French route with a close friend, but after a few days of trying to match each other’s pace, we decided to separate and meet at the end, which was really amazing. The Portuguese I walked on my own. It is very easy to meet people on the Camino and make deep bonds.
What is the cost of food and accommodation for the Camino de Santiago?
The cost of doing the Camino will depend on what your needs are. You can easily do it for anywhere between $30-$50 a day depending on your comfort needs. The Camino municipals are as low as six or seven dollars a night whereas albergues can run as much as $25 or $30 a night. [Municipals are large government-run accommodation with kitchens, while albergues are hostels set up for people walking the Camino usually with a shared evening meal.]
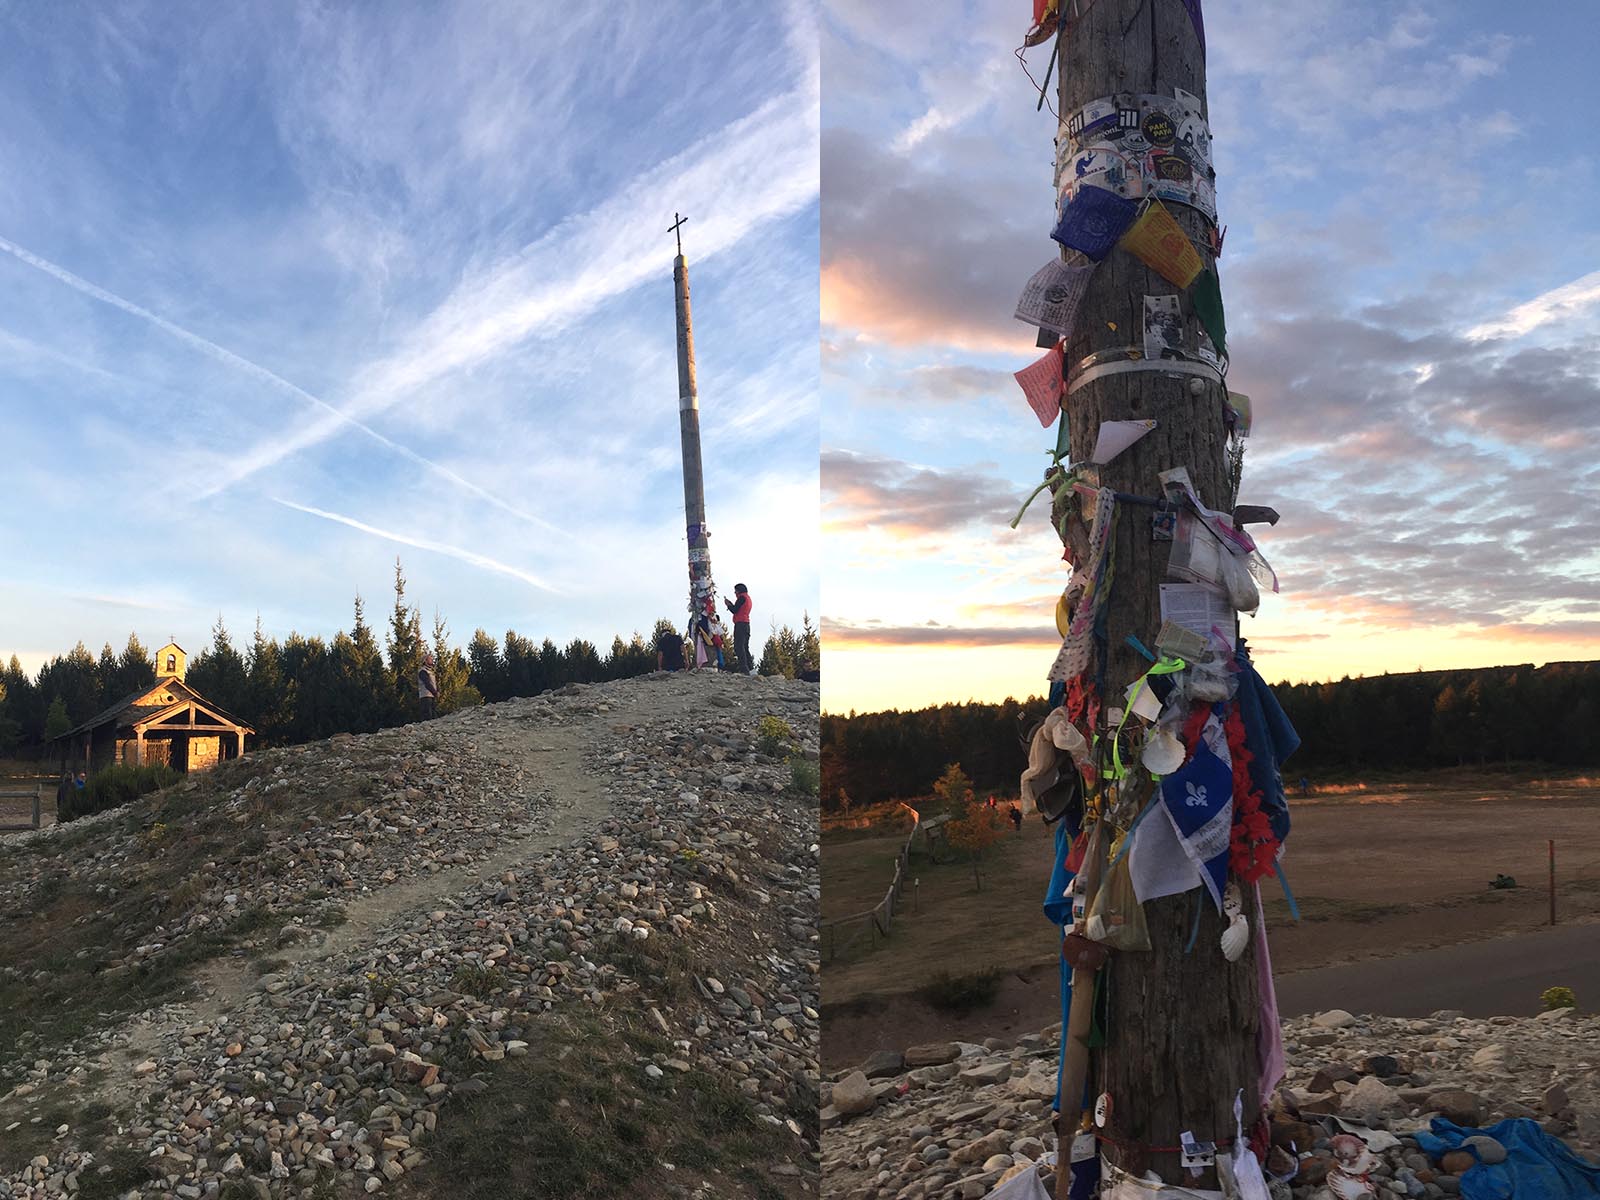 Cruz Ferro, the highest place French route of the Camino, has special meaning to Rufflo. “This is one of the most symbolic places along the Camino,” she says. “There is a custom of carrying a stone symbolizing something you want to put down or let go of. I placed a stone there in honor of my sister who had died the year prior.”
How much did your day pack weigh?
Your pack should weigh 10% of your ideal body weight, not including food and water for the day. I used an Osprey Stratus – it weighs three pounds and 4.5 ounces. It’s heavy for a pack, but I had a difficult time finding something that would fit both my torso length (which is long) and my waist. It’s a really great pack.
Can you give us a rundown on what to pack for the Camino de Santiago?
In many ways, the Camino was a metaphor for life. Learn not to carry what you don’t need. Be mindful of what you absolutely need and what you can leave behind. It will make your Camino much more enjoyable.
For myself, I brought four t-shirts very lightweight, four pairs of underwear, three pairs of very lightweight socks (Smartwool), three pairs of heavier socks (Darn Tough)—all wool. One long-sleeve Patagonia Capilene shirt, one pair of Patagonia water-resistant pants, one pair of lightweight cotton pants, lightweight hat, sunglasses, sunscreen, and toiletries. (Check out the detailed packing list at the end of the post!)
Some great hacks: Use a shampoo bar—it’s lighter than bringing regular shampoo. Remember, you can buy replacement for things such as toothpaste along the way, so bring a very small tube of toothpaste. You can buy a small tin of zinc sunscreen for your face. For your water bottle, use plastic.
If you were doing the French route, there will be days when you want to wear a light pair of socks with a heavier pair of socks over them to protect your feet. You will also want to change your socks out midday. You can buy gloves along the way if it’s cold.
How much water were you carrying every day on the Camino?
Typically, I carried about a liter to a liter and a half of water depending on how much water is available [on the route]. You can check the night before to see what water is available along the way. Finding water along the Portuguese route was more difficult and I ended up carrying closer to two liters every day.
 A scenic view of Moledo on the Portuguese route of the Camino de Santiago. Photo by Chris Rufflo.
What advice would you have for someone hiking the Camino?
Remember that the Camino is a personal journey, and everyone’s Camino will be different. Give yourself grace. Some people may find themselves walking five miles a day while others may find themselves walking 20 miles a day. Again, this is your journey!
What’s your next adventure?
Either going up to Hudson Bay, Canada to see the polar bears and Northern Lights or heading to Nepal for some trekking and cultural experiences.
Camino de Santiago Packing List
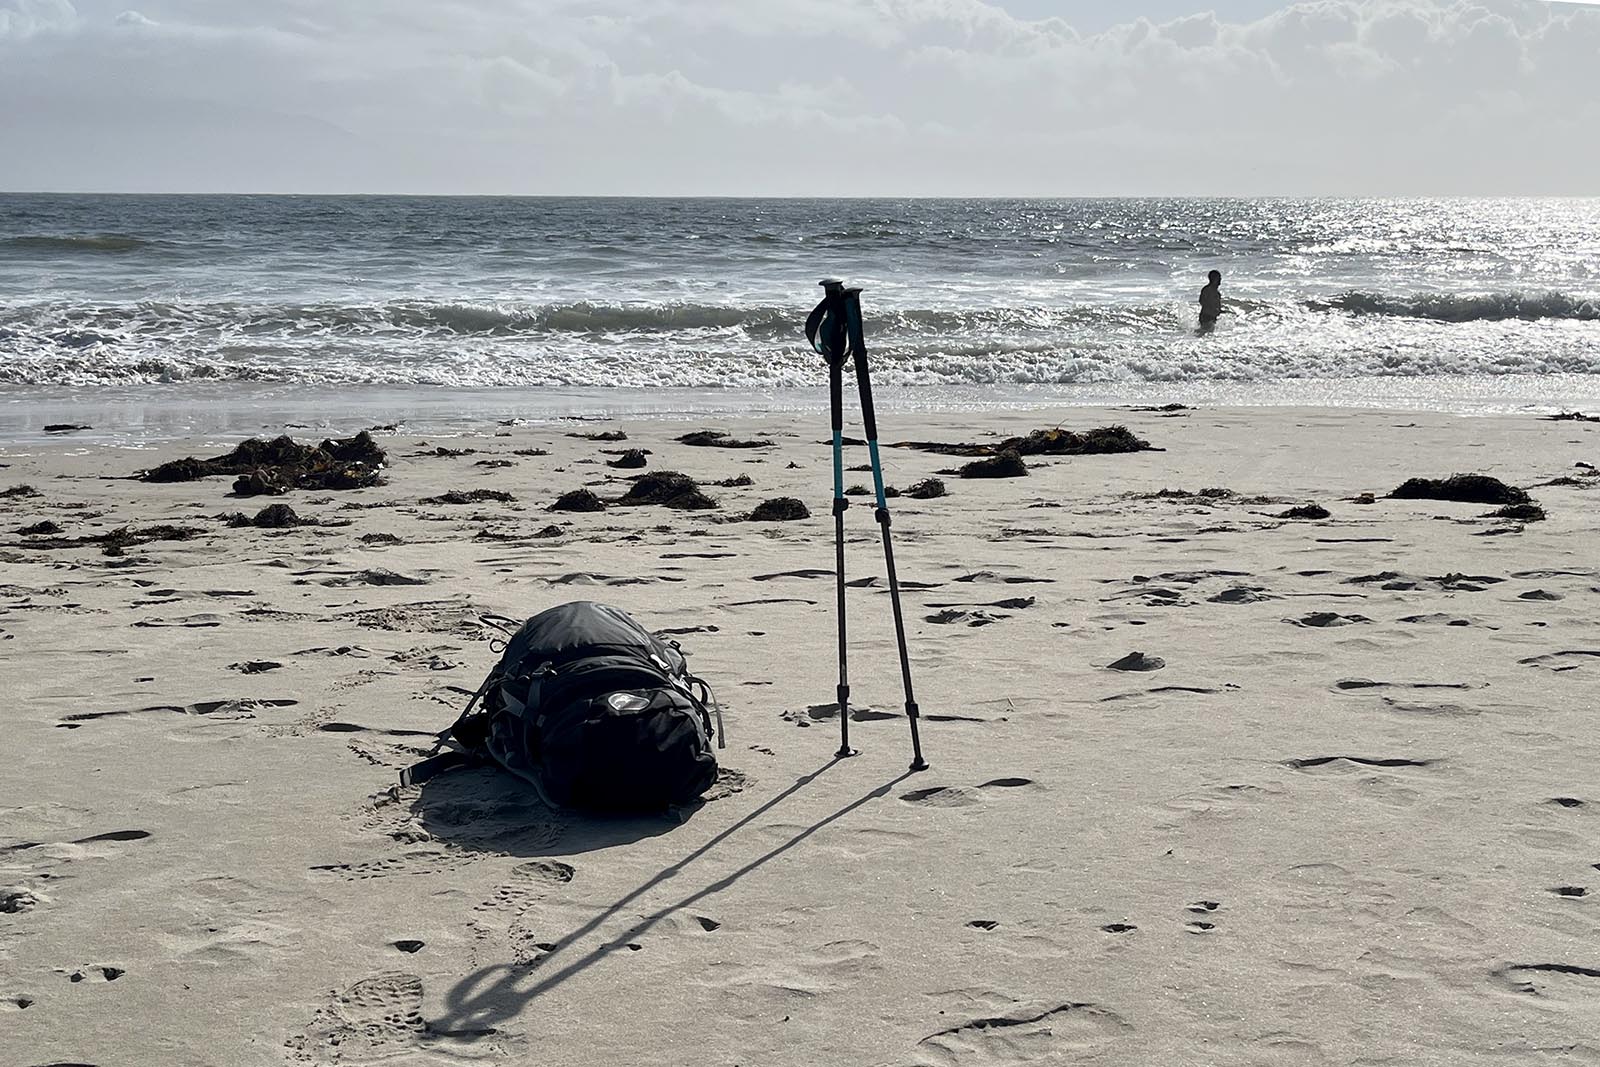 Chris’ Osprey backpack and hiking poles at Finisterre, which is on the Portuguese and French Route. Photo by Chris Rufflo.
Socks:
7 pairs (All should be wool!)
3 pairs ultralight weight Smartwool
3 pairs of Darn Tough heavier-weight socks.
One pair of ankle socks to wear at night ultra lightweight. Light Hiker Quarter by Darn Tough.
Underwear: 3 pairs
Tops: 4 lightweight t-shirts, One long-sleeve Patagonia Capilene base layer
Bottoms:
One pair of Patagonia water-repellent pants
One pair of lightweight Mountain Hardware pants.
One pair of shorts.
Chris Notes: I hiked in Patagonia [pants] the first time and Kuhl the second time. I have a pair of Mountain Hardwear for a backup but am also looking for something lighter!!!
Toiletries: Toothbrush, small toothpaste, shampoo bar (cut in half), Argon lotion bar (cut in half) for my face, lightweight towel (14X20 inches). [Chris cuts her shampoo and lotion bar in half and stores it in a plastic pill bag. She recommends Dr. Bronner’s.]
Water: Two plastic half-liter bottles. [Please note that water is more frequent on the French route than Portuguese.]
Shoes: Waterproof hiking boots (high ankle) for the French route. For the Portuguese route, I used trail runners. I did not bring a spare pair of shoes, but many people do.
Outerwear: Ultra lightweight raincoat, Patagonia puffer, lightweight hat, sunglasses.
Electronics: iPhone & charger
Hiking Poles: Get a pair of lightweight ones that can fold down.
Sleeping bag: Silk sleep sack. (Silk is both lightweight and can add warmth.)
Dry bags: Three ultra-lightweight dry bags: One to keep my clean clothes in, one to put my dirty clothes in and one very small one for my passport and other important objects that need to stay dry. Rain poncho for my pack.

Saily eSIM Review for Travel in Southeast Asia
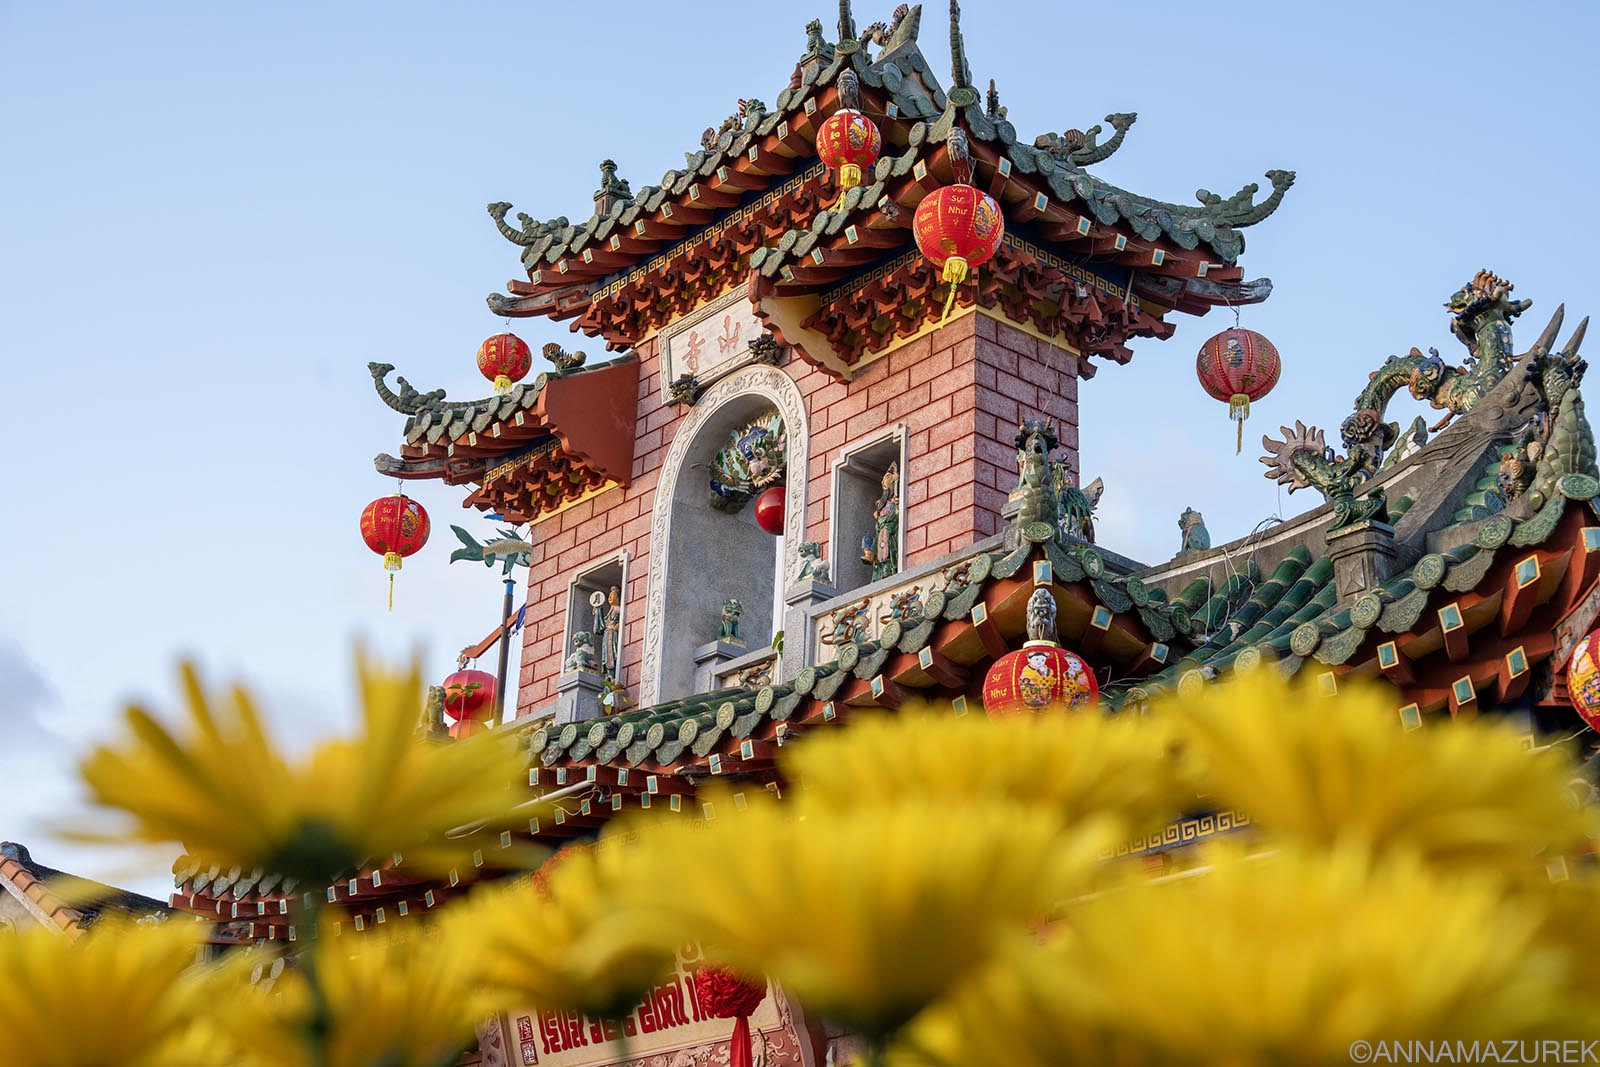 The colorful temples in Hoi An, Vietnam were one of my stops on my recent Vietnam trip testing the Saily eSIM card.
While I was hesitant to use eSIM initially, they’ve been a lifeline for me since I travel nonstop for work. While I’ve written about the pros and cons of eSIM cards, I’ve recently tested out Saily eSIM, which is owned by the team behind NordVPN, on a five-week trip through Southeast Asia with stops in Thailand, Cambodia, Laos and Vietnam in January and February.
(AFFILIATE DISCLOSURE: Please note that some affiliate links are used in this post. If you make a purchase, I earn a small commission at no cost to you, which goes toward blog maintenance costs. I only recommend products and companies I use.)
First of all, what’s an eSIM?
An eSIM card is a digital SIM card that works the same as a physical SIM card minus the hassle of trying to insert anything into your phone. Most newer phones only accept eSIM cards and allow you to switch easily between multiple eSIM cards.
What type of eSIMs does Saily sell?
Saily sells country and regional eSIM cards to over 200 destinations with data plans ranging from 1GB to 50GB over a period of one week to 30 days. Plans have a 30-day activation window, and if not activated during that period, they will automatically activate 30 days after purchase.
Regional eSIMs are the most convenient if you are country-hopping while country-specific eSIM cards are often cheaper. If you choose a regional eSIM card, make sure all the locations you are traveling are covered. (You’ll see where I made that mistake below.) Since they are owned by the NordVPN team, they’ve integrated a lot of free security features, which I talk about below. (Use Saily promo code ANNA5 for 5% off your purchase.)
Saily eSIM Review for Southeast Asia
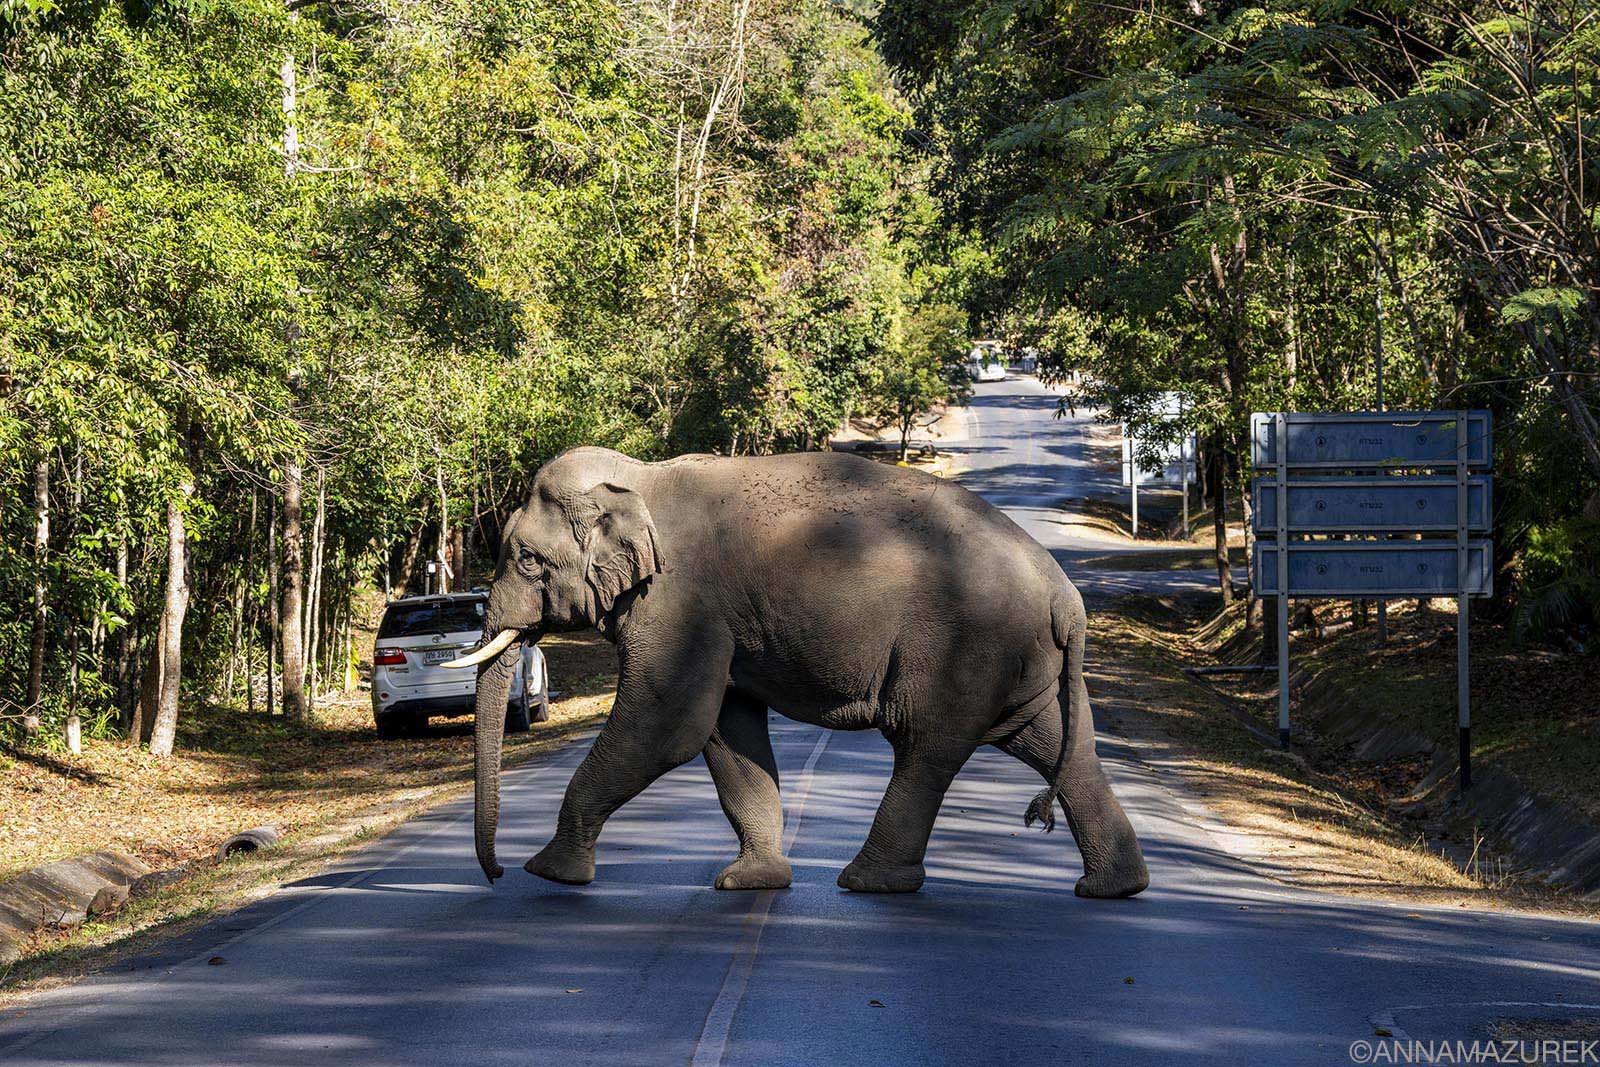 I started my trip in Thailand’s Khao Yai National Park, known for wild elephants.
I used a regional Asia eSIM (10 GB for 30 days for $35.99), a Cambodia-only eSIM (3GB for 30 days for $8.99), and a Vietnam eSIM (5 GB for 30 days for $10.99) during a six-week trip through Thailand, Laos, Vietnam and Cambodia. (Use promo code ANNA5 for 5% off all purchases. Yes, I totally use my own affiliate discount codes.)
It was very easy to install. The best thing about Saily is that you install the eSIM once, and it automatically reloads with any new plans you buy. (I’ve found it cumbersome to be constantly installing eSIMs every time I buy a new plan with other eSIM providers and having to delete old ones.) Saily does give you the option to install multiple eSIMs if you prefer.
Thailand
I installed this eSIM on a visit to Khao Yai National Park, roughly a 2.5-hour drive northeast of Bangkok. Saily uses the True network, which is one of the top two providers in Thailand. I only had LTE service initially since I was in a remote area, but it worked fine. I was even able to hotspot on LTE with no issues. In Bangkok, it was on 4G and worked perfectly.
Laos
Next, I flew to Luang Prabang, Laos, but I knew in advance that Saily doesn’t cover Laos. In fact, I’ve only seen one eSIM company cover Laos, and it was very expensive ($9.50 for 1 GB!). It was cheaper to buy a local eSIM on arrival.
Vietnam
I used this on two trips to Vietnam. On the first trip in mid-January, I flew into Hanoi and had issues getting the eSIM to connect. It finally connected to 3G service on Vietnamobile, which is not a fast network. It was a bit of a nightmare getting my Grab (Southeast Asia’s version of Uber) due to the slow network, and I had to go back into the airport to get WIFI to order the car. (I saw on Reddit and a few other forums about people complaining about this same issue at Hanoi’s airport with both Saily and other eSIM companies. This could be an issue with that airport specifically.)
I contacted Saily support immediately when I got to my hotel to resolve the issue, and their support team was fantastic. They had me go through several troubleshooting steps including ensuring roaming was turned on (it was). To fix the issue, they had me turn off automatic selection for the carrier network in the eSIM’s settings and select Mobifone, which gave me LTE service and resolved the issue. (When you do this, it gives a list of cell networks, but you need to know which ones your eSIM partners with to ensure you get service.) Please note that it’s not uncommon for eSIMs to switch between different networks.
Initially, I was expecting at least 4G or 5G coverage. (Even if an eSIM company partners with a network with 5G coverage, it usually only supports up to 4G in my experience.) With the LTE service, I was still able to stream YouTube videos on the ride from Hanoi to Ninh Binh with no issues. I had LTE with full bars in Hoi An, Ho Chi Minh City and along the Mekong Delta.
On my second trip to Vietnam, I flew into Ho Chi Minh City at the end of February and stayed in the city. Saily’s support told me they’d fixed the issue at the end of January, so I thought I’d test it again. (They gave me a code for a free 5 GB for 30 days plan due to the issues I’d experienced earlier.) I used a Vietnam-specific eSIM card, which connected to Mobifone LTE with no issues at the Ho Chi Minh airport when I arrived. I was able to call my Grab at the airport with no issues getting to my hotel. It worked in the city with no problems, and the connection was seemed pretty fast. I was able to use social media apps with no issues, etc.
Cambodia
When I entered Cambodia by ship on the Mekong River, my phone wasn’t initially connecting so I reached out to their support team. Turns out the regional Asia eSIM card I had doesn’t support Cambodia, which was my fault for not checking that. Haha!
I bought a Cambodia-specific eSIM card (3GB for 30 days for $8.99), which uses the SMART network, which works best in big cities like Phnom Penh and Siem Reap. In more rural areas like Kampong Cham, I had EDGE service whereas a second eSIM I’d bought on the Metfone network had 4G. Then, in other rural places, I’d have service on the Saily eSIM (SMART network) and no service on Metfone. Cell service in Cambodia is very location dependent.
Locals tell me that the Metfone and CellCard networks are best in rural areas in Cambodia. If you’re going somewhere outside the major tourist areas, then reach out to your accommodation to see what network is best for that area. For example, the remote island of Koh Rong Sanloem only gets Metfone service barely, so I bought a Metfone SIM card just for my three-day visit to the island.
Use Saily promo code ANNA5 for 5% off your purchase!
Saily eSIM Card Review Summary
 Mua Caves in Ninh Binh was a highlight of my Vietnam trip.
Overall, eSIM cards are only as good as the cell networks they partner with. I was impressed by the ease of the eSIM installation for Saily and their fast customer support, which was better than the support with other companies I’d used. I’d recommend it easily for Thailand and Cambodia (major cities). As for Vietnam, I initially wouldn’t have recommended it after my fiasco at the Hanoi airport, but I had a much more pleasant experience on my second visit to Ho Chi Minh. (If you’re heading to Hanoi, be aware that you’ll likely have trouble connecting to any cell network around that airport.) I’d highly recommend buying the plan and installing it before you leave for your trip, so it works on arrival.
While Saily has a virtual location option, I used my NordVPN in conjunction with my Saily eSIM to download shows on Paramount + and Disney + since I was switching back and forth from WIFI to cellular data for downloading. (Both streaming services require you to be in the U.S. for anything to download, which is why I always use a VPN when I travel.) NordVPN and Saily’s eSIM worked seamlessly together.
Before I boarded my flight, I was triple testing my downloads using the VPN to be safe, which I also recommend doing. The eSIM worked perfectly for this. If you purchase a Saily eSIM, use code ANNA5 for 5% off your purchase.
Saily eSIM FAQ
Photo of Screenshot: Virtual location is one of the built-in security features in Saily eSIM cards.
Are Saily eSIM cards safe and secure?
Saily is owned by Nord Security, the company behind NordVPN, so security is one of their top concerns. Saily includes the following security features in the top section of their app:
Virtual Location: Saily lets you choose your virtual location from 82 options and browse with more privacy by routing your connection through a remote server. (This is really important for streaming services and downloading movies to watch on planes.)
Ad blocker: To reduce screen clutter and save data, Saily can block intrusive ads. (Keep in mind that many websites rely on ad revenue to keep content free. If you’re browsing content from smaller creators (like me!), consider leaving ads on to help support them.)
Web Protection: Through DNS filtering, Saily reduces trackers and malicious websites before they reach your phone.
Does a Saily eSIM give you a phone number?
No, a Saily eSIM does not give you a phone number. It currently only supports mobile data, but this is a feature they are looking to add per their website. For more about having a number when you travel, check out my post on traveling and two-step verification.
Does Saily eSIM work in the U.S.?
Yes, Saily has six different plans for the United States ranging from 1 GB to 50 GB lasting from one week to 30 days. Prices range from $3.99 to $49.99.Use code ANNA5 for 5% off your purchase.
How to Install Saily eSIM on your iPhone
The setup for Saily is easy. Simply download the Saily eSIM app, choose your plan and it will activate automatically.
If you’d like to set it up manually, go to “Settings,” tap “Cellular”, Tap “Add eSIM,” click on “Use QR code” and follow the instructions. For more details, check out Saily’s Help website.
Troubleshooting Issues with a Saily eSIM card
If you are having issues with your eSIM cards connection to cellular service, try the following. These worked well for me when I had issues.
1. Turn Airplane Mode on and off.
2. Make sure the correct eSIM card is turned on and set as your default line.
3. Make sure data roaming is turned on.
4. If you know the network your eSIM is partnered with, turn off “Automatic Selection” and manually choose the network.
5. Toggle between 5G, LTE and the other network speed selections.
6. Turn Airplane Mode on and off again to test everything is working properly.
For more details, check out Saily’s Help website.
The 11 Best Things to do in Hanoi, Vietnam
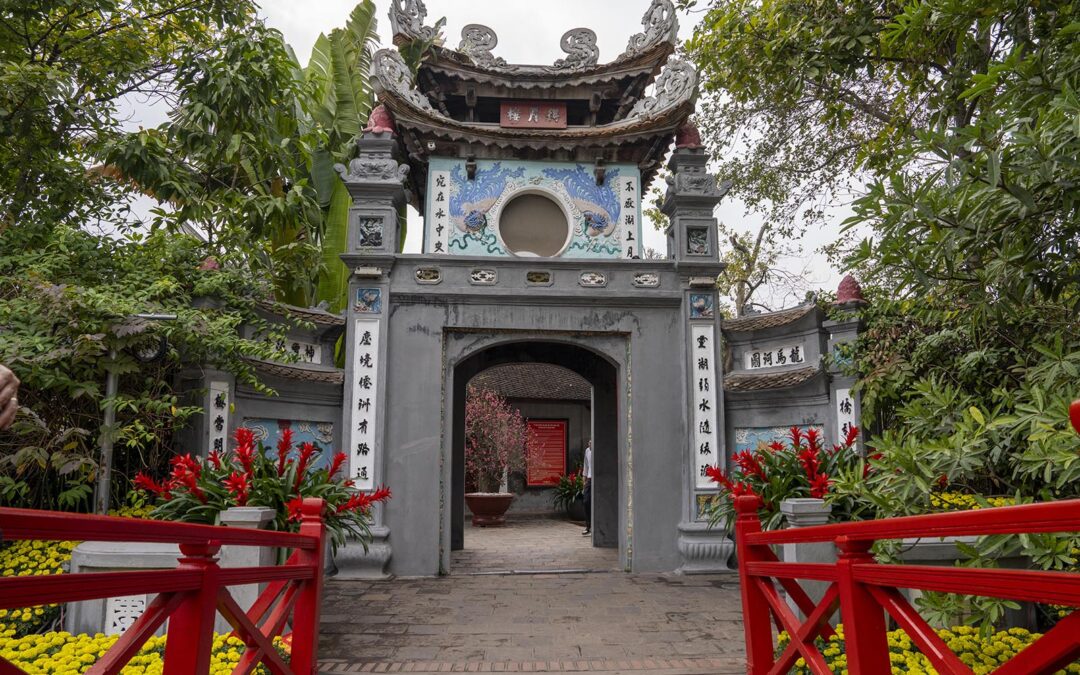
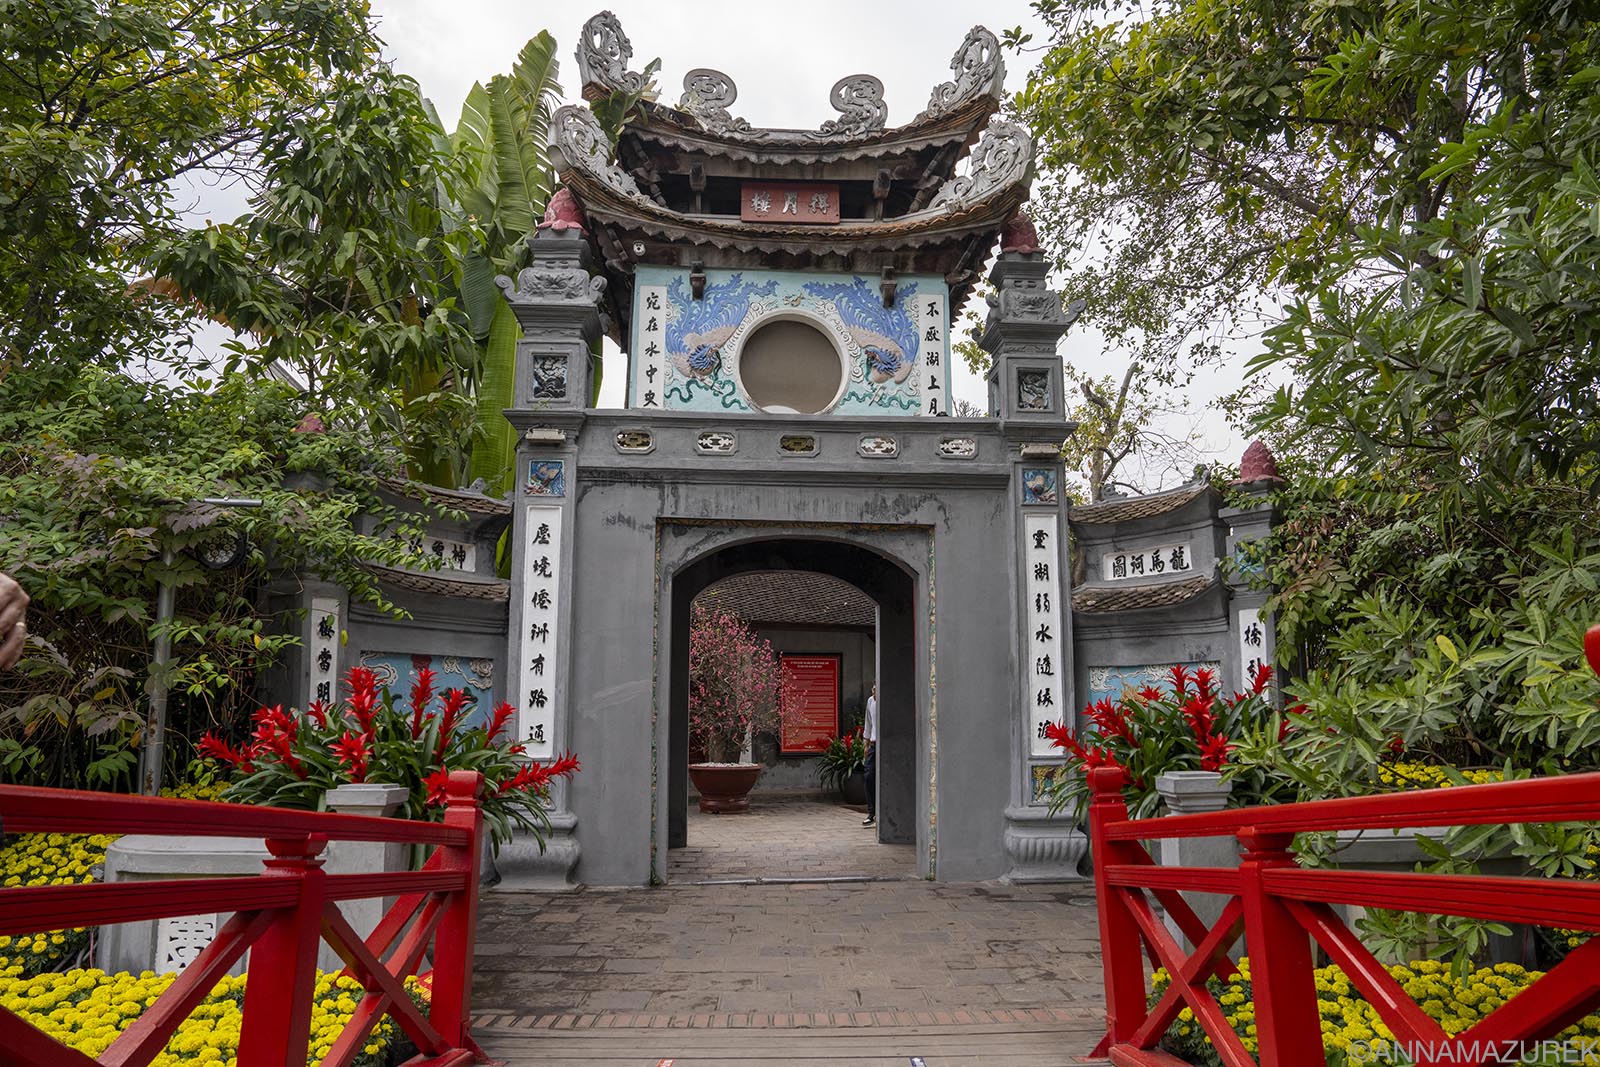 Located on an island on Hoan Kiem Lake, Ngoc Son Temple is easily accessible by a red bridge.
Vietnam’s two largest cities are polar opposites—Ho Chi Minh is a sleek, modern city of skyscrapers while the charming capital of Hanoi is filled with ancient history. Hanoi is the best for watching motorbikes defy gravity with their loads ranging from refrigerators to a family of five with a dog. It’s home to the country’s largest airport and the gateway to Ha Long and Lan Ha Bay and Ninh Binh.
These recommendations are based on my experience living and working for travel companies in Southeast Asia for the past decade. (I visit Vietnam at least once a year for work.)
Here are the best things to do in Hanoi along with the best time to visit and where to stay!
You can easily do all these things on your own, but if you’re short on time consider a city tour.
Affiliate links are used in this post. If you make a purchase, I earn a small commission at no cost to you, which goes toward the cost of maintaining this blog.
Plan Your Trip
Currency: Vietnamese Dong (VND)
When to Go: Temperatures cool down in November and December.
Travel Insurance: Protect yourself with SafetyWing travel medical insurance to cover accidents and travel delays.
Mobile eSIM Card: For the fastest cellular network in Vietnam, use Airalo for 5G connectivity.
 Conical hats and fresh flowers are a few of the many items for sale in the historic Old Quarter, the heart of the city’s shopping district.
Explore the Old Quarter
Hanoi’s Old Quarter lies North and slightly west of Hoàn Kiếm Lake and consists of 36 streets.It’s a great place for strolling and watching motorbikes with their outrageous loads. The streets are organized by the items they sell from shoes to silver jewelry. Here are a few of the most famous shopping streets:
Hang Dau – Shoe Street
Hang Ma – Lantern Street
Hang Bac – Silver Street
Hang Vai – Bamboo Street
Hang Duong – Sugar Street
Lan Ong – Traditional Medicine Street
Hang Gai – Silk Street
 Ngoc Son Temple is one a popular spot to visit and crowded on holidays.
Hoàn Kiếm Lake
No trip to Hanoi is complete without a stroll around Hoàn Kiếm Lake. On weekend evenings, traffic is banned by the lake making it easy to explore. You’ll find a good mix of locals and travelers. Be sure to cross the red bridge to visit the photogenic Ngoc Son Temple.
Cyclo Ride
To get an overview of the city, hop on a three-wheeled cyclo, which resemble a backwards tricycle, for an orientation tour. While it might seem touristy, it’s a fun way to support a traditional and eco-friendly transportation method in a city with a huge pollution problem. Rides start around 400,000 VND ($4 USD).
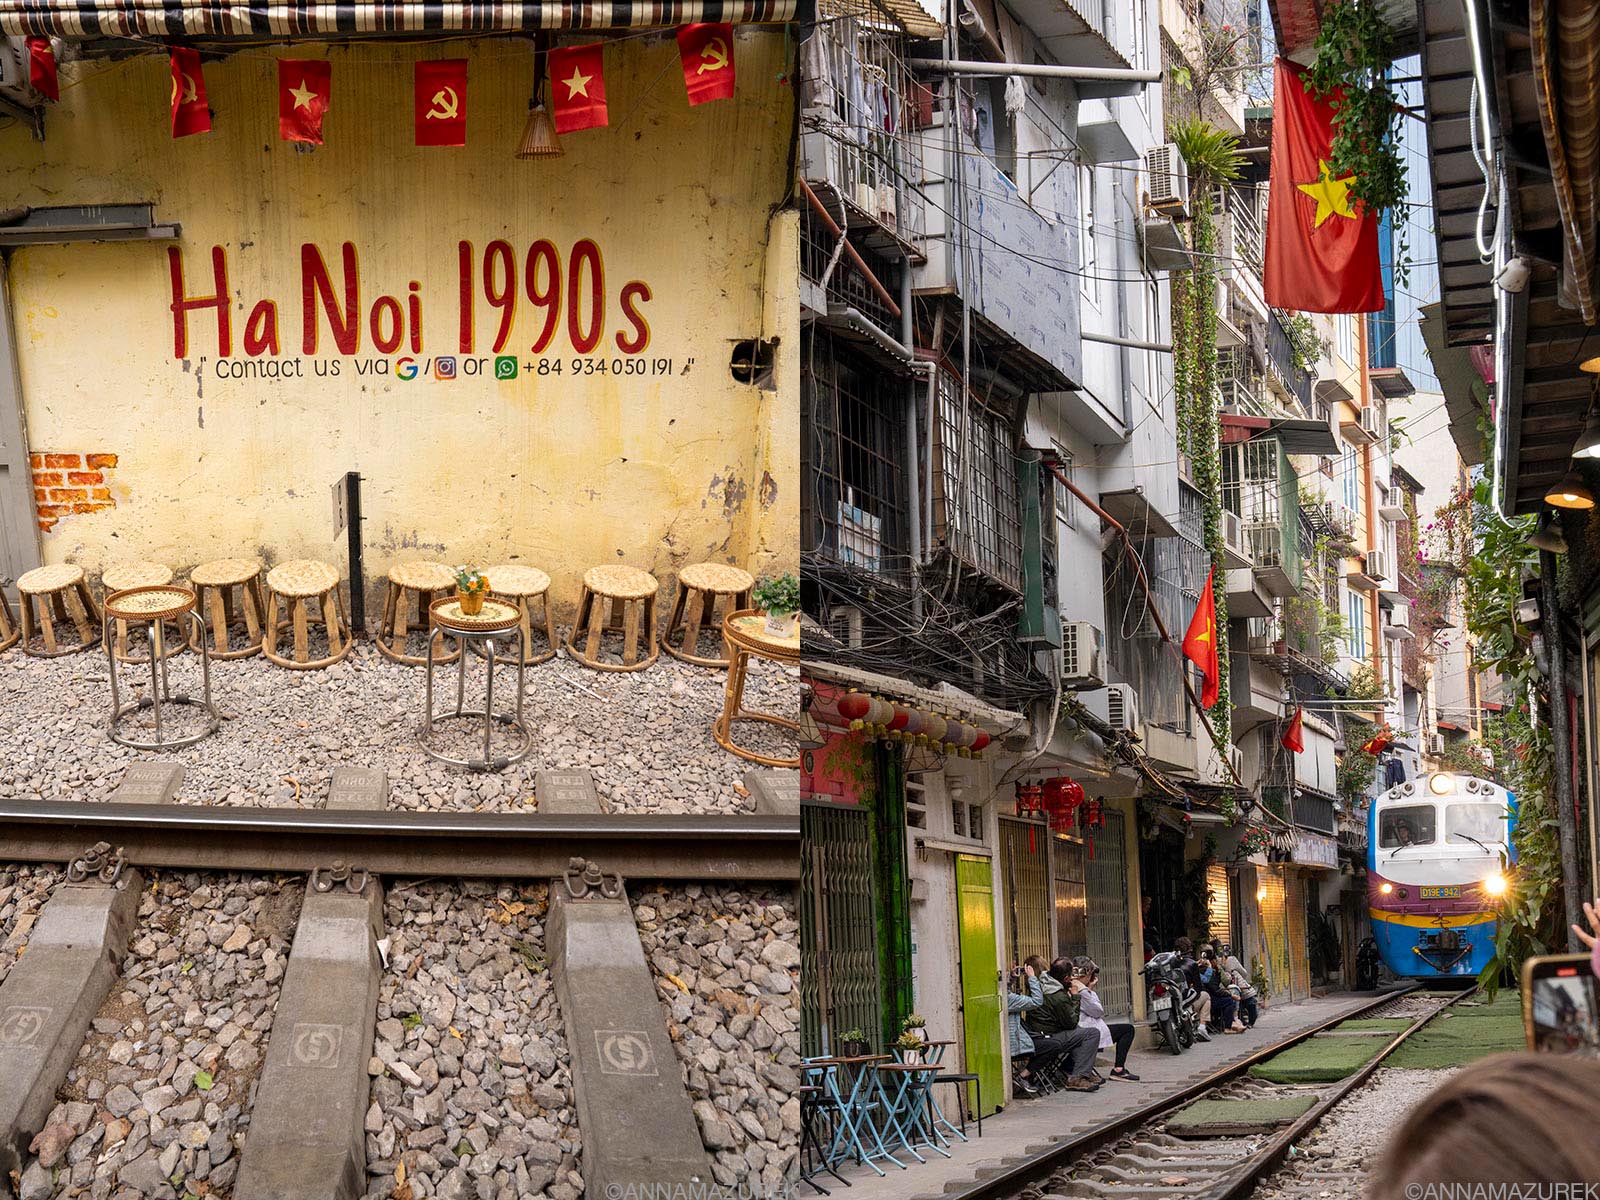 For an adrenaline rush, go have a coffee on Hanoi’s famous train street.
Visit Hanoi’s Train Street
There are two different streets where you can sip a coffee while a train whishes by just inches away from your table. The best one is a bit south of the Old Quarter and directly west of Thong Nhat Park. While it’s lined with cafes, I visited Hanoi 1990s, which I made a reservation with on WhatsApp in advance. (Plenty of people seemed to just be walking up, but I wanted to be safe.) The cafe told me to call them when I arrived, but it was easy to enter without calling because street Ngõ 222 Đ. Lê Duẩn crosses the tracks right by the cafe.
The trains get so close that the cafe lays down all the tables, makes you put your drinks on the ground and turn your body against the wall. It’s a bit scary but fun. Drinks cost around 60,000 VND. (There’s a minimum charge of 40,000 VND to sit if you don’t order a drink.)
Check the Hanoi 1990s Instagram for the train schedule. The trains departing from Hanoi station are always on time, so opt for those departures.
 Left: A banh mi and smoothie from Banh Mi 25; Right: The eclectic decor of The Note Café.
Relax at one of Hanoi’s Cafes & Eat a Banh Mi
Vietnam does cafes well. The Note Cafe is covered floor-to-ceiling in notes and stickers and worth a stop. Even though it’s an Instagram hotspot, their smoothies are delicious, and it’s a great view of the lake. Climb to the higher floors for solitude. Don’t miss JOMA, my favorite café chain in Southeast Asia, for homemade bagels and delicious pumpkin soup!
While there’s no shortage of bánh mi restaurants, one of the most famous is Banh Mi 25. Due to its popularity, it now covers three storefronts on the same street—it’s a great place for a budget-friendly and tasty meal. I had a tasty sandwich AND a strawberry banana smoothie for $3 USD.
 Ho Chi Minh Mausoleum is a marble moment is the resting place of the famed leader and is known for the changing of the guard ceremony.
Ho Chi Minh Mausoleum and Grounds
Behind the Ho Chi Minh Museum lies a large green space featuring a wide variety of the city’s attractions related to the former ruler including the Ho Chi Minh Mausoleum where you can walk by his embodied body on display. (The building exterior is photogenic and lit up at night.) Other attractions include Ho Chi Minh’s Stilt House and One Pillar Pagoda, a wooden building built on top of a single concrete pillar meant to resemble a lotus flower. It was built in 1054 later destroyed by French in 1954 and later rebuilt.
Vietnam Museum of Ethnology
This museum does a deep dive into the 54 recognized ethnic groups that comprise modern-day Vietnam. One of the highlights is the outdoor architectural garden that includes a life-size republic of traditional houses that you can explore, including the awe-inspiring 19-meter-high Bahnar communal house (my favorite.)
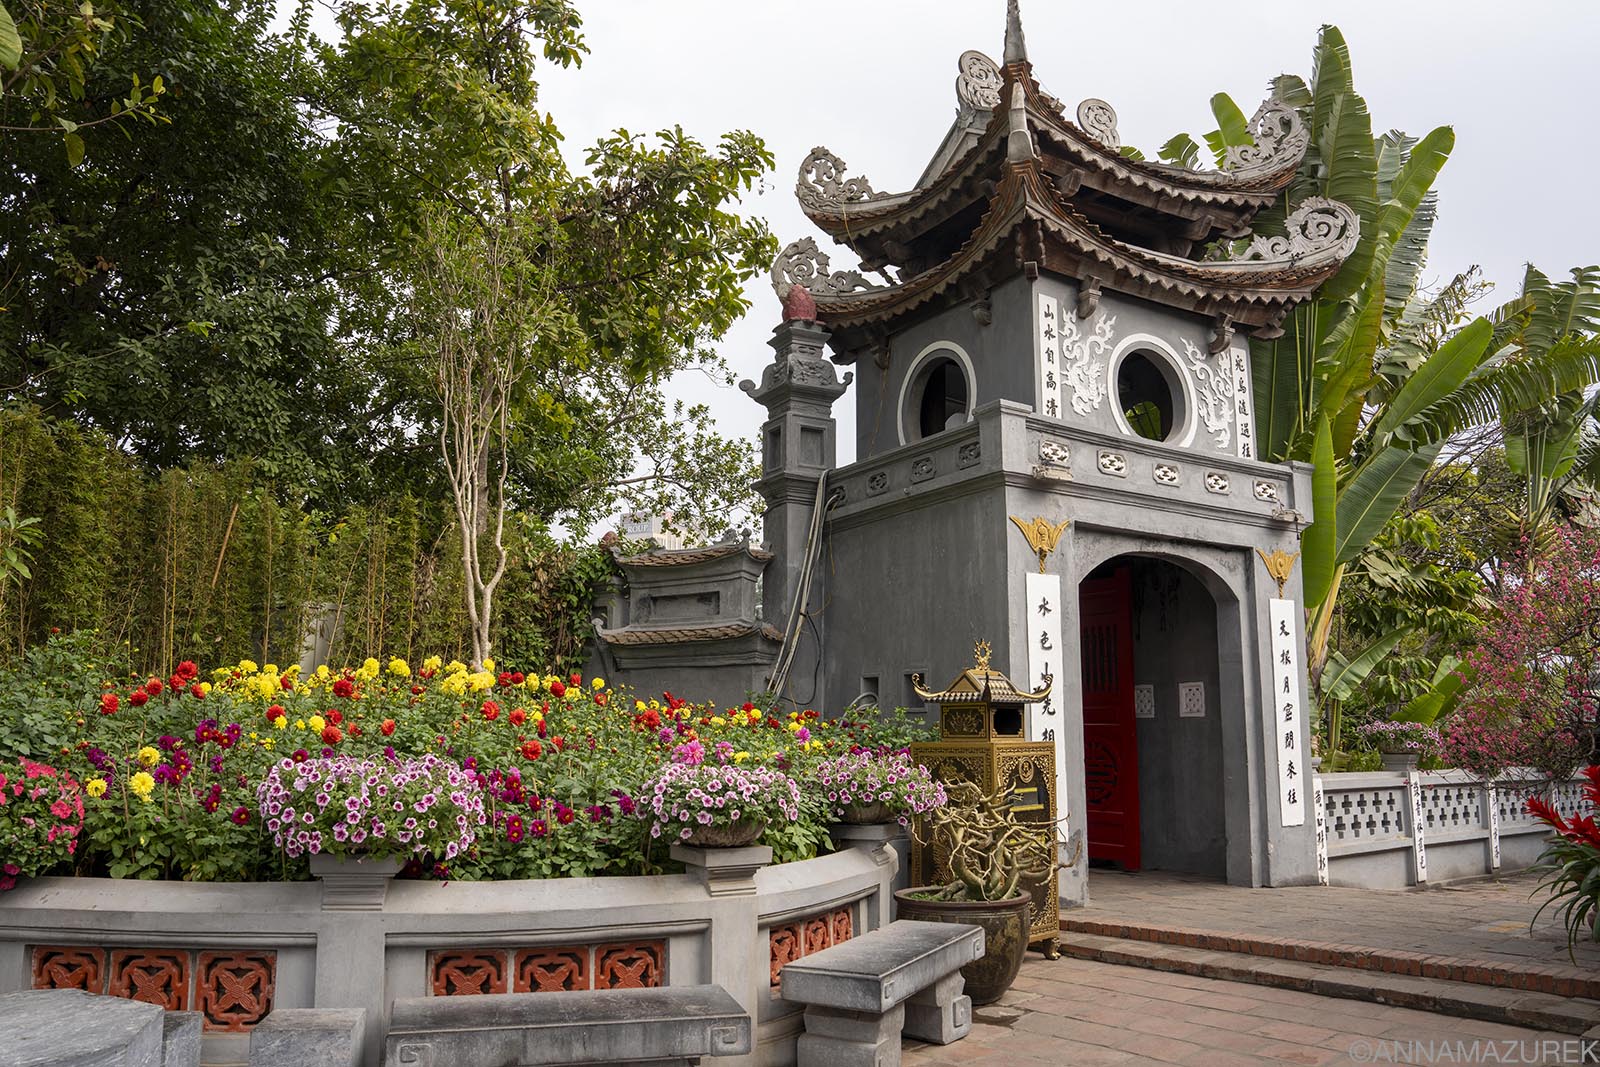
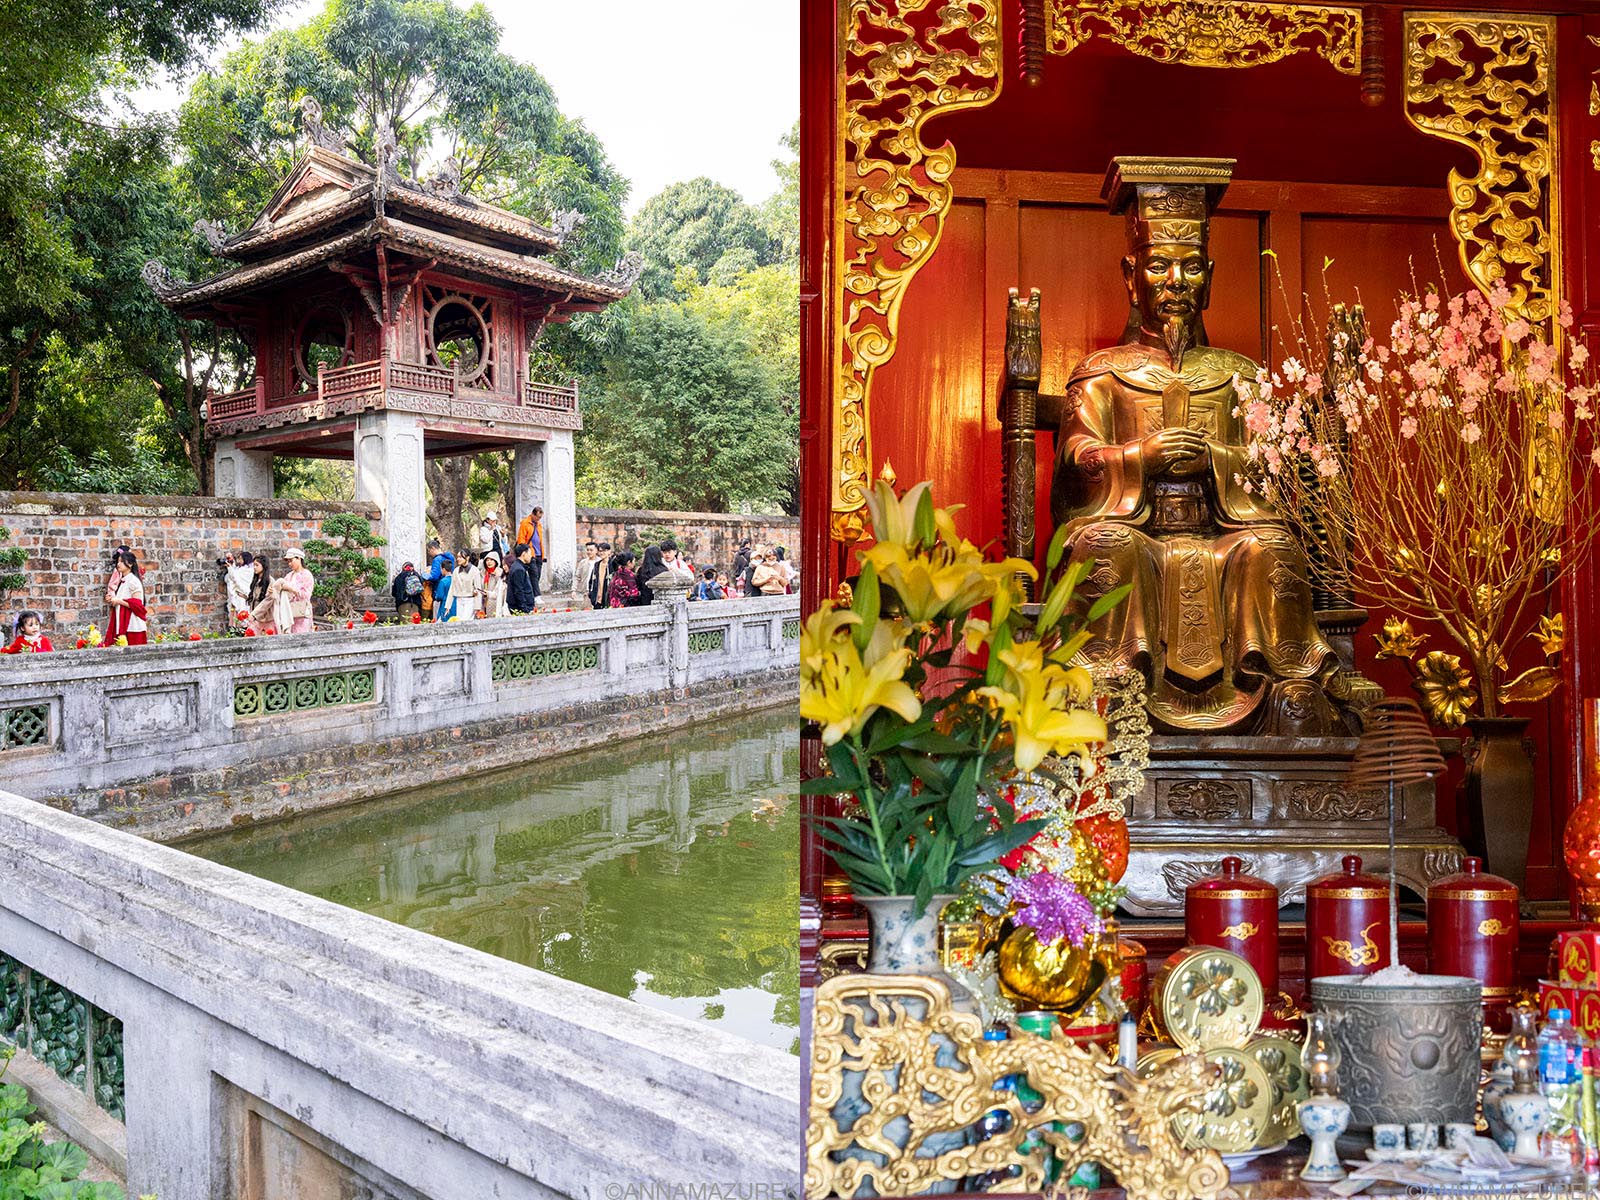 Scenic views of the interior and exterior of the Temple of Literature.
Temple of Literature
Famous for its traditional Vietnamese architecture, this historic attraction was the site of Vietnam’s first university and a Confucius temple, founded in 1070 by Emperor Ly Thanh. (You’ll recognize it as the temple on the back of the 100,000d bill.) It’s crowded on holidays, like TET, and during graduation season, when it’s often used as a photogenic backdrop.
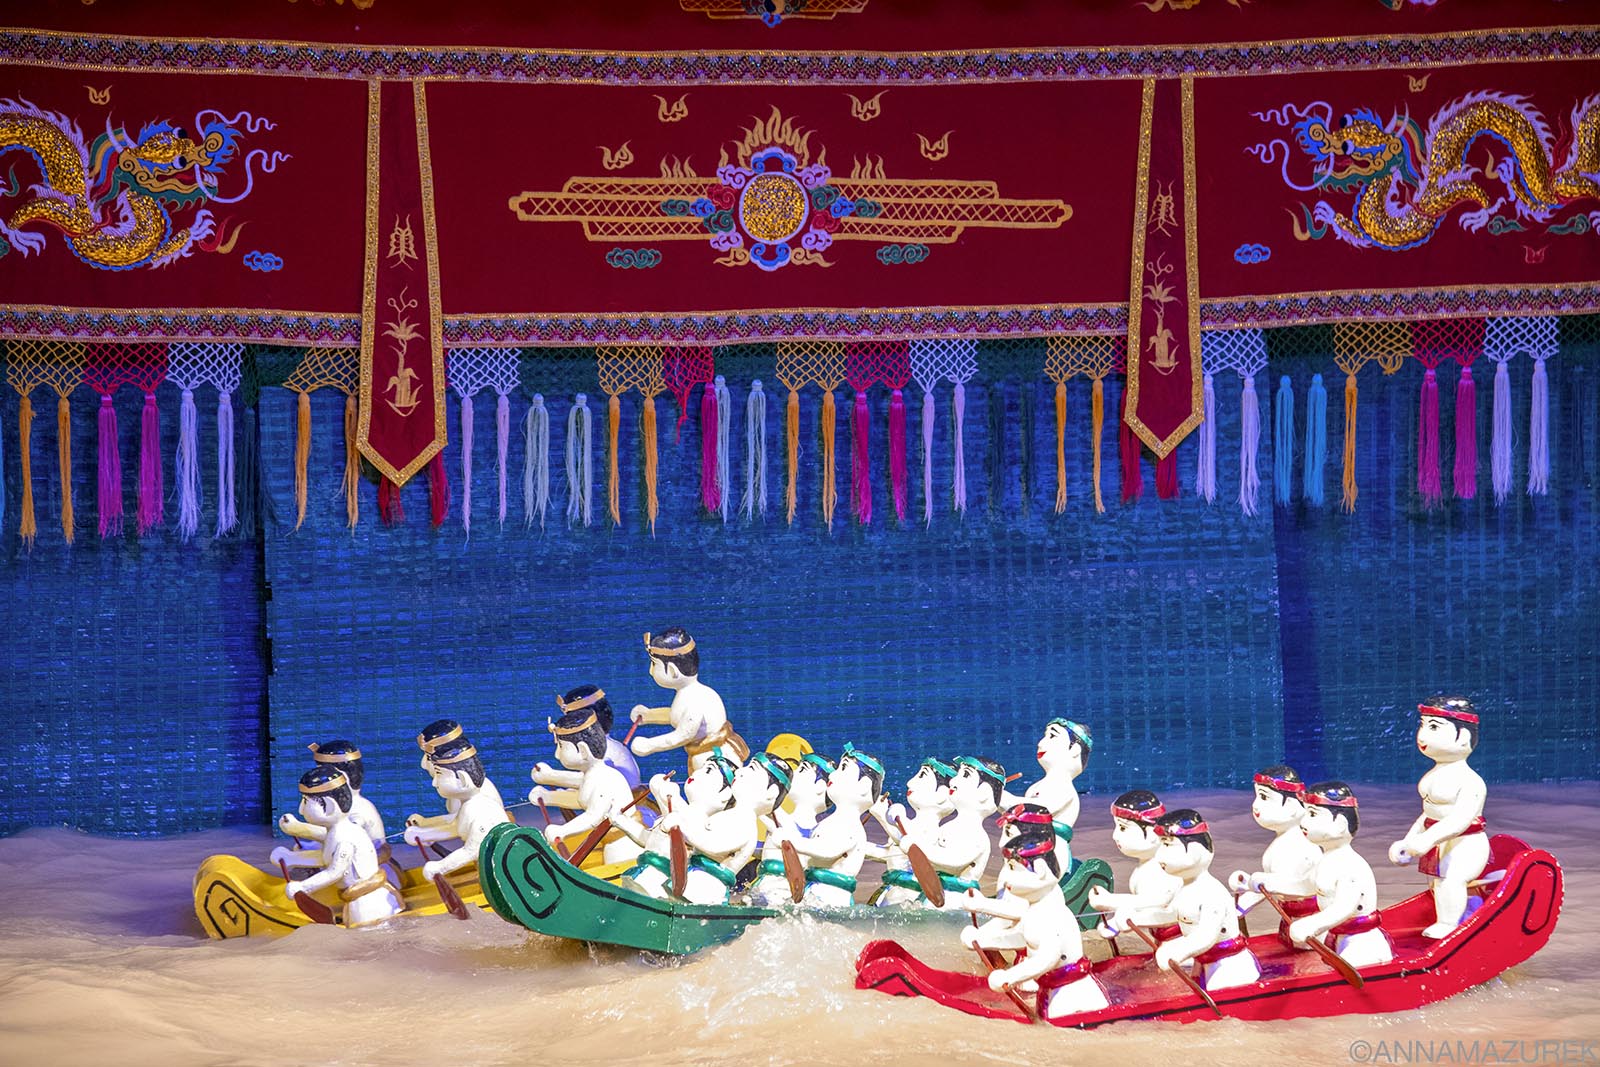 Vietnamese water puppet shows are a fun-filled attraction for all ages.
Water Puppet Show
Water puppetry is a traditional form of Vietnamese theater dating back over a century performed in a waist-deep pool accompanied by traditional folk music. While the show is entirely in Vietnamese, it’s easy to follow along with the action and laughs. (I go to one water puppet show every year for work, and it’s a really fun to experience at least once.)
The Lotus Water Puppet Theater and Thang Long Water Puppet Theater have regular performances. (You can buy tickets in person or in advance on Klook for the same price.) All water puppet shows across Vietnam are similar storylines, so no need to see shows in multiple cities.
 The twin bell towers of St. Joseph Cathedral in Hanoi.
St. Joseph Cathedral
Built in 1886, the neo-Gothic façade of St. Joseph Cathedral is a landmark leftover from the colonial era, known for its towering bell towers. The main entrance is only open during mass times while the side entrance is used other times. The street to the right is lined with cute cafes including the taproom for my favorite Vietnamese brewery, Pasteur Street.
Rooftop Drinks
Who doesn’t love a good sunset cocktail? On a recent trip, I googled rooftop bars and found one next to my hotel called the Terraco Sky Bar on top of the La Sinfonia del Rey Hotel & Spa overlooking the lake for happy hour. The food was also delicious. No matter where you are staying in the city, just Google rooftop bars and pick a spot with a 4.5 rating or above. That’s a trick that always works for me.
 The best places to stay in Hanoi are around Hoàn Kiếm Lake and the Old Quarter.
The Best Places to Stay in Hanoi
Hotels: The highest-rated budget hotels include Hanoi Saga Hotel ($27/night) and TrangTrang Premium Hotel & Sky Bar ($37/night). The La Sinfonia del Rey Hotel & Spa ($82/night) is lovely and has that great rooftop I mentioned. I’ve also stayed at the Hanoi Authentic Boutique Hotel ($62), which has a great location.
Hostels: The Old Quarter View Hanoi Hostel has 6-12 dorm rooms with a/c starting at $18.
Splurge: If you’re looking to do a crazy splurge or cash in some credit card points, the historic 1901 Sofitel Legend Metropole is one of the nicest hotels in Vietnam. Even if you aren’t staying there, book one of their historic tours that takes you down into the wartime bunker!
The Best Time to Go to Hanoi
May through October is the rainy season, which also means the foliage will be very lush and green. Temperatures will start to cool down in November and December. January can be cold a night (50s Fahrenheit)! (Personally, I love October in Asia in between the rainy and dry seasons.)
The winter months usually mean dreary skies and high air pollution due to several factors including heavy traffic and industrial pollution from power plants. (In rural parts of Asia, farmers burn the fields in winter to prepare for planting, which creates a huge amount of air pollution.) The colder weather in Hanoi traps these pollutants closer to the ground.
During TET (Lunar New Year), the city is emptier than normal because many attractions and restaurants shutdown. It’s best to avoid this time of year because prices spike.
 Hanoi’s famous train street is lined with cafes just inches from the tracks.
Vietnam FAQ
Where’s the best place to buy a SIM card in Vietnam?
The easiest thing to do is buy a Vietnam-specific eSIM card from Airalo that will work instantly when you arrive. (Airalo partners with Viettel, the fastest network in Vietnam.) For more details, read my review of Airalo eSIM cards in Southeast Asia.
Promo Codes: New customers save 15% off with NEWTOAIRALO15 and existing users save 10% with AIRALOESIM10.
If you are traveling to multiple countries in Southeast Asia on a short trip, then consider one of their Asia Regional eSIM cards. (Both the country-specific and regional eSIMs have worked wonderfully for me and even have a mobile hotspot option that’s critical for me because I’m always working remotely.) Keep in mind it’s always cheaper to buy a country-specific eSIM than a regional one.
Do you need travel medical insurance for Vietnam?
Yes, travel medical insurance is one of the most important things to purchase for any trip abroad, especially Vietnam. It covers all the things that could go wrong from injuries to travel delays so that you don’t have to worry and can focus on traveling!
SafetyWing’s Nomad Insurance offers $0 deductible travel medical insurance coverage for over 180 countries for people aged 69 and under when traveling outside their home country. The best part is that it only costs a few dollars a day! If you get sick or injured abroad, you can visit any hospital or doctor.
Other benefits of Nomad Insurance include coverage for lost checked luggage, travel delays over 12 hours, motor accidents (if properly licensed, wearing all safety equipment and not intoxicated) and injuries from sports or leisure activities. You can even add adventure sports, electronics theft and U.S. coverage (for non-residents) to your policy.
One of the best things about SafetyWing is that you can buy policies abroad and speak to a REAL human from the 24/7 customer support team if you have questions! (I can vouch that they are excellent at assisting and will follow up with you afterward.) Pay in full or choose an auto-renewing plan that can be canceled anytime.
For more details, read my review of using SafetyWing in Southeast Asia.
Photo Guide to Mesa Verde National Park
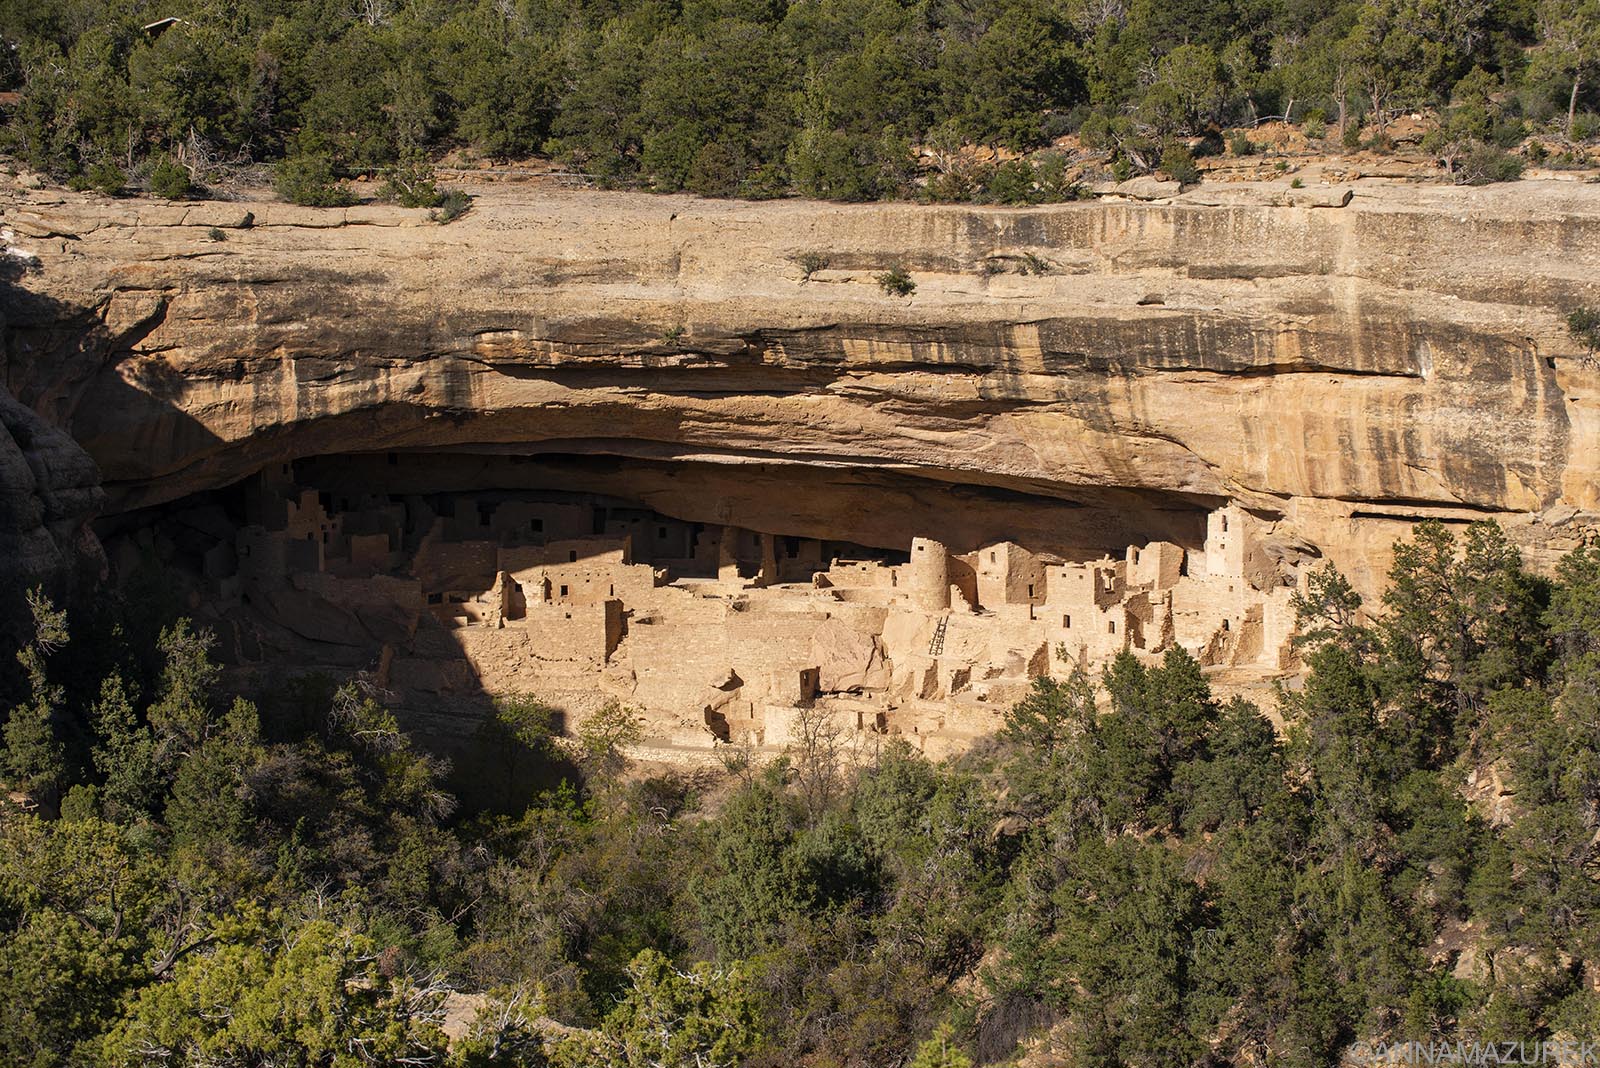
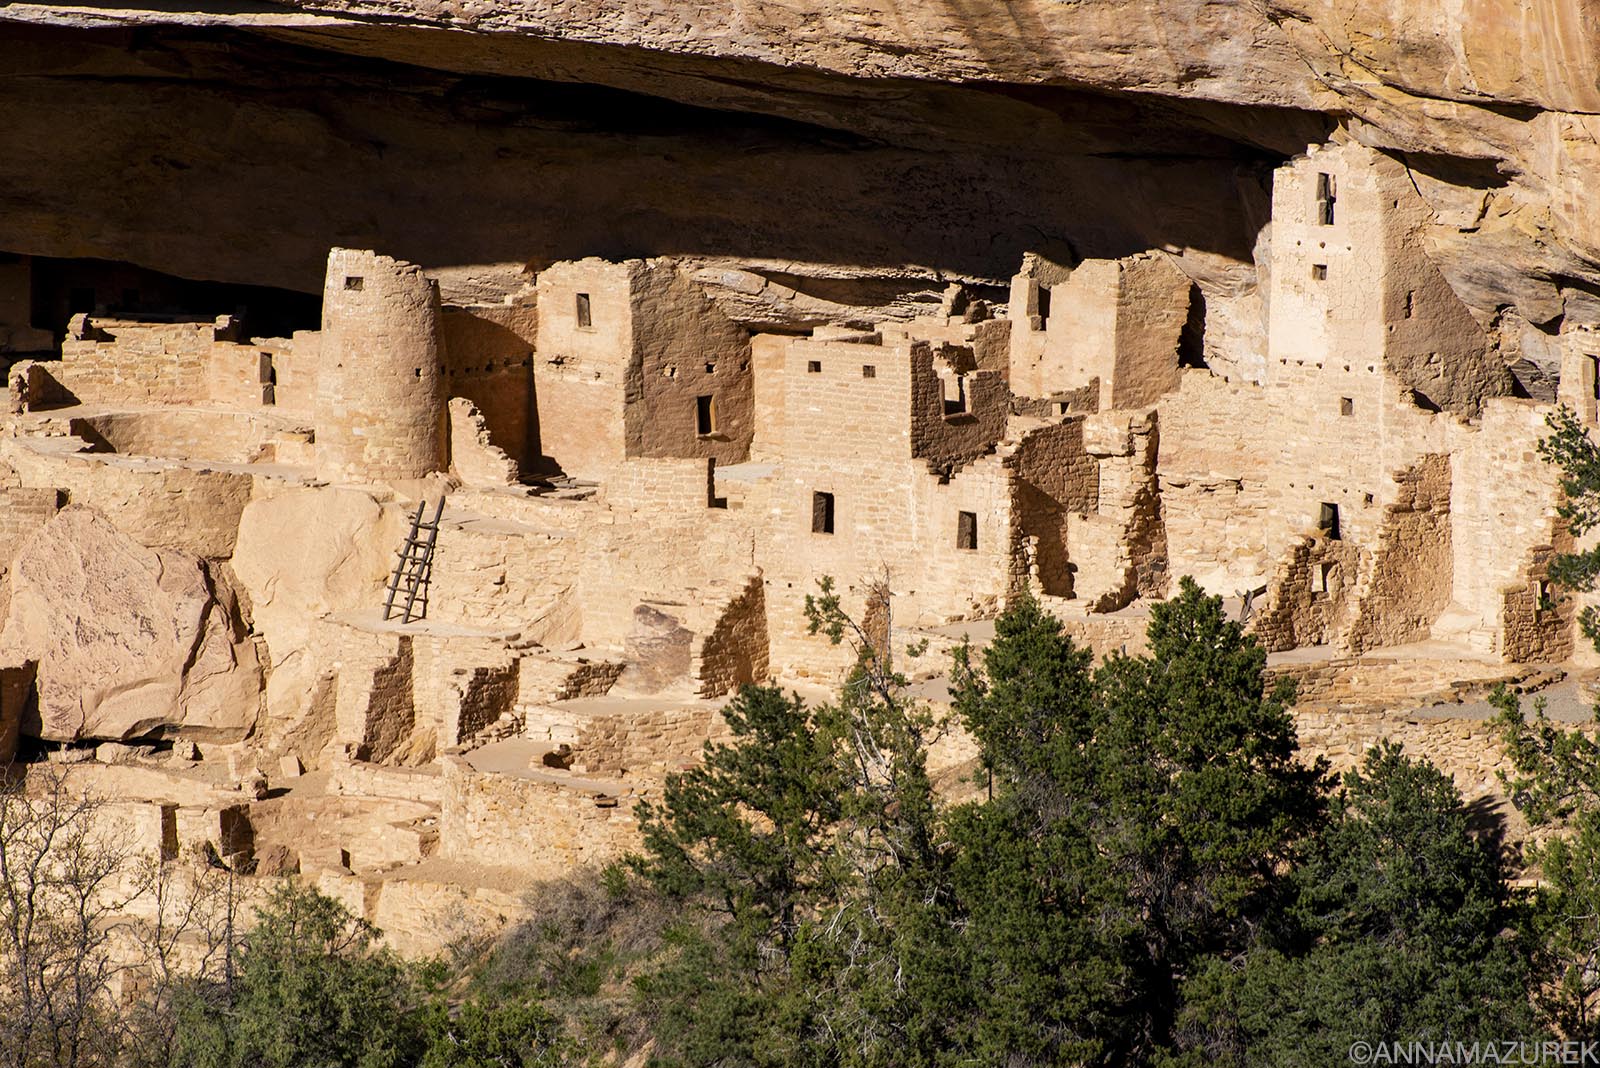 Cliff Palace cliff dwelling photographed from the Cliff Palace Viewpoint by Sun Temple on Mesa Loop. Camera Settings: f/16 @ 1/250, ISO 400, 350 mm (70-200mm lens with 2X teleconverter.)
Mesa Verde National Park is one of my favorite places in the Southwest. In 1906, it became the seventh national park in the U.S. in 1906 and is home to hundreds of ancient cliff dwellings. Now, it’s a World Heritage Site and International Dark Sky Park. In this post, I included a detailed list of the best things to see in Mesa Verde along with the best times for photography. For logistics about cost and where to stay at Mesa Verde National Park, please read the FAQ section at the end of the post.
Why is Mesa Verde Worth Visiting?
Mesa Verde National Park is home to over 600 cliff dwellings built by the ancestral Pueblo people starting in A.D. 550. The settlements evolved from half-buried pit houses to above-ground multi-room and often multi-story complexes made of stones and mud mortar, with thick wooden beams supporting roofs topped with a layer of dirt. Kivas, circular ceremonial chambers, were also key features. The walls were often covered in plaster. The settlement was abandoned by 1300 with any clear indication of why, but several theories suggest climate change or conflict. In addition to the cliff dwelling tours, be sure to stop by the Mesa Verde Museum and the Mesa Verde Visitors Center.
Where is Mesa Verde National Park?
Mesa Verde National Park is in southwestern Colorado and the closet town is Cortez, Colorado, which is where I recommend staying. It’s a 13-minute drive from Cortez to the park entrance but another 45-to-60-minute drive from the entrance to the main sites and cliff dwellings.
Guide to Mesa Verde National Park
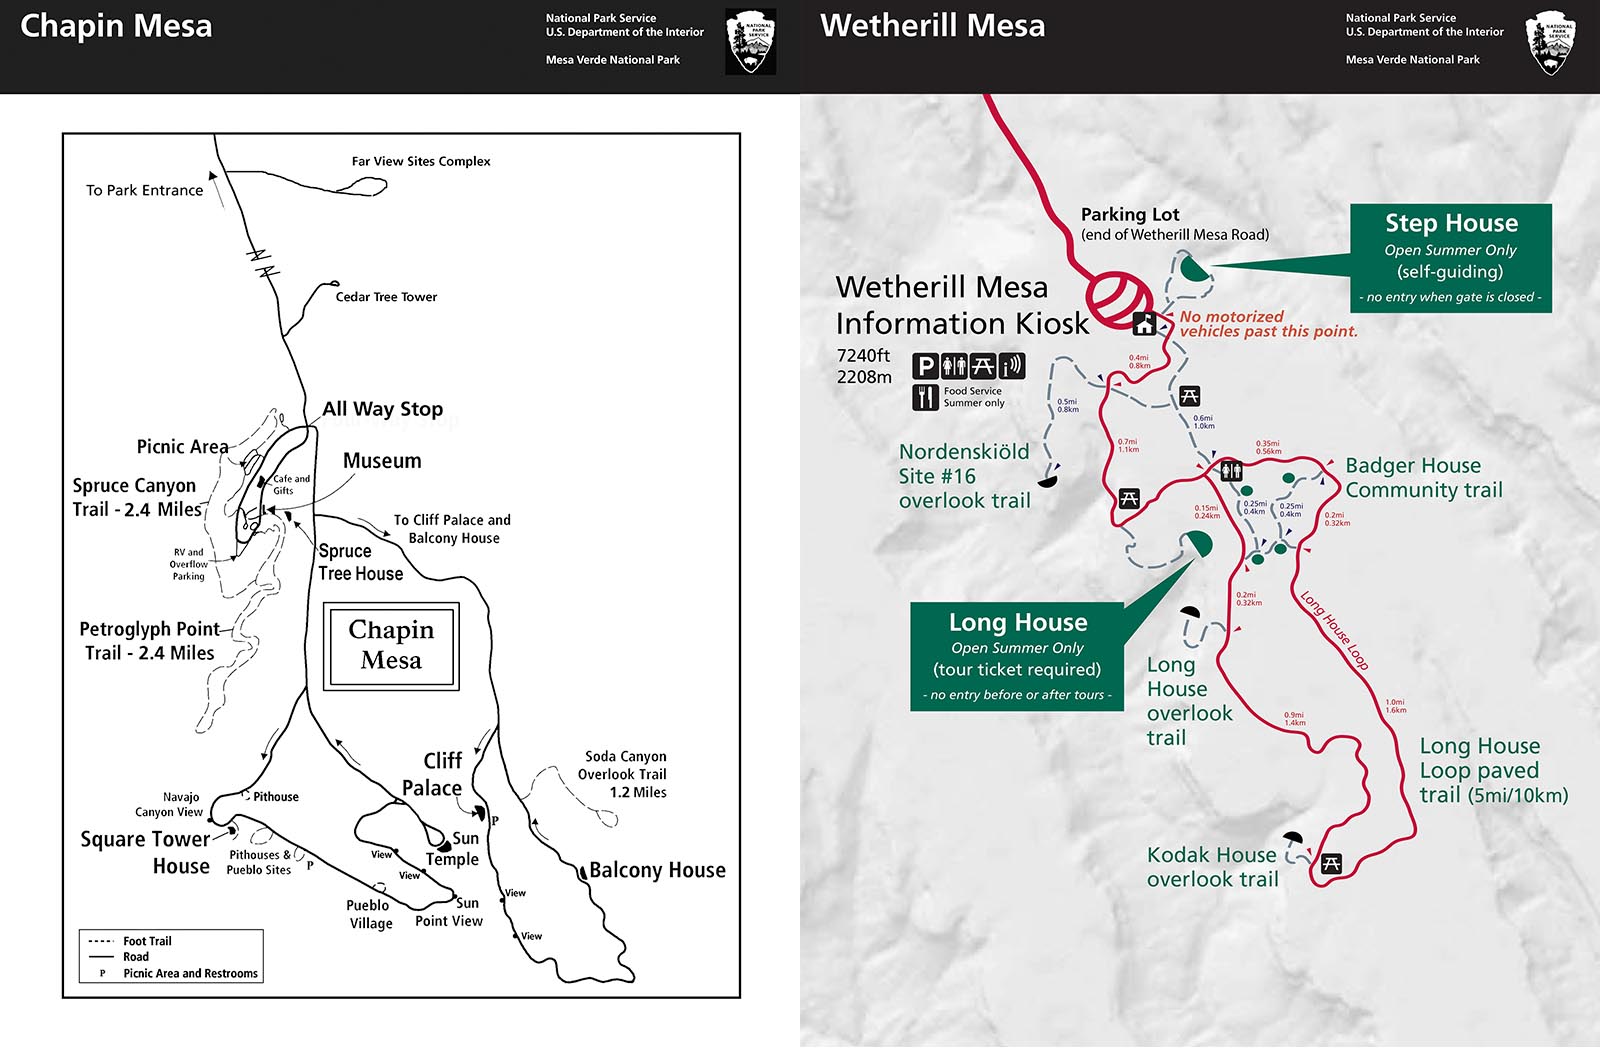 These maps from the NPS show the main areas of the park, Chapin and Wetherill Mesa, which are up to an hour drive from the park entrance.
There are two main sections of the park – Wetherill Mesa and Chapin Mesa. Chapin Mesa includes Mesa Loop, Cliff Palace Loop and Spruce Tree House. Wetherill Mesa is a good 30–60-minute drive from the other sites, which are closer together. It can take 45 to 60 minutes to drive from the park entrance to any of the locations listed. All park roads are narrow two-lane winding roads so driving between sights can take a while if there’s traffic or construction. (There was a good bit of construction when I visited, and Cliff Palace Loop was closed. It’s slated to be open summer 2025 if construction on viewing platforms is completed.) Check the park website for detailed maps and road closure notices before visiting.
Best Photo Spots in Mesa Verde National Park
I’ve organized my favorite photo spots in Mesa Verde National Park by location: Chapin Mesa versus Wetherill Mesa.
Chapin Mesa
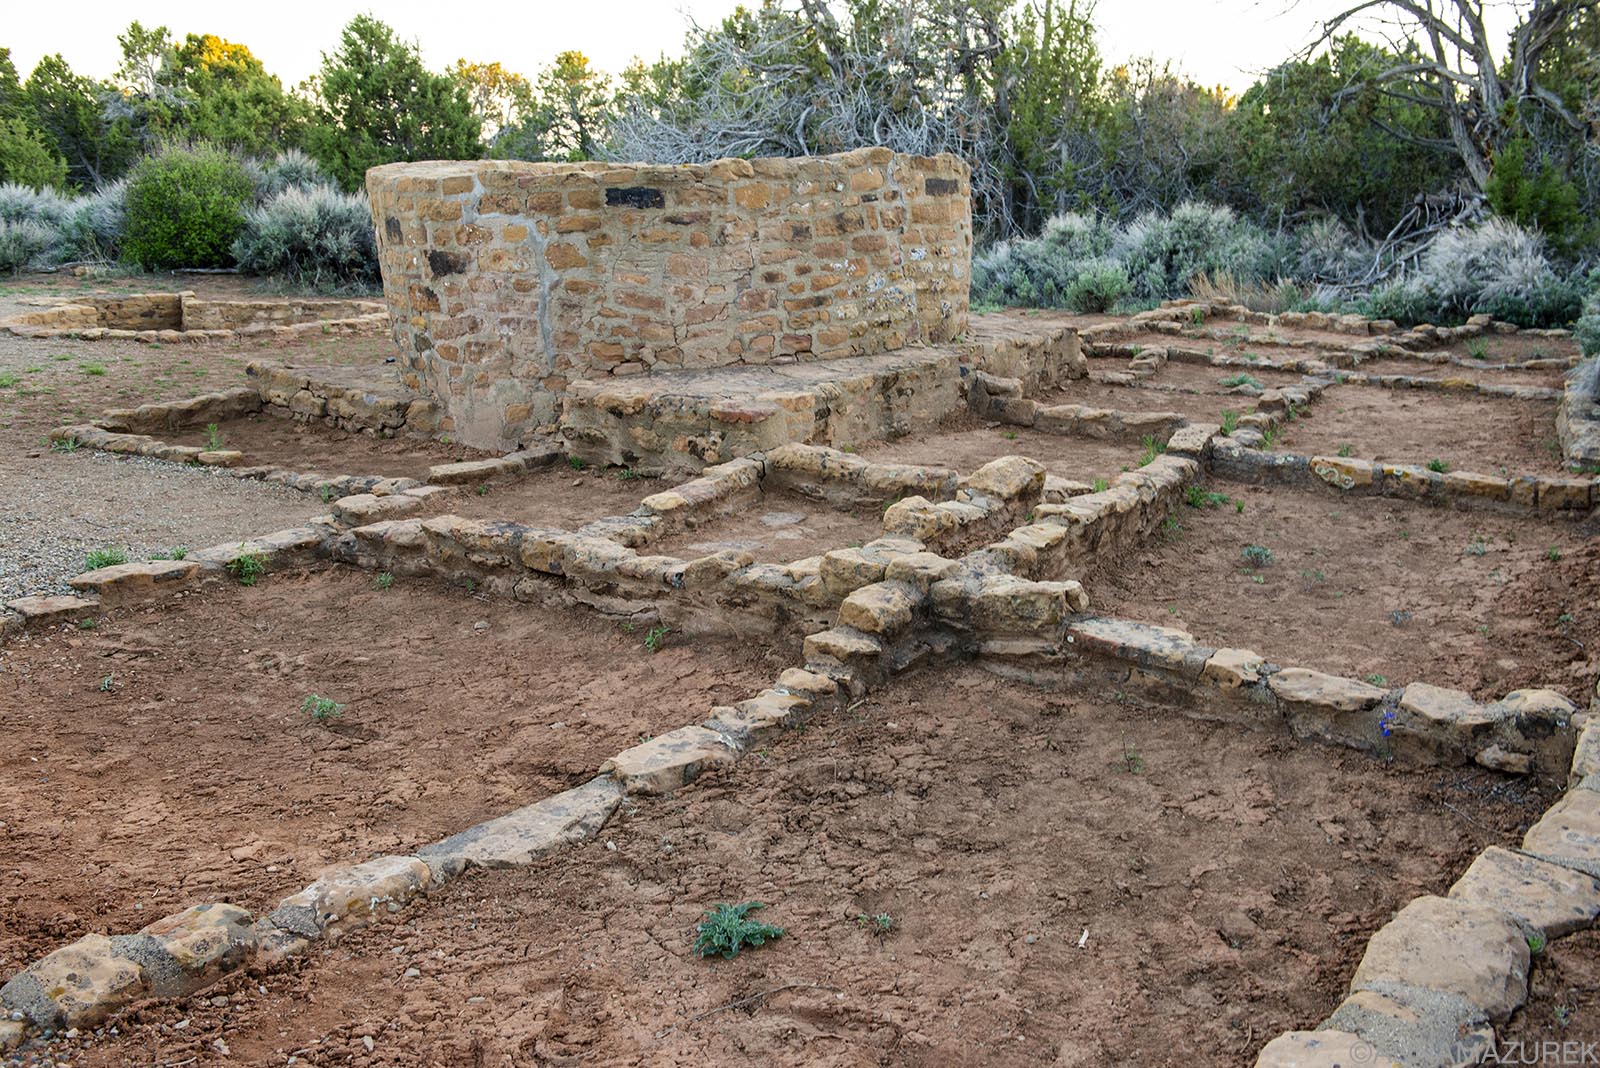
 Square Tower House photographed from the viewpoint in the early afternoon. Camera Settings: f/11 @ 1/320, ISO 400, 95 mm with 70-200mm lens
Chapin Mesa is the location for Mesa Loop, Cliff Palace Loop and Spruce Tree House. It’s the most popular portion of the park and most crowded. Cliff Palace Loop is currently closed as of October 2024 per a notice on the website in early 2025.
Cliff Palace Loop
Cliff Palace cliff dwelling photographed from the Cliff Palace Viewpoint by Sun Temple on Mesa Loop. Camera Settings: f/16 @ 1/250, ISO 400, 350 mm (70-200mm lens with 2X teleconverter.)
Cliff Palace Loop is located on Chapin Mesa and was closed due to construction when I visited. (It’s slated to be open summer 2025.) When the loop is open, Cliff Palace Dwelling is only accessible by guided tours for $8/person. The loop also contains Balcony House and the Soda Canyon Trail.
Mesa Loop
 New Fire Temple and New Fire House Overlook on Mesa Loop. Camera Settings: f/8 @ 1/1600, ISO 800, 240 mm with a 70-200mm lens with 2X teleconverter. The wind was insane here, which is why my shutter speed and ISO were high.
The six-mile Mesa Loop, located on Chapin Mesa, will take a while to drive because there’s so much to see. Sunrise shots aren’t an option here because the road doesn’t open until the staff arrive (varies based on staffing so check website for details), but sunset is possible. Law enforcement will sweep the road before they close the gates at sunset so you can shoot until they come along. While it was cool to see the pit houses, they aren’t the best with photography because they are in buildings with guard rails. The viewpoints of the dwellings were the best photo spots. I recommend downloading the free Mesa Loop driving tour podcast before visiting.
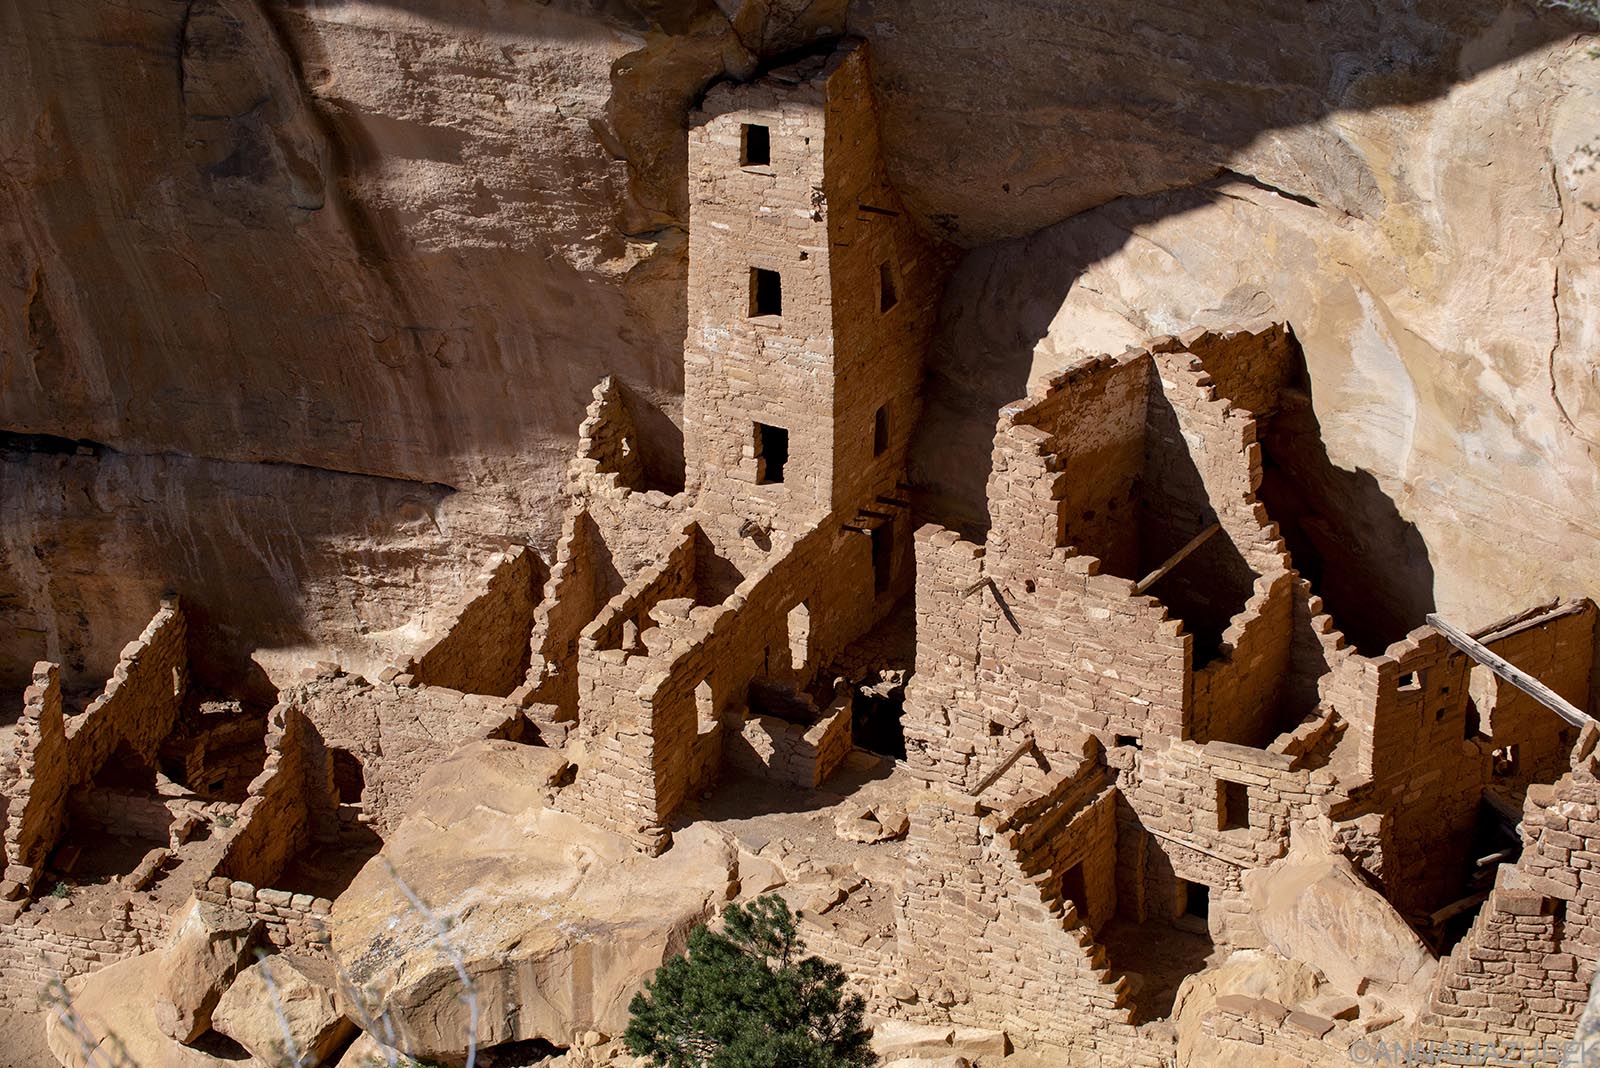
Square Tower House
 There is a crow’s nest set of buildings in in the corner of the canyon at Square Tower House that can only be seen on the tour. Camera Settings: f/9 @ 1/320, ISO 1250, 38mm with a 24-70mm lens.
The house itself is in the shade in the morning and full sun later in the afternoon. I recommend shooting in the afternoon to get the light on the house and the cliff. For tours, it’s best to go in the morning when the house is in the shade to avoid harsh shadows in the afternoon. The trail is only a mile but includes two ladders. It was my favorite of the two ranger-guided tours I did. There’s a cool Crow’s Nest building that can’t be seen from the viewpoint that we kept joking was a kid’s treehouse!
Cliff Palace Viewpoint by Sun Temple
 Cliff Palace cliff dwelling photographed from the Cliff Palace Viewpoint by Sun Temple on Mesa Loop. Camera Settings: f/11 @ 1/400, ISO 500, 98mm with 70-200mm lens. This was shot at roughly 4:30 p.m. in May. I’d suggest going earlier in day to avoid the dark shadow on left.
Spruce Tree House
 The view of Spruce Tree House from the back porch of the ranger’s office is one the best viewports in my opinion. Camera Settings: f/11 @ 1/320, ISO 400, 48mm with a 24-70mm lens.
Due to rock falls, Spruce Tree House is closed for the foreseeable future. (Previously, it was open to a self-guided tour.) There’s a lovely view of it from the back porch of the ranger’s office, which is better than the viewpoint below on the trail because it puts you above some of the trees. Unlike the other loops Spruce Tree House area is open 24/7 so you can shoot at sunrise or sunset easily, which I’d recommend. Otherwise, you’ll have to time your shoot between 3-5 p.m. to get light on the house while avoiding shadows from the cliff above or the trees in front. Around 6 p.m. the shadows from the trees in front really photobomb the image.
I’d only recommend sunrise/sunset shoots if you feel comfortable driving the two-lane winding park roads in the dark. The roads are well maintained but pretty scary driving out of the park at night, which is why I never stayed for sunset. There are some pretty steep drop-offs with no guardrails on the road! Plus, wildlife is another concern at night – there are still wild horses roaming the park. Due to this, I wasn’t happy with any of my images of Spruce Tree House.
The bathrooms at Spruce Tree House are the best ones. Mesa Loop only had portable toilets when I was there.
Wetherill Mesa
(Wetherill Mesa was closed for all of 2024 but the park office said it should hopefully be open in summer 2025 depending on staffing.)
 The majority of the trails at Wetherill Mesa are flat unless you are touring one of the cliff dwellings.
Once you arrive at Wetherill Mesa, you have to walk to the sites. No cars are allowed beyond the parking lot. All the trails to viewpoints are flat and easily bikeable. (This is the ONLY area in the park where bikes are allowed!) There’s no shade so go early or be prepared for the sun and wind! The area is open from May to October and is usually the quieter part of the park. Allow a least half a day to see all the sites excluding dwelling tours. There’s a ranger posted at a desk at the entrance. I’ve listed the sites you can physically visit below, but there are more sites you can see from viewpoints. It takes about 45 minutes to drive to Wetherill Mesa from Chapin Mesa and about 45-60 minutes from the park entrance!
Step House
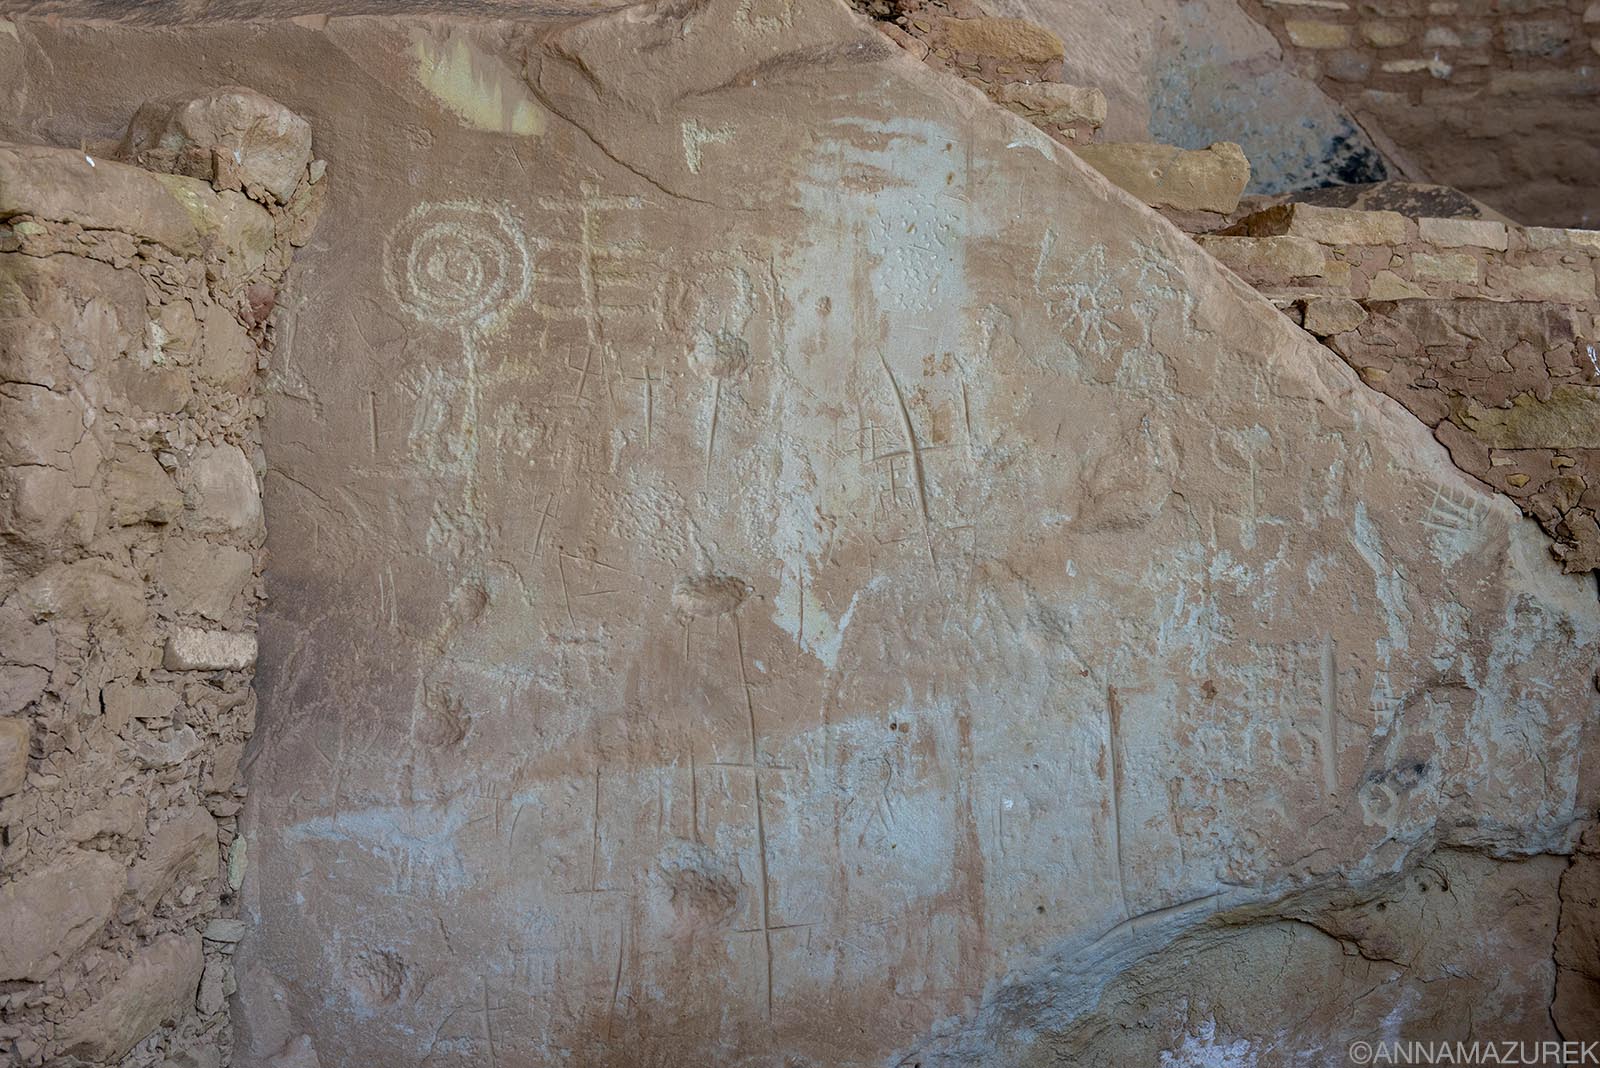 Petroglyphs inside Step House at Wetherill Mesa. This dwelling isn’t as amazing as the others but is very accessible.
A one-mile roundtrip trail starts at the kiosk and leads through the cliff dwelling that was once home to 30-40 people. It’s a unique site with a reconstructed pit house constructed around 620 and a multi-story pueblo built in 1226. It’s not as impressive as the other dwellings on the guided tours but this is the most accessible by foot, which is why they allow self-guided tours. A ranger is always on duty to answer questions at the site.
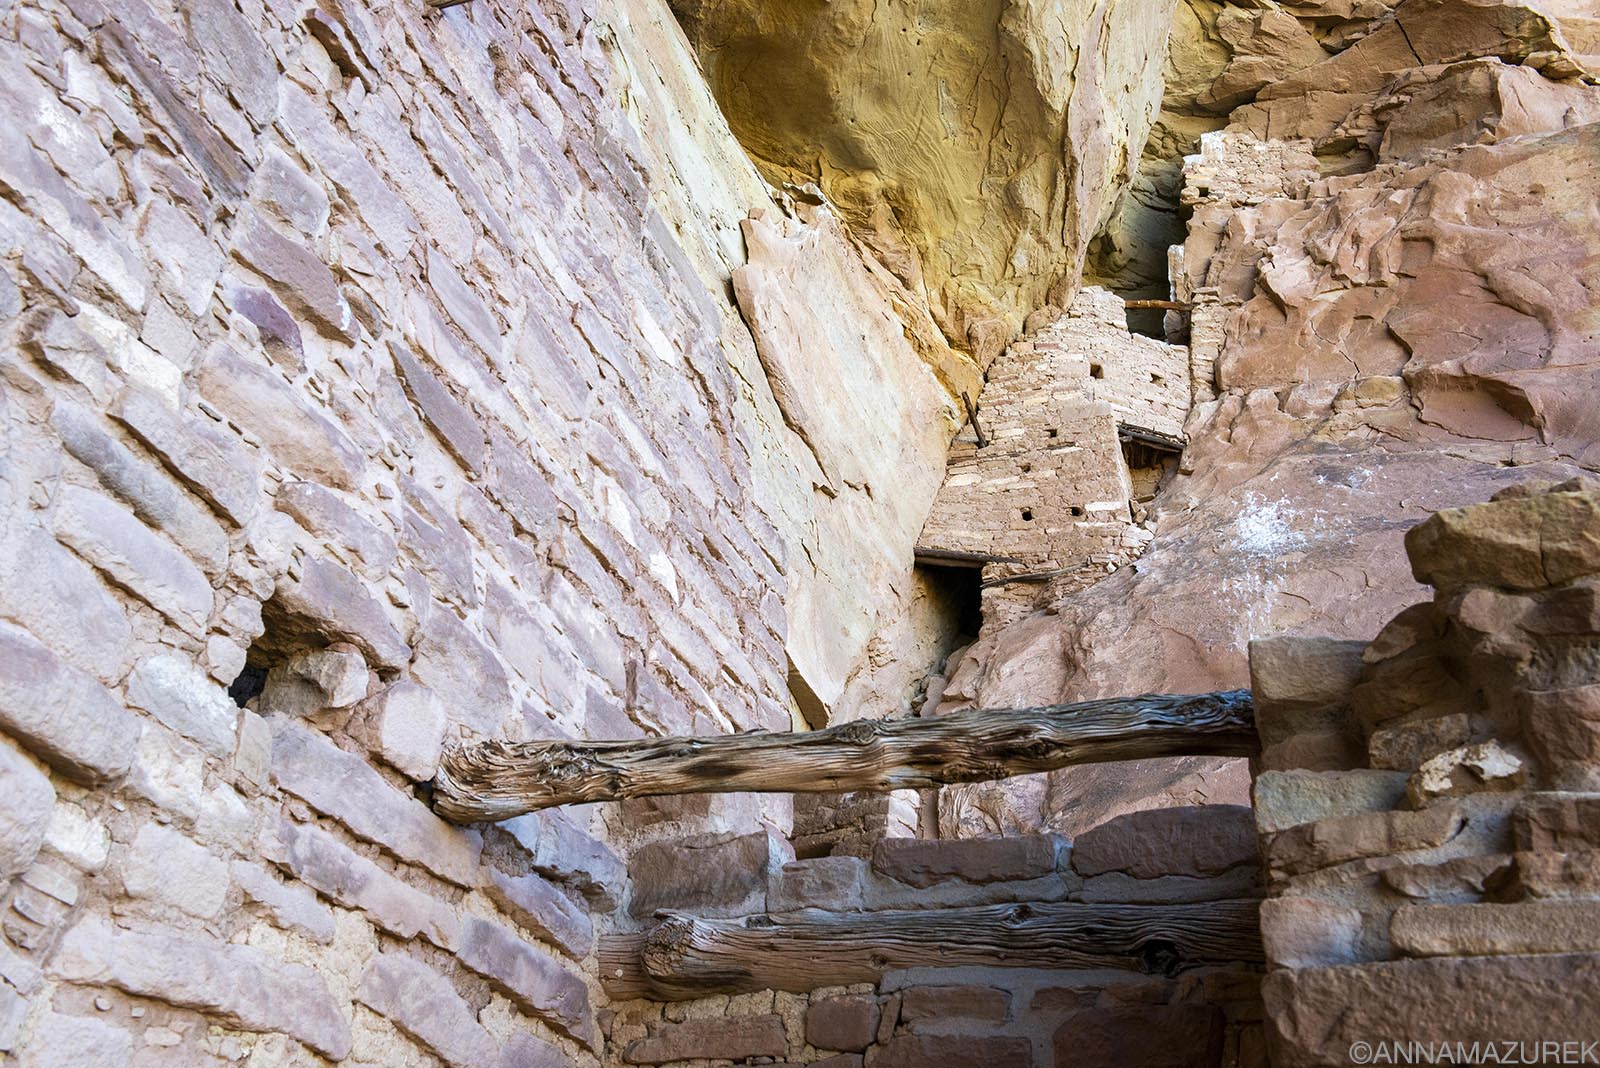
Mug House
 Mug House isn’t visible from any viewpoints and can only be visited on a tour. Camera Settings: f/10 @ 1/160, ISO 640, 52mm with a 24-70mm lens.
Mug House isn’t listed on any map and is only accessible by guided tour with a ranger. It’s a three-mile roundtrip hike from the kiosk and not visible from any viewpoint. While it’s labeled as a strenuous hike, I didn’t think it was bad. I did the noon tour, and the site was still in the shade since it faces west. The dwelling was named for three mugs found tied together on the site. Tours are $25/person with a maximum of 10 people.
Long House
Long House is the second-largest cliff dwelling in the park with 150 rooms and accessible only by a ranger-guided tour. ($8/person) It’s the most in-depth tour offered at the park but wasn’t available on the dates I visited.
Trails at Wetherill Mesa
 Nordenskiöld Site #16 photographed from the viewpoint. Camera Settings: f/8 @ 1/640, ISO 400, 60mm with a 24-70mm.
The main trail is the paved five-mile Long House Loop that’s great for hiking or biking. The Kodak House overlook (2.5 miles) and Long House overlook (1.5 miles) are located on the trail. Bikes have to be parked at the trailhead while you walk the .15-mile trail to the overlooks. The Badger House Community Trail (2.25 miles RT) weaves through four mesa-top sites and crosses the Long House Loop trail. The Nordenskiöld Site #16 Trail leads to an overlook of the cliff dwelling and is two miles roundtrip. All trails are relatively flat but exposed to sun/wind. (Due to the heat and exhaustion of doing two dwelling tours and Step House back-to-back, I only did the Nordenskiöld Site #16 Trail.)
Far View Sites
 I had the Far View Sites to myself at sunset, which I recommend to avoid people in your photos. Camera Settings: f/6.8 @ 1/80, ISO 1000, 32mm with a 24-70mm.
The Far View area was a mesa-top community and one of the most densely populated regions. A .75-mile trail leads through ruins of several houses and a reservoir. I went right before sunset and really enjoyed this small walk. It’s definitely underrated and worth a visit! The site is open from 8 a.m. to sunset. It’s located on the main park road.
Hiking Trails at Mesa Verde National Park
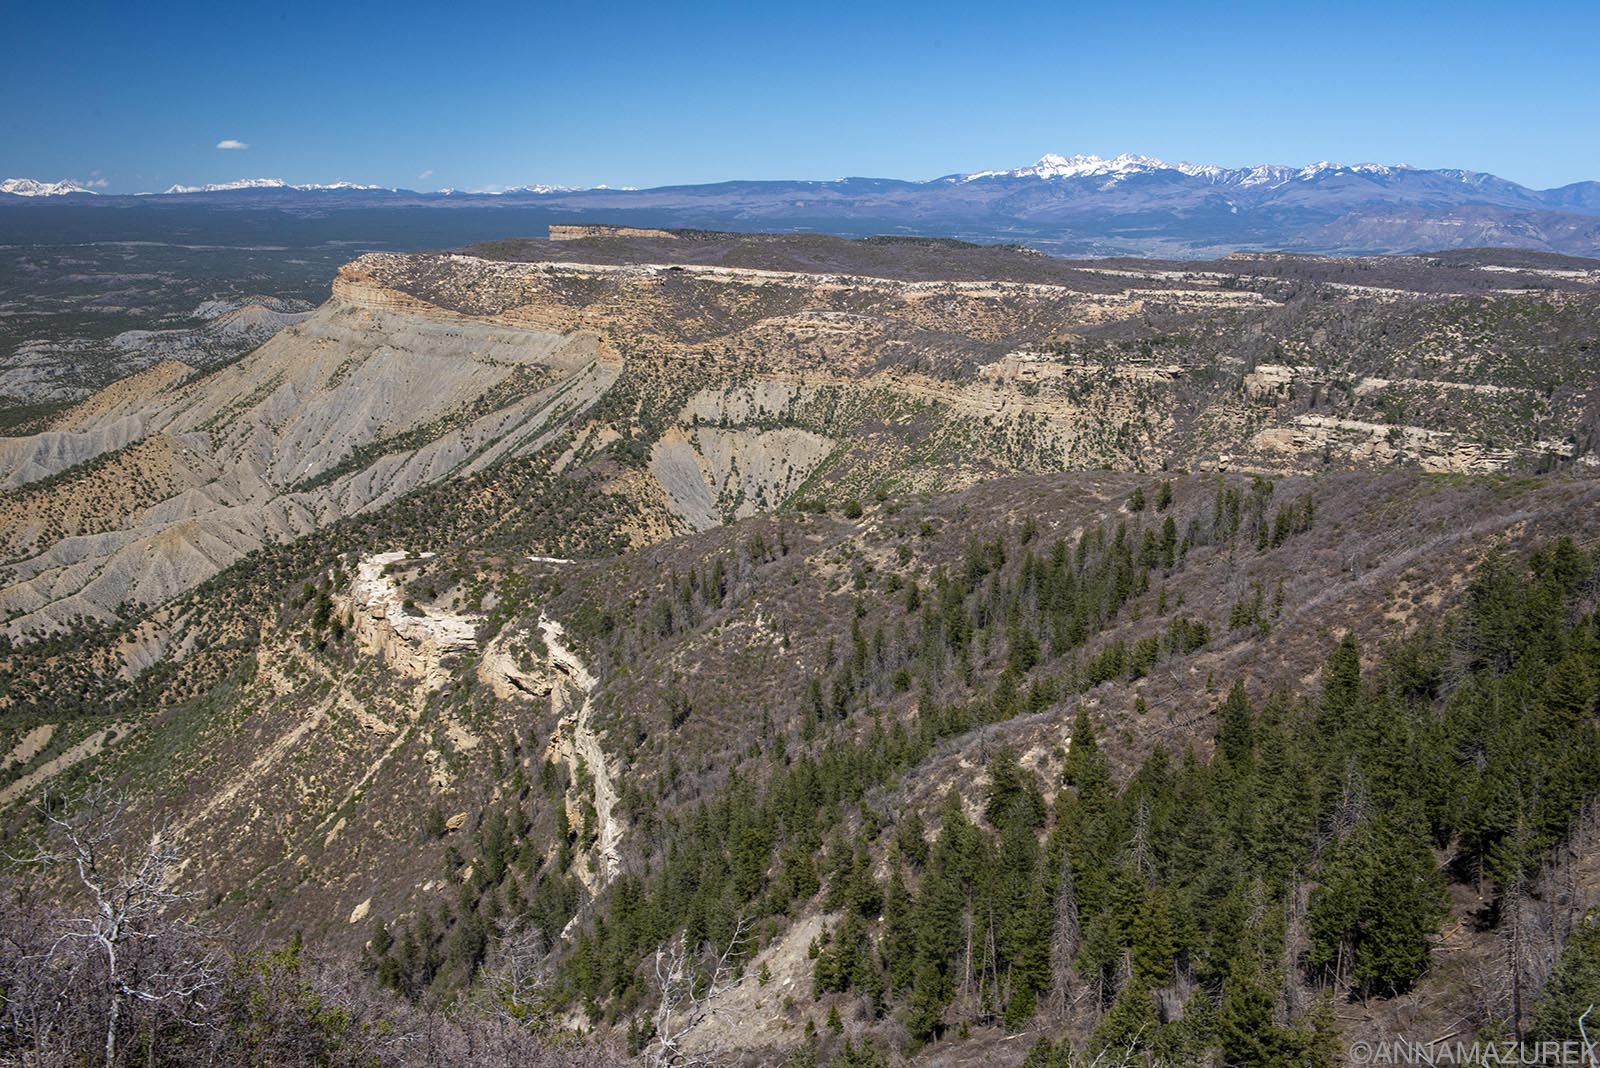 The main park road has several scenic viewpoints including this one — Park Point Viewpoint, the highest point in Mesa Verde.
There are several hiking trails throughout the park. Many of the ones I was interested in were closed partially due to Cliff Palace Loop construction, which should be open in 2025. Elevation in the park ranges from 7,000 to 8,500 feet so carrying camera gear gets even harder if you’re not used to the elevation. The sun is relentless, and there’s very little shade so start hikes early. Since I was so focused on photography and booked the dwelling tours, I didn’t get to do any other hikes due to the heat. I wanted to do Petroglyph Point but skipped it since I was going to Petroglyph National Monument in Albuquerque a few days later.
The Mesa Verde Museum Association offers free downloadable site guides for Cliff Palace, Spruce Tree House, Wetherill Mesa (Step & Long House) and Balcony House.
Photo Tips for Mesa Verde National Park
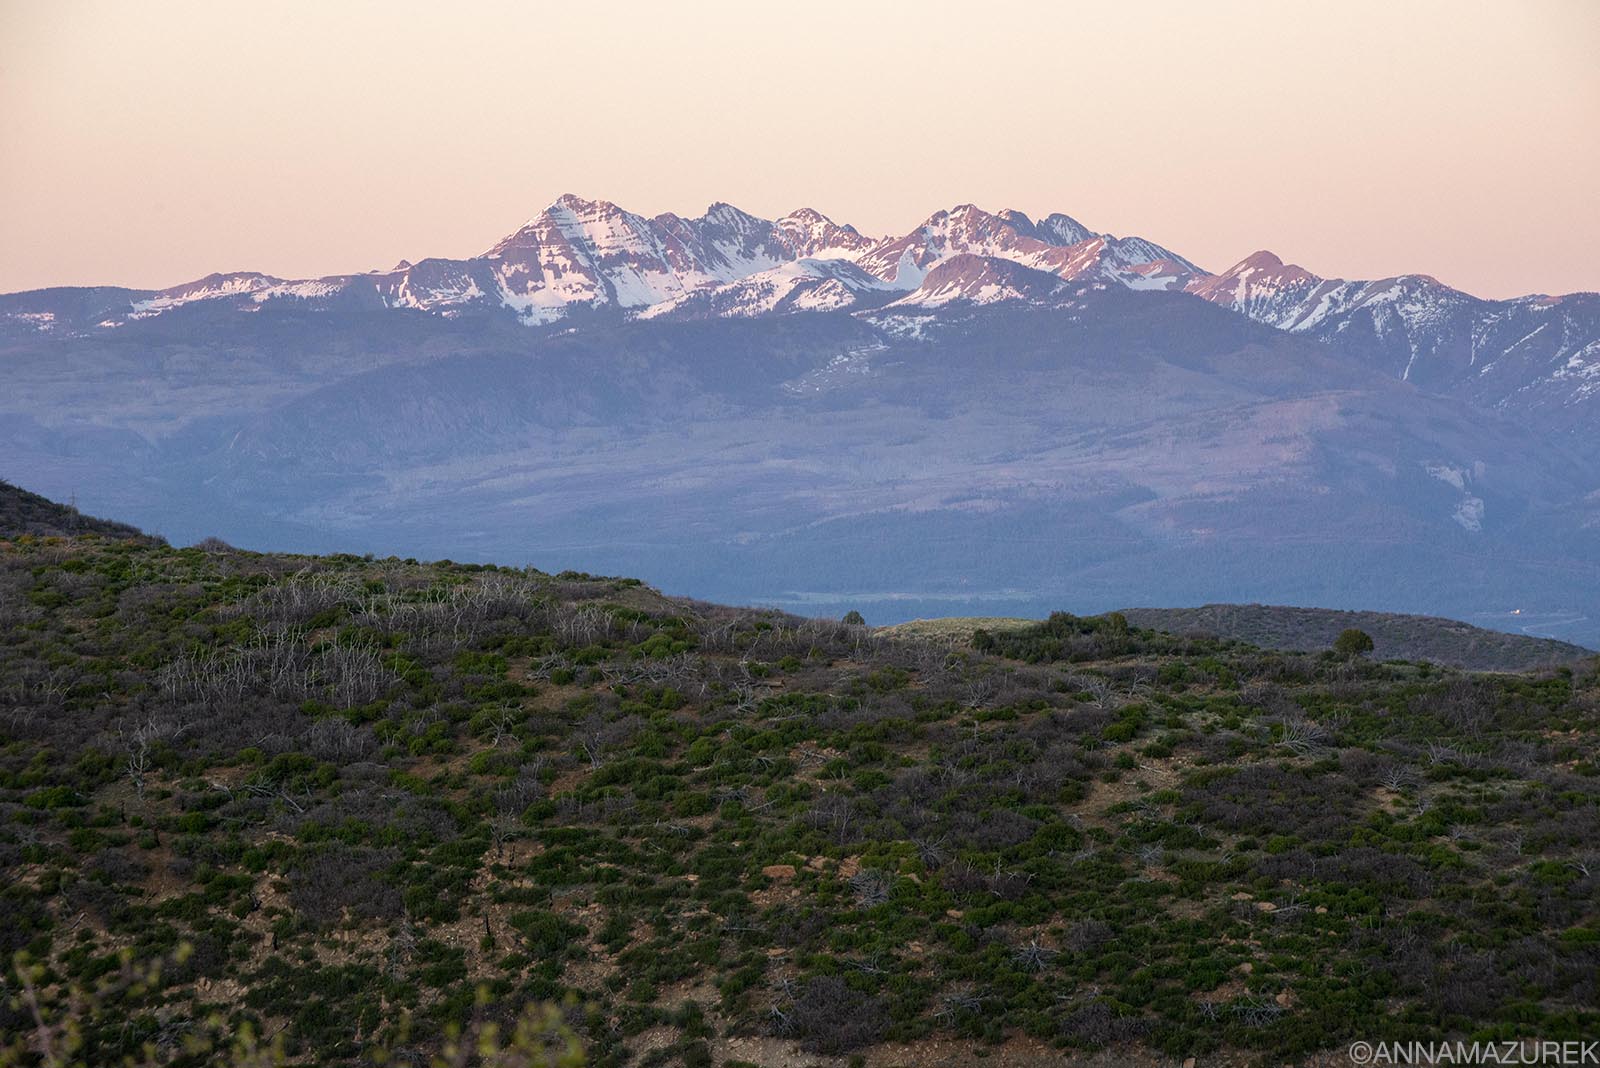 I stopped at an unmarked viewpoint to take this photo while I was leaving the park at sunset.
-
Lenses: You’ll need at least a 70-200mm zoom lens from the viewpoints for most of the cliff dwellings. I’d recommend a 400mm or a teleconverter as well. (I rented a Nikon 2X teleconverter from LensRentals.com for my trip to test it out, but I’d recommend a 1.4x teleconverter instead because that’s much sharper.)
-
Filters: A circular polarizer is a big help with the blue skies and helps reduce glare on the rocks, especially when shooting petroglyphs in the sun. A graduated neutral density filter would also be helpful with contrast but can be time consuming.
-
Take a Tripod: The wind is fierce so change lenses in your car or take two camera bodies. I’d recommend a tripod in low light or even with the teleconverter since the wind will knock you around. I used my Peak Design Travel Tripod, and it was perfect with my 70-200mm with the 2X teleconverter.
-
Photo Guide: At the entrance kiosk, they have an amateur photography guide with a chart of the most photographed areas in the park and the best times to shoot during the summer. I’ve included the chart below.
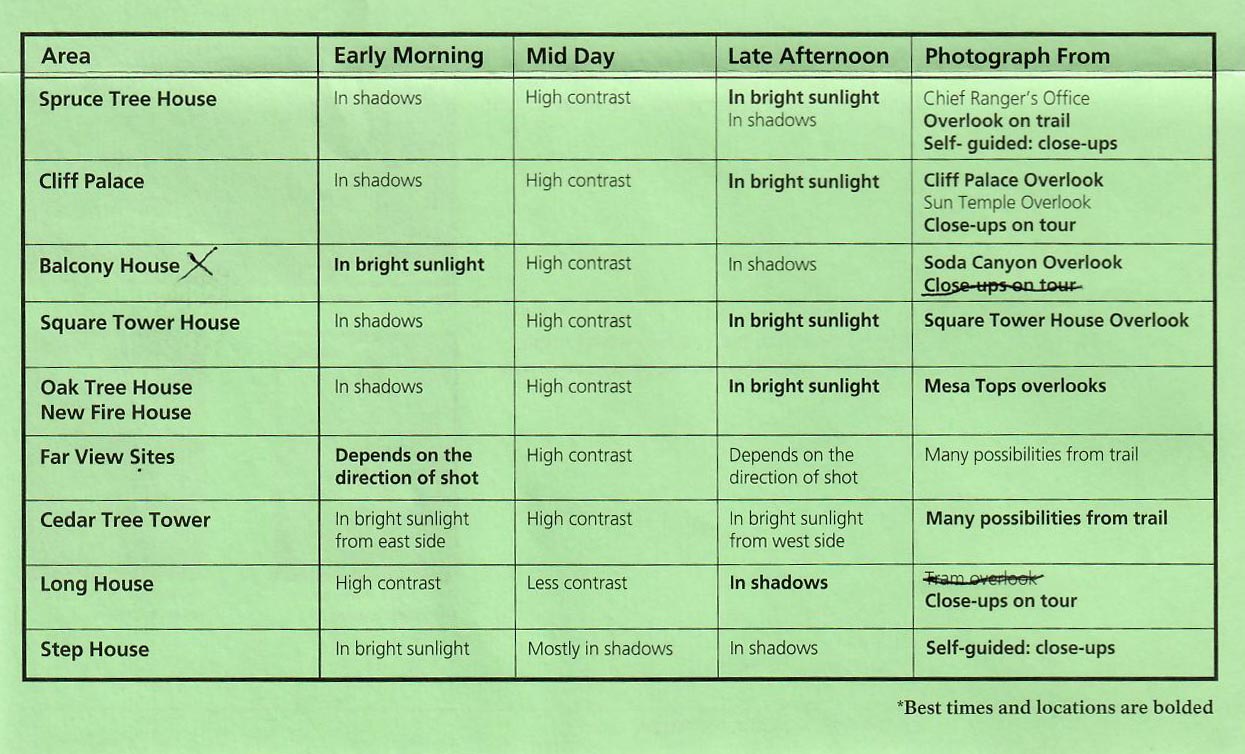 This is a scan of the National Park Service’s amateur photography guide for Mesa Verde National Park that is available at visitors center and entrance kiosks. The best times and locations for summer are bolded.
Mesa Verde National Park FAQ
 Every year there’s a series of “dry” lightning fires on the mesa tops, which are usually labeled by signs with the date of the fire. Since the park was established in 1906, 70 percent of the park has been burned by wildfires.
How much time do you need to visit Mesa Verde National Park?
Not all the sites are Mesa Verde are open at the same time each year so it honestly will probably take multiple trips to see it all. Otherwise, I’d suggest at least three to four full days and possibly more for photography. You could spend an afternoon going to the main sights on Mesa Loop but what makes this place special is going into the dwellings on a tour! It can take 45 to 60 minutes to drive from the park entrance to any of the locations listed above. All park roads are narrow two-lane winding roads so driving between sights can take a while if there’s traffic or construction. I was only here for two days (too short) because I added this on to a New Mexico road trip but plan to come back in the next year or two.
How much does it cost to visit Mesa Verde National Park?
For private vehicles, the entry fee is $30 from May 10-Oct. 22 and $20 from Oct. 23- April 30. Motorcycles are $25 from May 10-Oct. 22 and $15 from Oct. 23- April 30. The park also sells annual $55 passes. If you’re going to visit more than one national park, I’d recommend an annual pass for $80 that covers one vehicle or up to four people. If there are cancelations, they will show up on Recration.gov. I recommend setting reminders and be logged in ready to book at 8 a.m. MDT. I got every tour I wanted using this strategy. Since cell service is limited in the park, save digital tickets to your phone or take a screenshot.
Can you tour the cliff dwellings at Mesa Verde National Park?
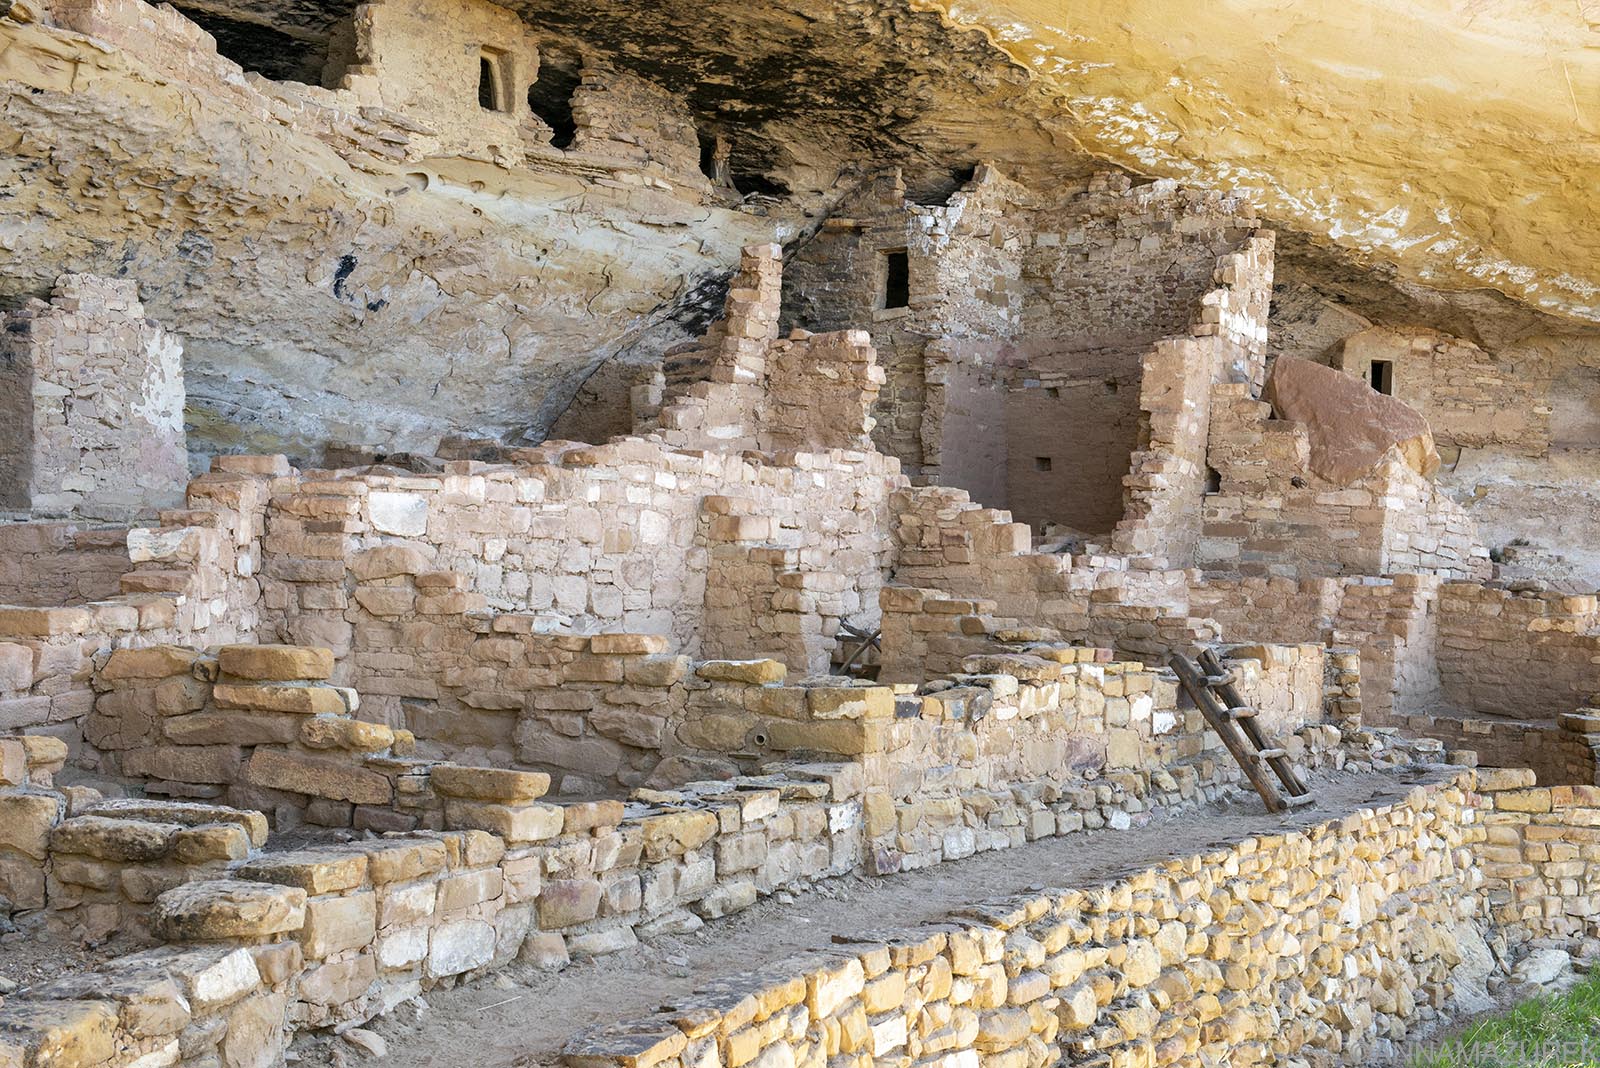
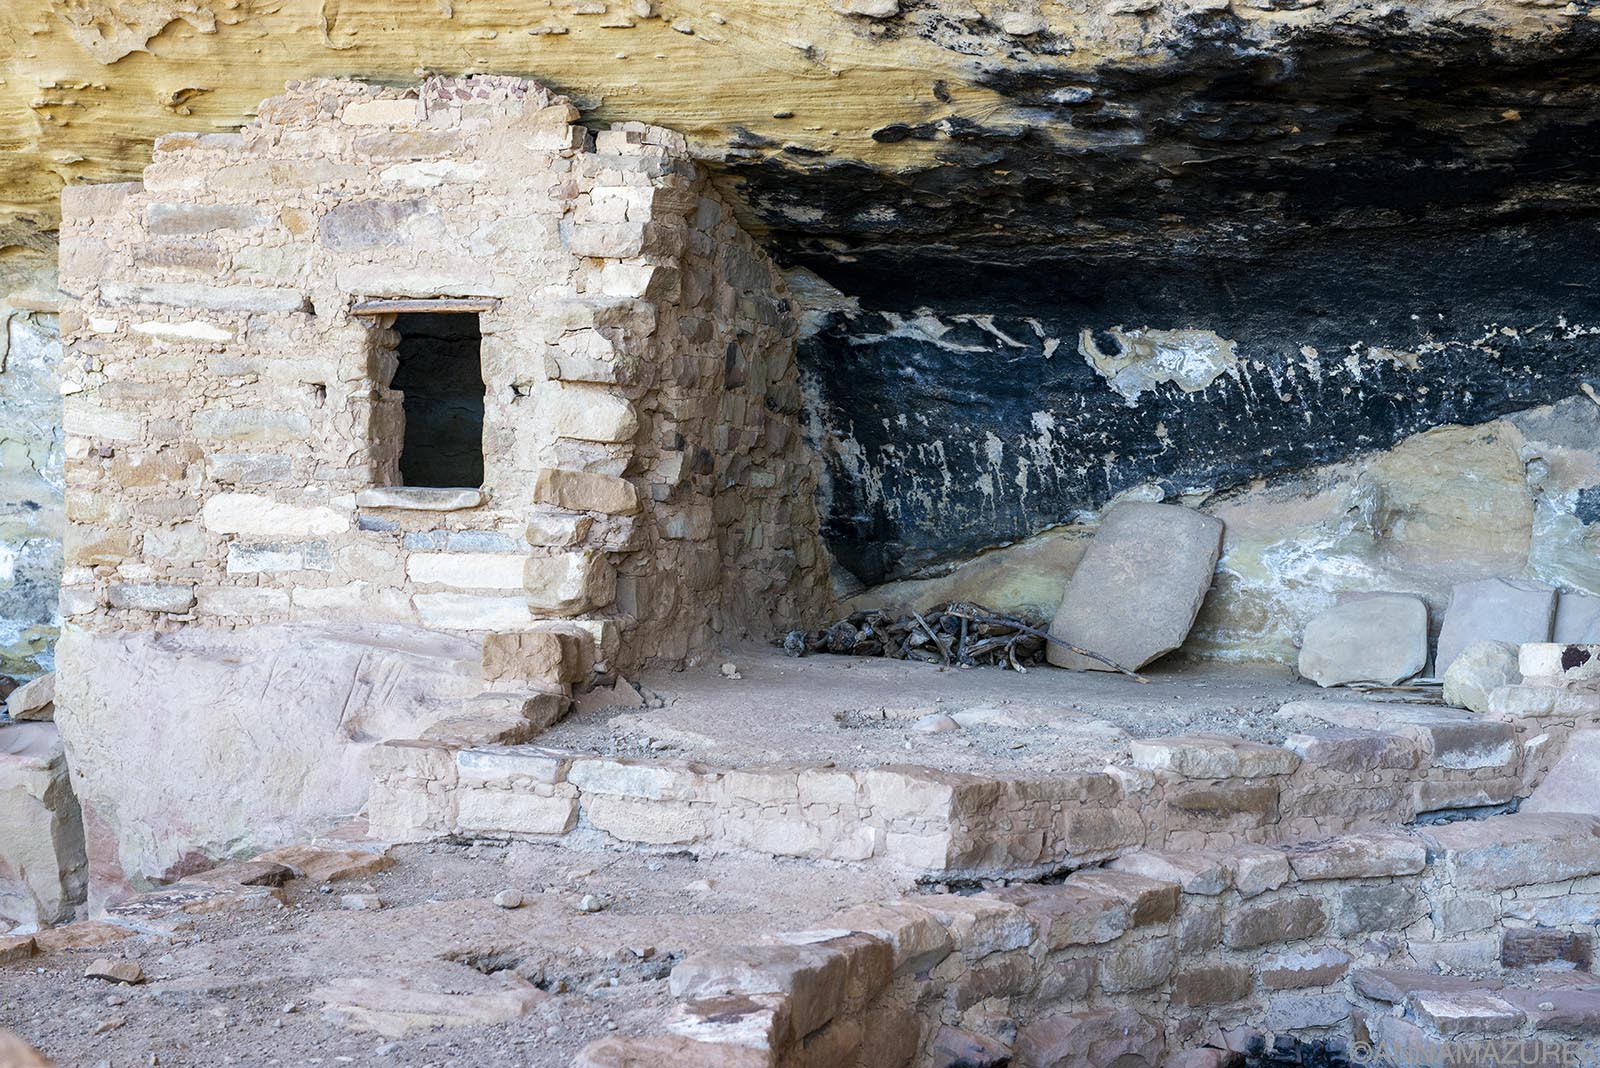 Mug House on Wetherill Mesa // The cliff dwellings are all made with rocks and mud mortar. The roofs were made of wood and covered in a layer of dirt. The black areas in the caves were the result of fires from the kitchen areas. Camera Settings: f/7.1 @ 1/250, ISO 650, 60mm with a 24-70mm lens.
Step House is the only cliff dwelling that’s publicly accessible for a free self-guided tour. A handful of other dwellings are open for either ranger-assisted or ranger-guided tours for $8-45/person, which trust me is worth it, especially for photography. The only way to get detailed shots of the dwellings is to do a tour, which books up fast and reservations open at 8 a.m. MST 14 days before the date. (I was literally on my computer when the clock it 8 a.m. to book my tours! Each tour only had 10 spots!)
The dwellings that are open for tours varies each year, so check the park website for updates. I toured Square Tower House in the morning and Mug House in the afternoon. (Both were $25 each.) I highly recommend both but loved Square Tower House the most. Read the details for the tour carefully as some require climbing ladders on the trail.
More tours are offered during the summer, which is also the busiest season so expect crowds. Other sites available for tours are Long House and Spring House, which is an eight-mile full-day tour only offered four times this summer. There are other sites available for limited dates, which vary each year. For more information on guided tours, visit the NPS website.
Is there cell service in Mesa Verde National Park?
Cell service is non-existent in most parts of the park. Download offline maps before visiting the park. Keep in mind that it’s a 45–60-minute drive from the entrance to the main sites.
What’s the best time to visit Mesa Verde National Park?
Spring (May) and fall (September and October) are the best time to visit for weather and to avoid the crowds. Most cliff-dwelling tours are open during these dates. Summer means more daylight but more crowds and often intense heat. (There’s not a lot of shade in the park.) The park is open in winter but facilities are limited and snow can make things hard to access. (I visited in mid-May and highly recommend that time of year.)
Where to stay at Mesa Verde National Park?
The most budget-friendly option is the Morefield Campgrounds (all services open May to September in addition to limited October options) in the park, which has direct access to some of the best hiking trails that are focused more on scenery than cliff dwellings. The Far View Lodge (starting at $146/night) is an excellent location in the park for photography because it’s close to attractions and located past the scariest portions of the road.
There’s a plethora of other camp and RV sites including a KOA and most hotel brands available on the way to the park or in the city Cortez, which is just a 10–15-minute drive from the park entrance. I stayed at the Hampton Inn in Cortez, which was cheaper and rated higher than the Far View Lodge. (Prices vary by season.) I brought my own food to cut costs, so I didn’t eat out at all.
This post originally appeared online in 2021; it was recently updated in February 2025 to include current information.
An Easy Guide to Getting American Airlines Elite Status—And How to Optimize it Once You Do
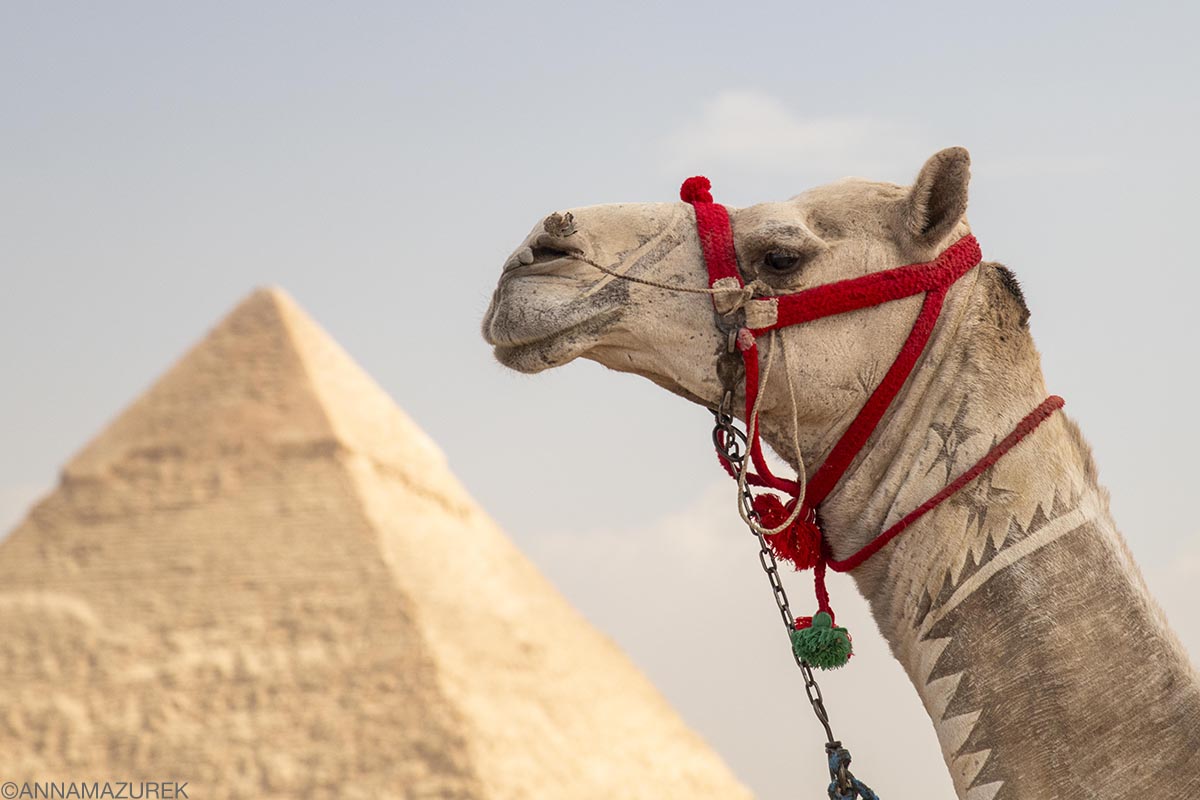 A work trip to Egypt in January helped me earn American Airlines AAdvantage Platinum status thanks to a stopover in Dubai and flying oneworld alliance airlines.
In 2024, I achieved American Airlines Platinum status, my first elite status on any airline. This year, I hacked the system to reach Platinum Pro status. How did I do it? (Hint: Hotels are the secret!) Is it worth the effort? (Yes, and here’s why.) Here’s my guide to American Airlines Elite Status including pie charts with a breakdown of how I earned status!
Affiliate links are used in this post. If you make a purchase, I earn a small commission at no cost to you, which goes toward the cost of maintaining this blog.
In this Article
How I Got American Airlines Platinum Pro Status (2025)
How I used Hotels to get American Airlines Status
How I Got American Airlines Platinum Status (2024)
Is American Airlines Platinum worth the effort?
American Airlines Frequent Flyer Mile FAQ
American Airlines Status Levels
There are four American Airlines status levels: Gold (40,000 loyalty points), Platinum (75,000 loyalty points), Platinum Pro (125,000 loyalty points) and Executive Platinum (200,000). Status levels are calculated annually from March 1 to February 28. (I hit Platinum in January 2025 and my status is valid until March 31, 2026.)
How are American Airlines Loyalty Points Calculated
My loyalty has always been with American Airlines because I’ve always lived near one of their hub cities. In 2022, the airline revamped its loyalty program to focus solely on a loyalty point system for achieving elite status. For each qualifying mile you earn, you also earn one loyalty point from flying on American, oneworld airline partners and Jet Blue. In addition, you can earn loyalty points for using their branded credit cards, shopping on their portal sites (SimplyMiles, AAdvantage eShopping, AAdvantage Dining, American Airlines Vacations) or through other partners. The more money you spend, the easier it is to earn elite status. It’s no longer about how much or far you fly—it’s all about money.
Loyalty points for flights are calculated using the base fare before taxes. You’ll earn a loyalty point for every dollar spent. You earn a significant mileage bonus for every dollar spent based on your status:
AAdvantage member: 5 miles per dollar
AAdvantage Gold: 7 miles per dollar
AAdvantage Platinum: 8 miles per dollar
AAdvantage Platinum Pro: 9 miles per dollar
AAdvantage Executive Platinum: 11 miles per dollar
Example: If the base fare for a flight is $500, that equals 4,000 loyalty points for that flight with the 8-mile multiplier for platinum status.
How I got American Airlines Platinum Pro Status (2025)
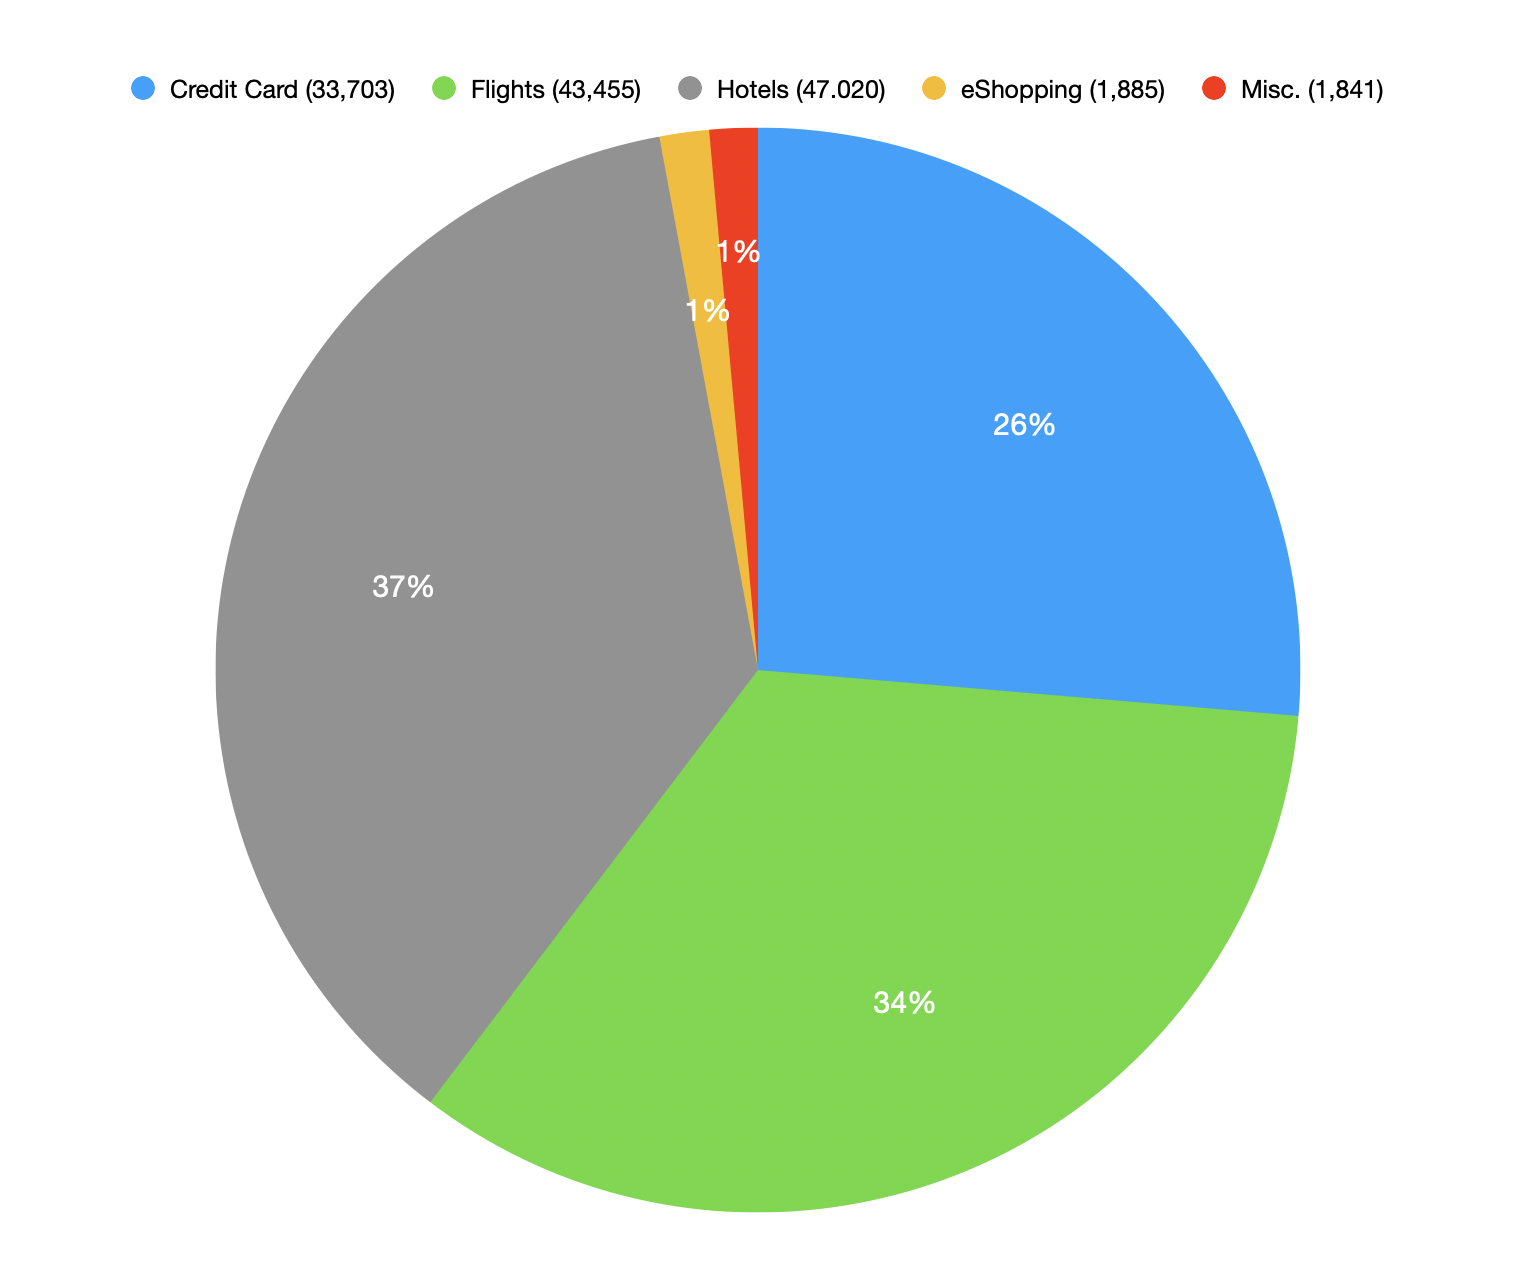 To earn American Airlines Platinum Pro status, I earned 127, 096 through the following: credit card spending (26%; 33,703 points ); flights (34%; 43,455 points); hotels booked through AAdvantage Hotels (37%; 47,020 points); eShopping through the American Airlines portal (1%; 1,885 points) and miscellaneous (1%;1,841 points from a rental car, dining and the 1,000 point loyalty bonus once you reach 15,000 points.)
A few notes:
- I flew 10 American Airline and oneworld alliance flights for a total of 38,832 points. Since one of my freelance jobs pays for my flights, I only got loyalty points for flying, not for purchasing them.
- My credit card spending was higher than normal because I dropped $10,000 on new camera system (switched from Nikon to Sony). Roughly, 10% of my credit card spending was reimbursable from work expenses.
- Once I hit the 15,000 point level, American Airlines lets you choose a bonus of 1,000 loyalty points, which helped.
- After hitting the 60,000 level, you can earn a 20% loyalty point bonus rewards, which includes AAdvantage Hotel bookings. After achieving 100,000 loyalty points, it increased to 30%, which was instrumental in helping me get status.
How I used Hotels to get American Airlines Status
 Three nights at the Chatrium Grand Bangkok worth nearly 10,000 loyatly points each helped me achieve American Airlines Platinum Pro status.
The secret for me was booking hotels through AAdvantage Hotels after I was eligible for the loyalty point bonuses. (Again, there’s a 20% bonus at 60,000 points and 30% at 100,000.) Keep in mind booking through AAdvantage Hotels is always more expensive than booking directly—at least 20% by my calculations but sometimes more. You are always paying more for the points.
Once I achieved Platinum status (75,000 loyalty points) in late August 2024, I needed 47,000 points to reach Platinum Pro, which seemed unrealistic because I wasn’t going to be flying any oneworld airlines again until March. There was no way I’d spend nearly that much on my credit card over the next six months. (I was in Southeast Asia where things are often cash-based.)
By November, I needed 42,000 points for Platinum Pro and decided to try to hack the system with hotels for some January trips. I booked four hotel nights for $1,431.25 totaling 39,660 points. To earn the same amount of loyalty points from flights, I would have had to spend $4,957 on airfare (base fare, excluding taxes). By booking the hotels, it was essentially a 72% discount on money spent!
I found an amazing 5-star hotel in Bangkok (Chatrium Grand Bangkok) that I booked three individual nights back-to-back to get roughly 9,300 to 10,000 points each night. (The rewards are higher for individual nights than multi-night stays booked together.) I emailed the hotel in advance to ensure I had the same room the entire time and “checked in/out” daily. It was roughly $400/night, which is more than I’ve ever spent on a hotel. Don’t get me wrong it was a stunning hotel, but I could have gotten it at least $100 cheaper on Booking.com. The loyalty points for each stay posted individually less than a week later.
I booked another hotel in Hanoi for $167/night for 4,300 points. (I booked a second night at the same hotel fairly last minute for a discounted $66 on Booking.com.) I only chose these hotels because they had the highest loyalty point value and good reviews. These were trips I was taking anyway and not every city I was visiting had great deals like this. To be honest, I was really concerned this wouldn’t work, and I’d wasted my money, so I was grateful it paid off. Now, will this lead to more upgrades internationally? I’ll keep you posted.
How I Earned American Airlines Platinum Status (2024)
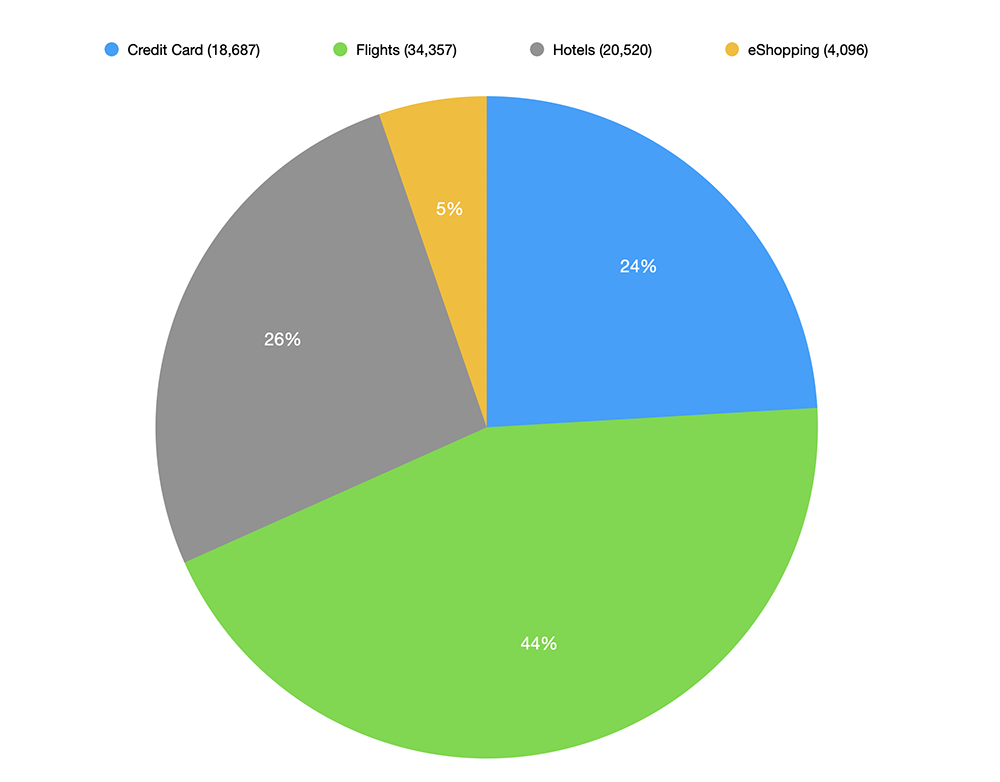
This handy pie chart breaks down the percentage of how I earned American Airlines AAdvantage Platinum status. I earned 79,369 loyalty points through flights (44%; 34,357 loyalty points), credit card spending (24%; 18,687 loyalty points), hotels booked through American Airlines (26%; 20,520 loyalty points) and shopping through their eShopping portal (5%; 4,096 loyalty points).
It took a calculated combination of efforts to earn platinum status because I’m a pretty frugal person who doesn’t spend a lot of money and saves half of my income. This makes it extremely difficult to earn elite airline status since it’s all about how much money you spend.
Full Disclosure: One of my freelance jobs is teaching photography for a luxury travel company so most of my flights are paid for by my job. This alone is the only reason I’m currently able to earn status becuase I wouldn’t be flying as much without this job. I try to strategize the best I can to stay loyal to American Airlines or oneworld airlines when convenient. Since traveling is exhausting, I’ll always fly a non-oneworld airline if they have a direct flight versus having to connect or even worse, overnight somewhere just to stay loyal.
For few notes for transparency and clarification:
- I flew 13 flights on American Airlines and their oneworld partners for a total of 34,357 loyalty points.
- When you book hotels through American Airlines, they have loyalty point bonuses. I got 10,000 loyalty points for one three-night hotel stay in Dubai. After I hit 60,000 loyalty points, I got a 20% bonus on loyalty points earned for hotels and shopping. These hotel bookings were critical for me to get status. I did find the prices for hotels were roughly 10% more on the American Airlines site than booking directly through the hotel. You will always pay more in these situations just as prices are always higher when booking award travel with miles. This is a business after all, and the airlines just want to make money.
- Loyalty point levels for booking hotels through American Airlines change frequently so check back after booking to see if there is a better deal. This Dubai hotel I mentioned above was only 6,800 loyalty points but when I checked a few weeks later, it was 10,000 loyalty points and $200 cheaper. Since it was free to cancel, I just canceled and booked it again!
- Roughly, 39% of my credit card spending was for work expenses that I was reimbursed for afterward. I never maintain a balance on my credit card and use it to pay for everything I can.
- On the eShoppping portal, I only bought things I was going to buy anyway. I did return a few things I didn’t like and haven’t seen any of those loyal points removed. I also bought cat food for my parents and had them pay me back just to get the points. Normally, I would use Rakuten, the cash back program, when buying online so I did lose out on a little cashback by going through the American Airlines portal. I traded the cash back for loyalty points.
- Please note that American Airlines “bonus miles” are not loyalty points. This term only means frequent flyer miles.
Benefits of American Airlines’ Platinum Status
 Flying Royal Jordanian, a oneworld airline, to Jordan for work also helped me earn status on American Airlines, and my status got me access to their lounge in the Amman Airport, which is also a Priority Pass lounge. While in Jordan, I hiked to the monastery in Petra, which is best photographed in the afternoon.
Premium Cabin Upgrades: For me, the main benefit is a higher chance of upgrading to Business Class (25,000 miles + $350 fee) for long-haul flights. (I was able to upgrade on a 15-hour flight to Sydney in October when I had gold status but wasn’t able to upgrade on my last flight from Tokyo to LAX a few weeks ago with platinum.) In my experience, it’s nearly impossible to get a complimentary first-class upgrade (another benefit) on domestic flights with either gold or platinum status.
Main Cabin Extra: After booking, you have access to extra-leg room seats (these are up to a $100 value). I would never pay for these, but this is a huge help for long-haul flights where I can’t get the upgrade.
60% Status Mileage Bonus: For every dollar spent on flights, you earn a 60% bonus on flights that helps you earn status faster.
Two Free Checked Bags + Priority Handling: This is nice, but I never check two bags. The priority handling is great when I have Global Entry and don’t want to wait ages for all the bags to come.
Priority Lanes for Check-in Security and Boarding: My biggest pet peeve with flying now is having to fight to carry on my camera gear, which I don’t want to check for fear of theft or damage. Priority boarding resolves this easily. You get group 3 with platinum, group 4 with gold and group 5 if you have an American Airlines credit card. Group 5 has been fine for me with my luggage, so this isn’t as much of a game changer as other things. Priority boarding has been a lifesaver with oneworld airline flights—that’s huge for me because British Airways was recently trying to make me check my carry-on bag with my camera gear. Priority boarding saved me last summer. The priority boarding with gold status was enough to make a difference.
Oneworld Sapphire Status: Lounge access is one of the top three benefits for me because I literally hate being in airports and love anything that makes it more tolerable. You only get access to lounges when flying oneworld airlines. If you’re flying internationally, you can get into business class lounges. For American Airlines, this means I get Admirals Club access, which is a game-changer—free champagne, delicious food and showers. It’s a nice space to work as well.
Other benefits include same-day priority standby and a designated travel planning desk.
Benefits of American Airlines Platinum Pro
It includes all of the benefits of Platinum listed above with some added perks. The two biggest are an 80% mile bonus on every dollar spent on flights and oneworld Emerald Status, which means access to fancier lounges and priority boarding on oneworld flights. In addition, you get three free checked bags with priority handling.
American Airlines Frequent Flyer Mile FAQ
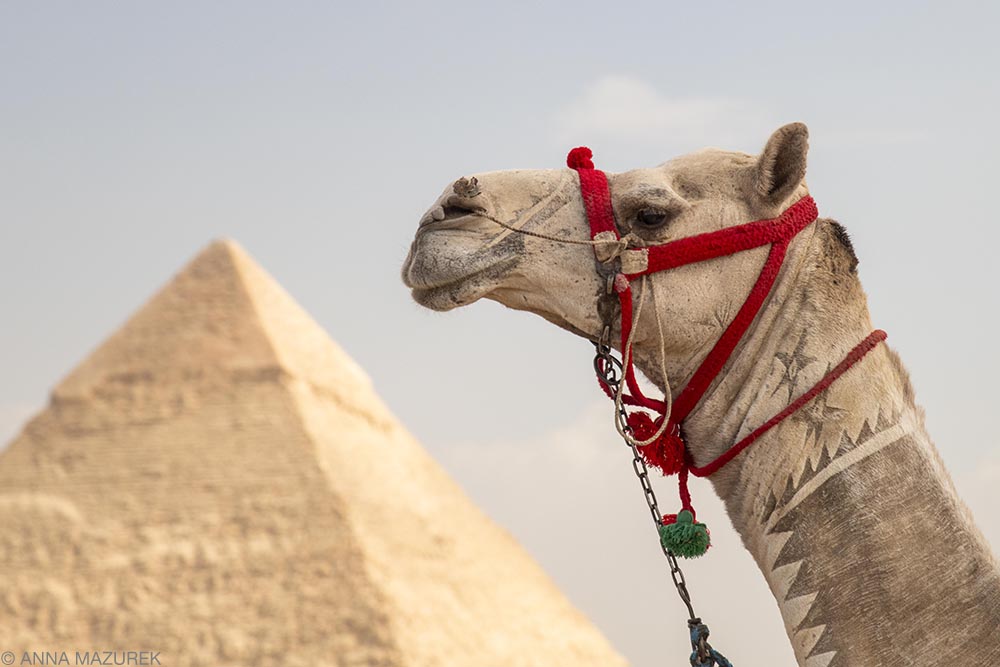
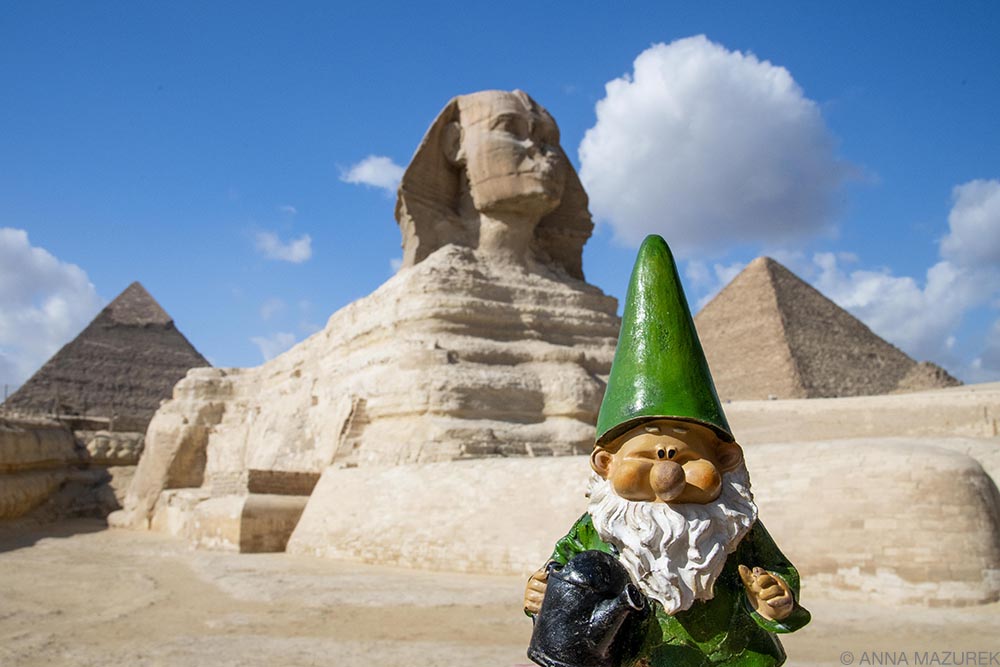 Alfred the Gnome at the Sphnix in Egypt. We had a private tour of the Sphnix and were able to get closer than you can with general admission tickets.
How does American Airlines Gold status compare to Platinum?
Gold status offers priority upgrades but no free main cabin extra and only one free checked bag. The mileage bonus is slightly less, and you only get oneworld Sapphire status, which gives you priority boarding but no lounge access.
Gold status was worth it for me in 2023 for the priority boarding on other oneworld airlines, which prevented me from having to check my camera gear. It also allowed me to upgrade to business class on a 15-hour flight from LAX to Sydney, which was huge.
Is American Airlines Platinum worth the effort?
If it’s convenient for you to fly American Airlines or another oneworld alliance airline regularly, then yes, it can be worth the effort.
For me, American Airlines Platinum status has definitely been worth it but ONLY because I organized most of my flights with American Airlines and oneworld airlines. First of all, it gave me access to Fast Track security in London Heathrow with British Airways, which is similar to TSA PreCheck. This was a game changer because I was through security in minutes without having to take out all my electronics.
I got access to the Cathy Pacific Lounge, which is the best lounge in Heathrow Terminal 3, with my oneworld emerald status. The spacious and quiet lounge had a NOODLE BAR and free-flowing champagne. I boarded the plane a happy girl with a belly full of bao and pho. Literally, it was the best airport lounge I’ve ever visited.
The priority boarding and seating meant that I didn’t have to check my carry-on bags on British Airways flights. I was able to choose main cabin extra seats with extra legroom for free. (You can’t upgrade with miles on British Airways flights, which is a bit of a bummer.)
In July 2024, I was trying to fly from Austin to Charlotte but was hit by multiple delays (10 hours of sitting in the Austin airport!). I ended up switching flights in the app and was upgraded for free to first class for the flight! This was the first time I’ve ever been upgraded domestically, which seems like a bit of a fluke related to the delays and switching flights.
Two weeks later, I got upgraded again on a domestic flight from CLT to SFO. Then, I was approved for an upgrade on an 11-hour LAX to Tokyo flight to business class, which is paid ($350 plus 25,000 miles). I purposely fly through LAX for a higher chance of getting upgraded and for amazing LAX Admirals Club lounge. (Since DFW and JFK are the most popular hubs, it’s harder to get upgraded on those legs.)
My connecting flight to Bangkok was on Japan Airlines, another oneworld airline, so I got priority boarding AND Fast Track security, a total game changer. (I’ve add issues with Japan Airlines being stern about the weight of my carry-on luggage. I was really concerned about this in Tokyo, but they didn’t weight my bags at all.)
I had two rough and long weather-related delays so my status really helped make the flights more manageable thanks to the Cathy Pacific lounge at Narita Airport in Tokyo. It was a quiet reprieve to get some work done, shower, eat and drink a glass of champagne.
American Airlines Credit Card Versus
Chase Sapphire Reserve
In addition to the American Airlines credit card ($95 annual fee), I have the Chase Sapphire Reserve card, which has a hefty fee of $550. There’s a $300/year travel credit so the fee is technically only $250, and it covers Global Entry every five years. Chase was my go-to card for earning points that I redeemed for flights and hotels. It was the card I used the most until 2023 when I started making my American Airlines card my go-to card.
After I hit platinum in early 2024, I focused on using the Chase card until the new loyalty points year started on March 1. My point is that having American Airlines status almost makes it not worth paying for other credit cards. In the next year, I’ll either downgrade the Chase card or I’ll change my airline alliance.
Since I have status with American Airlines, it has me wondering if I should downgrade my Chase Sapphire Reserve card. While it comes with Priority Pass, it has a hefty annual fee. Once I hit platinum, I started solely using my Chase Sapphire Reserve to get points that I’m redeeming for hotels, which proven to be a good strategy and worth keeping the card for now.
Even if your loyalty is with another airline, they will have very similar benefits and ways to earn miles/status. I hope you find this helpful.
Where to go (& NOT go) in Vietnam
Like India, Vietnam can be a sensory overload of beauty and complexity. The scenery is diverse—the mist-covered mountains of Sapa, the seemingly endless swarms of motorbikes in Hanoi and the tower limestone pillars of Ha Long Bay. I consider travel the best teacher, and there’s no better place to get a lesson in world history than this Southeast Asian nation.
I visit Vietnam at least once a year for work, so I decided it was time to compile a travel guide of my favorite and least favorite spots. (I’ve worked for multiple travel companies running trips across the country. In addition, I did a month-long 2019 backpacking trip to some lesser-visited spots.)
Keep reading for all the details about where to go in Vietnam and how to best prepare for your trip! (The locations are organized by region: north, central and southern Vietnam.)
Affiliate links are used in this post. If you make a purchase, I earn a small commission at no cost to you, which goes toward the cost of maintaining this blog.
I recommend booking transfers on Klook for convenience and using 12go.asia for bus and train tickets if it’s too much hassle to go to the station to buy them directly. Please read reviews before booking.
Plan Your Trip
Currency: Vietnamese Dong (VND)
When to Go: July to September for beaches. December to March for cooler temperatures.
Travel Insurance: Protect yourself with SafetyWing travel medical insurance to cover accidents and travel delays.
Mobile eSIM Card: Get seamless connectivity worldwide with Airalo minus the hassle of physical SIM card. (Save 10% with code AIRALOESIM10!)
Northern Vietnam
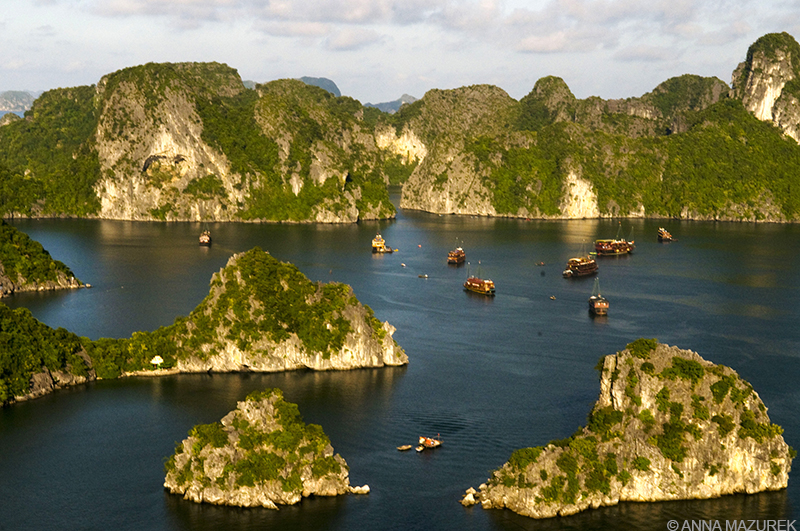
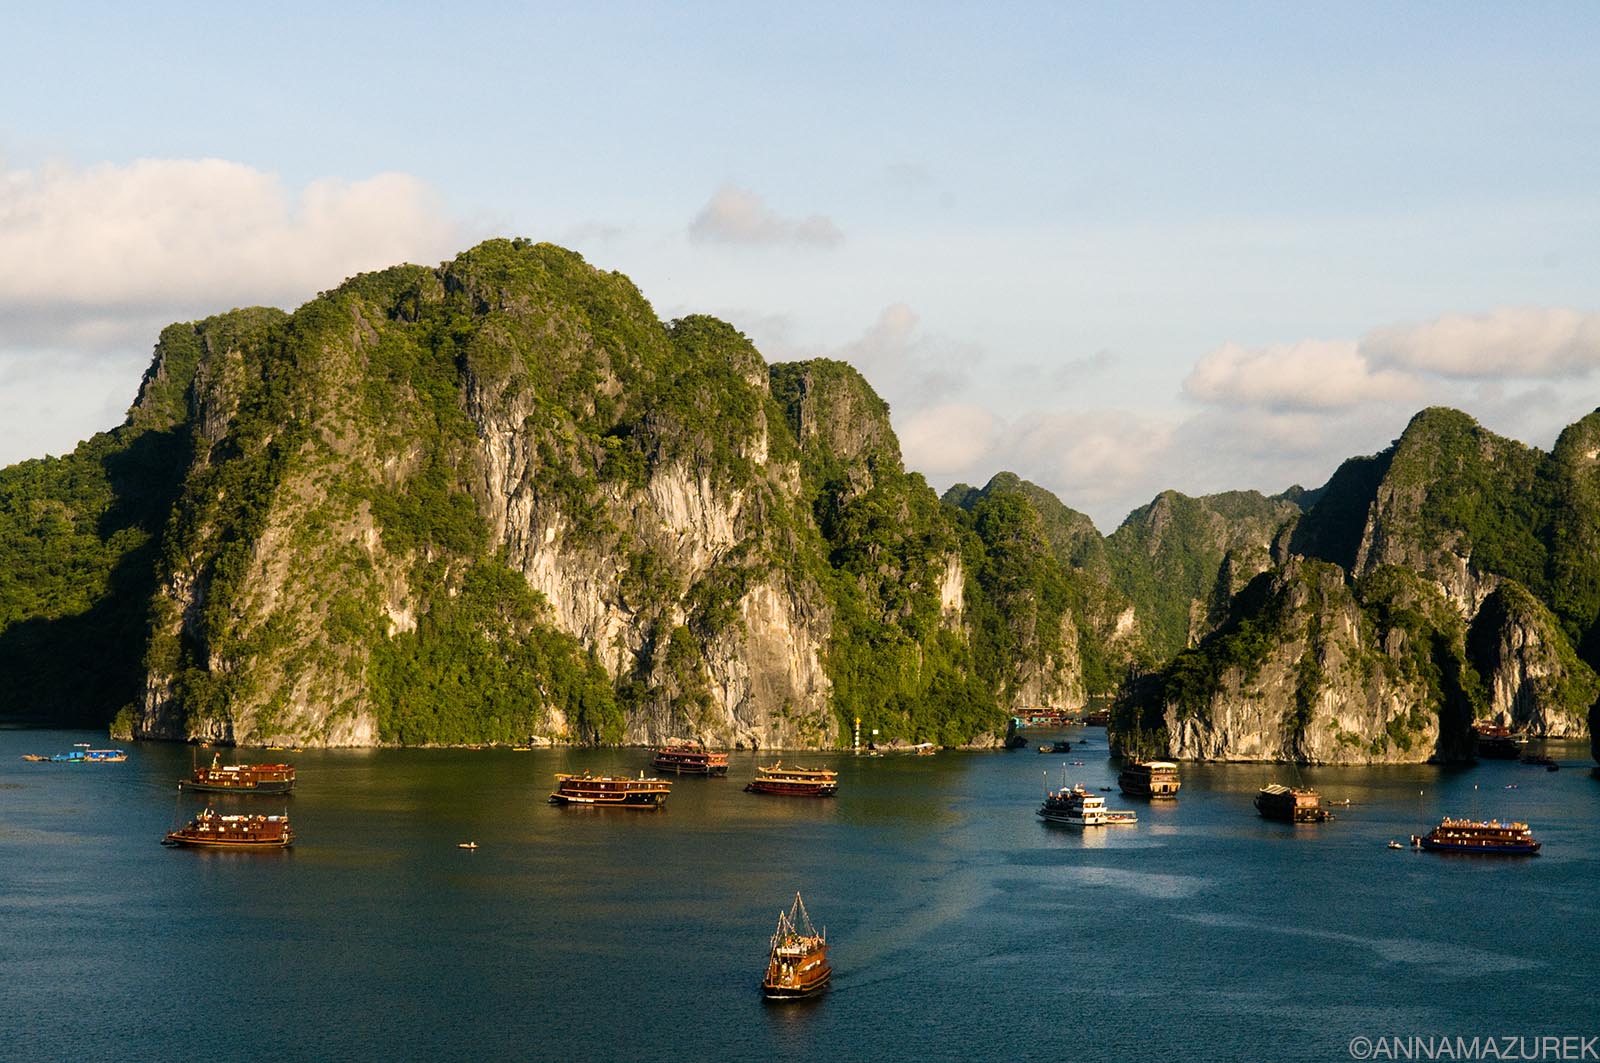 The best time to go swimming in Ha Long Bay, Vietnam is between April and October.
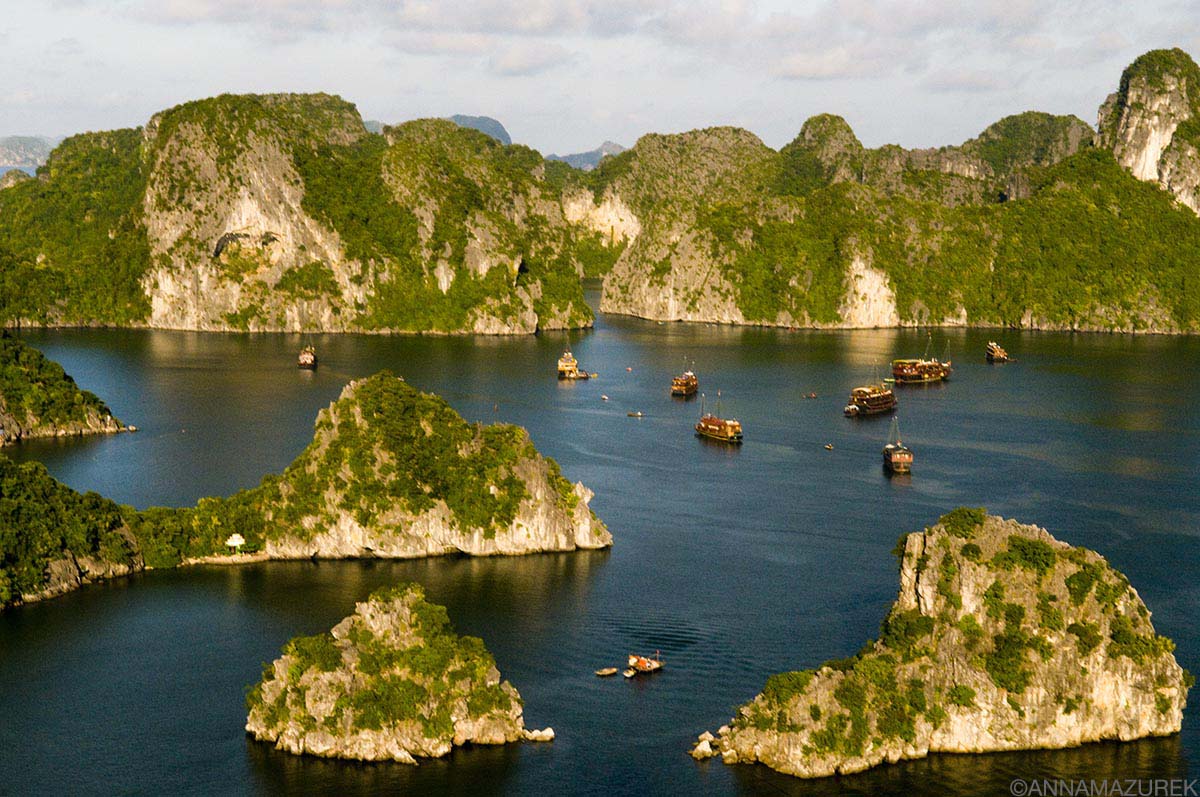
1. Ha Long Bay & Lan Ha Bay
Ha Long Bay, a UNESCO site, is one of those places like Machu Picchu that you must visit once in your life. The scenery is postcard-perfect: towering limestone karsts and over 1,100 islands scattered through the Gulf of Tonkin’s emerald waters. It is the number one attraction in Vietnam. The best way to experience the bay is to do a multiple-day cruise on a houseboat to explore the islands, swim and eat year weight in fresh seafood! There are day boat trips and overnight cruises for every budget. I recommend spending a night or two on a houseboat!
Ha Long Bay vs. Lan Ha Bay
Historically, Ha Long Bay spread across two provinces and was split into sections controlled by two different local governments—Ha Long Bay to the north and the Lan Ha Bay to the south bordering the coast of Cat Ba Island. (Both bays are included in the UNESCO area.) Over 300 boats operate in Ha Long Bay (popular with Chinese tourists) but only 64 in Lan Ha Bay, according to my local guide on a recent visit.
While both share the same scenery, Lan Han Bay has less pollution and tourists, but less infrastructure, which I’ve witnessed on my visits to both. There are no caves in Lan Ha Bay or scenic viewpoints like the one in my photo above from Ha Long Bay. The caves are one of the noteworthy features in the UNESCO nomination. While the caves are stunning, they get crowded.
While it’s possible to book last-minute budget tours on Klook or GetYourGuide, luxury boats, like the Ginger by Heritage Line, (stunning ship I stayed on for work trip) fill up four months in advance. To visit both bays, consider booking separate back-to-back one-night trips on different boats. (Only a couple of boats with good government relationships can operate in both bays.)
When to Visit Ha Long Bay & Lan Ha Bay
If you want blue skies, visit from April to October. June to August is steaming hot but less crowded. November to March brings cooler weather (highs in the 60s in January) but often consistent gray skies. September to October is packed with tourists. My visits have always been in January or July. I prefer July for blue skies.
How to Get to Ha Long Bay
Most people fly into Hanoi’s Noi Bai International Airport, the country’s second-largest airport, and take a transfer. (There are two smaller airports near Ha Long Bay—Van Don International and Cat Bi International.) If a transfer isn’t included in your boat tour, you can find affordable transfers through Klook. It’s roughly a three-hour drive.
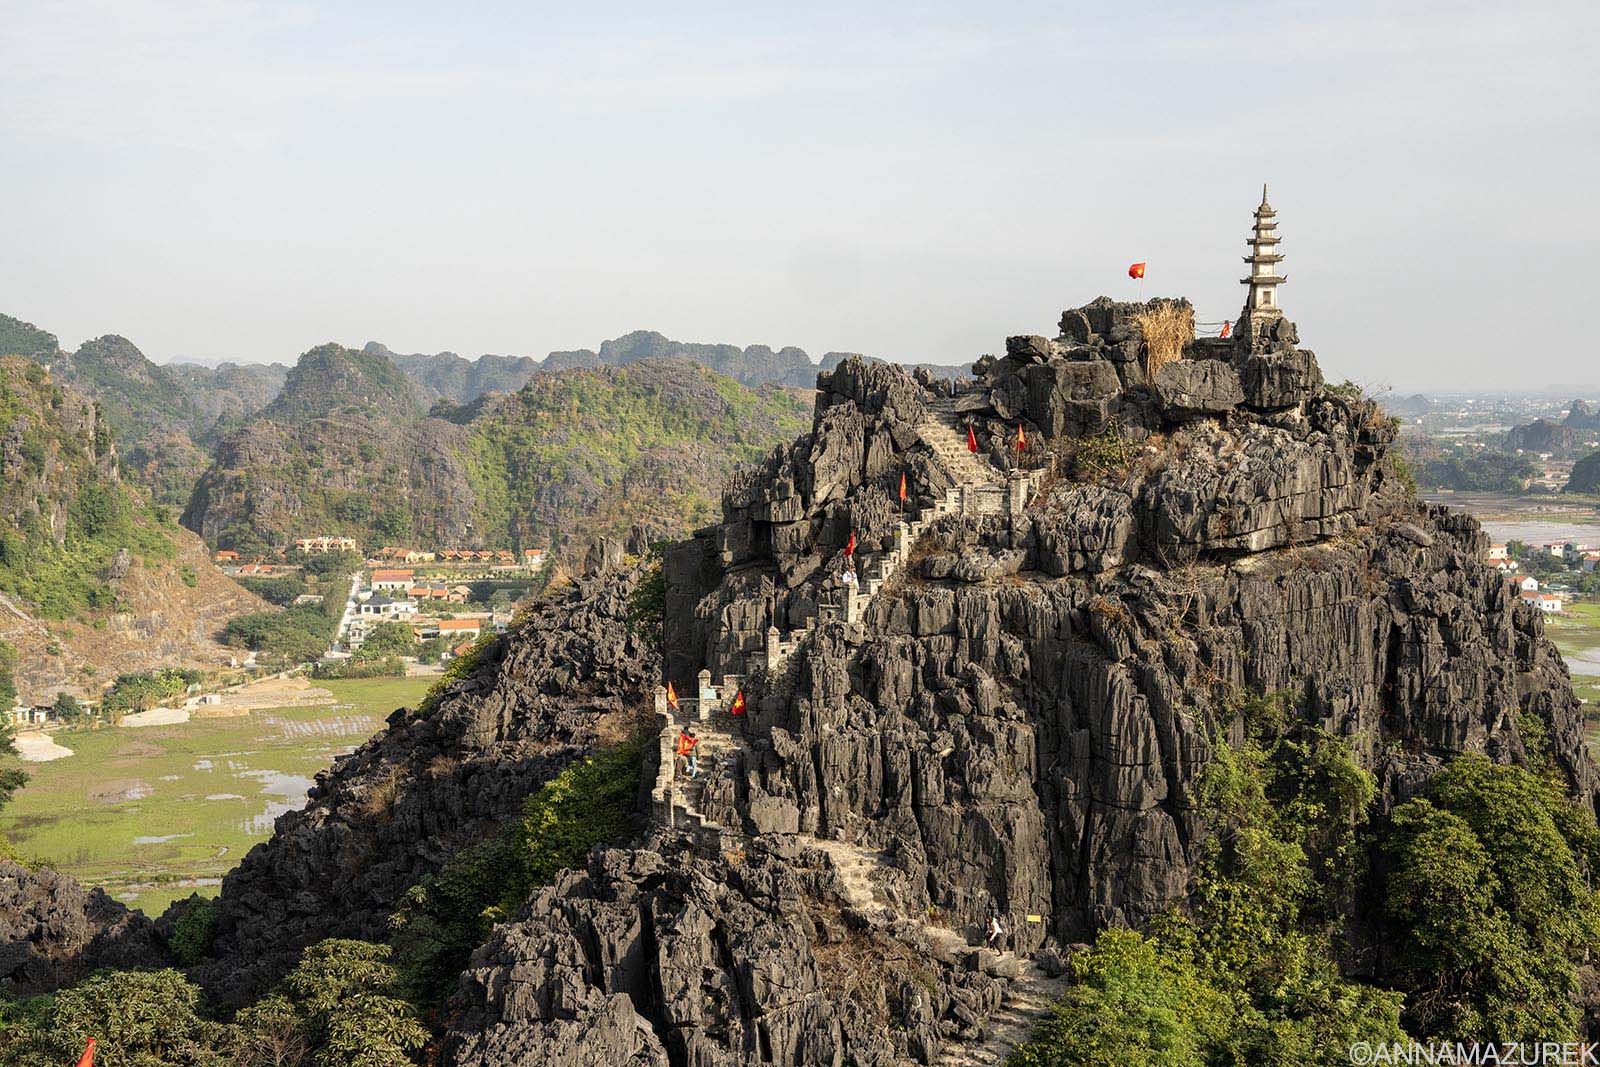
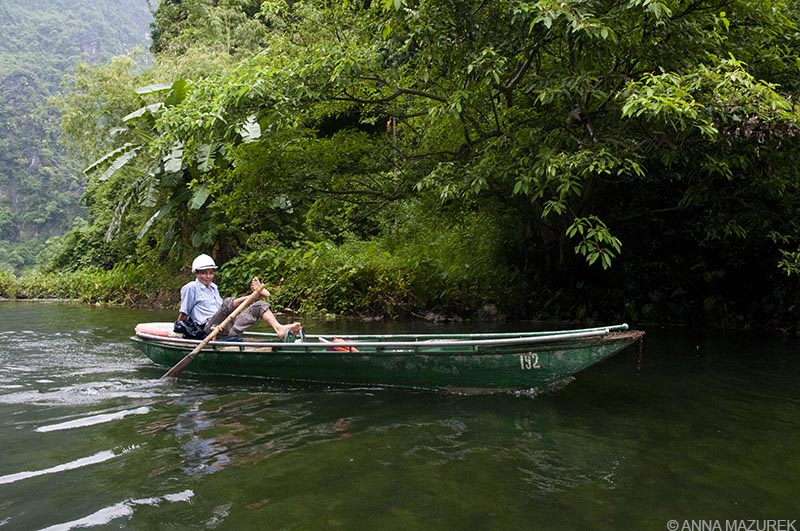 If you like the idea of riding a boat through stunning caves, then add Tam Coc to your list. The rowers use their feet to move the oars just like this guy!
2. Ninh Binh
The Ninh Binh province is known as the “Ha Long Bay on land” famous for row boat tours through giant caves and alongside limestone karsts. The most stunning boat ride is Trang An (Route 3), which is a three-hour tour through spectacular scenery and the kilometer-long Hang Dot cave.
When the rice fields are green (wet season), Tam Coc, a 1.5-hour boat trip where the boat guides row with their feet, is beautiful, but Trang An is better if you only have time for one.
The viewpoint from Mua Cave is worth the 500-stair climb but again is best when the rice fields are green. My other favorite places include the picturesque Bich Dong Pagoda and cave temple (free entry), and Bai Dinh Pagoda, a photogenic 4,200-acre Buddhist complex, one of the largest in Southeast Asia, that’s easily explored on an electric cart shuttle.
Hoa Lu Old Town in Ninh Binh City is a stunning sight of two towering modern pagodas lit up at night with detailed carvings inside. This free attraction was built in 2022, so don’t get it confused with Hoa Lu Ancient Town, the historic site of the first capital of Vietnam that’s 11 kilometers away.
Tam Coc is a good base for exploring the area. In January 2025, I stayed at Tam Coc Mountain Sunset and Garden Hotel ($30 USD/night) with spacious rooms with a convenient location with a pool and helpful English-speaking owner. I recommend staying a few nights in the area, but there’s also plenty of day tours from Hanoi if you are short on time.
How to Get to Ninh Binh Province
The Ninh Binh province is roughly an hour and 45 minutes southeast of Hanoi. The cheapest option is public buses from Hanoi. I recently took this $7 shared transfer from Hanoi, which was efficient and involved transferring to an SUV to drop me off directly at my hotel.
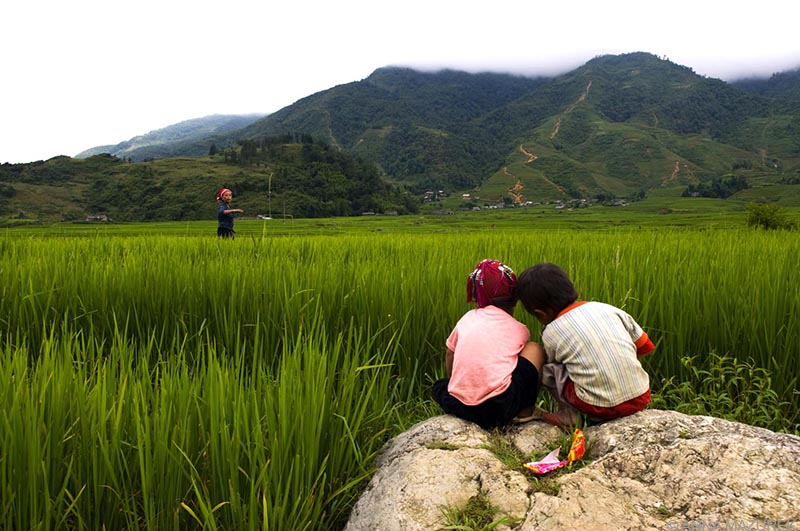
This shot from Sapa is one of my favorite travel images from Asia.
3. Sapa
The former 1922 French hill station is the trekking mecca of Vietnam. The views of the valley from the town are stunning. (The photo above is one of my favorite images I’ve shot in all my years in Asia.)
Popular treks include Fansipan, the highest mountain in Vietnam (3143 m); Cat Cat, a village three kilometers south of Sapa; Ta Phin Village, a 10-kilometer hike from the city; Sa Seng & Hang Da, a hike along the eastern ridge is great for valley views. Be warned—the tourist touts and aggressive vendors are relentless in Sapa. (I visited a village with a student group and each student had one vendor following them around town the entire day trying to see them something.) Despite this, the scenery is unreal and worth the trip!
How to get to Sapa
Sapa is located 195 miles northwest of Hanoi (closest airport) near the China border. By car or bus, it’s about a five-to-six-hour journey depending on traffic. I’ve taken the roughly seven-hour sleeper train previously, which goes from Hanoi to Lao Cai (closest station to Sapa). It’s an additional 50-minute transfer from there to Sapa. There are also cheaper sleeper buses for about half the price of the train ($11-16 USD).
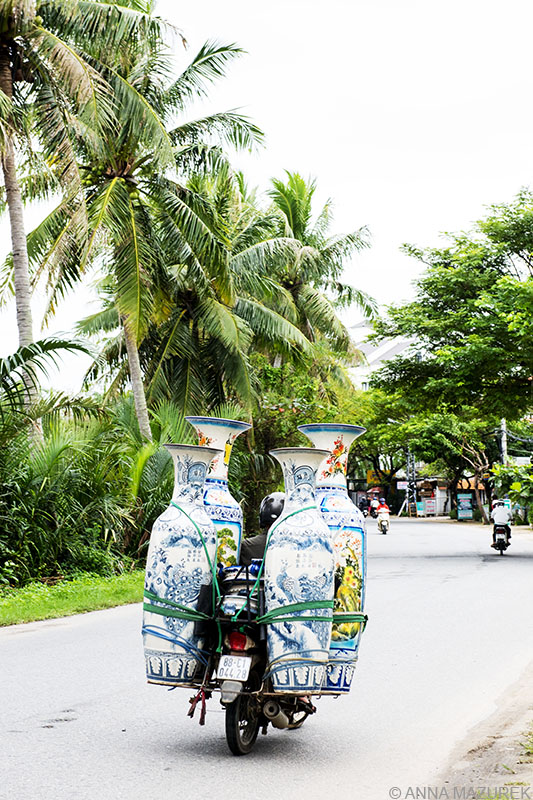 Hanoi is the mecca of the motorbike madness, and this is just a taste of the crazy things you’ll see on motorbikes there!
4. Hanoi
Hanoi is both the capital of the country and the chaos. Hordes of motorbikes cover the streets. Find a safe spot on the sidewalk to people watch as the motorbikes defy gravity and logic with their loads which range from refrigerators to a family of five with a dog and my favorite – dozens of plastic bags filled with water and live goldfish tied to a giant hoop structure on the back of the bike.
Wander the streets of the Old Quarter and the Hoan Kiemshopping district where streets are organized by the goods they sell. (This is really annoying if you need to buy a pen and you’re on the shoe street.) Pho bo (beef noodle shop) is a must for breakfast along with a traditional Vietnamese coffee, which is medium to coarse ground dark roast with a small metal drip filter.
For a bánh mi, try Banh Mi 25. The Note Cafe is an Instagramable spot covered floor-to-ceiling in post-it notes while JOMA is one of my favorite café chains in Southeast Asia for breakfast. For an adrenaline adventure, visit Hanoi 1990s, a small cafe perched on the edge of Hanoi’s famous train street where a handful of trains come buzzing by daily just inches from your table.
Go for a stroll around Hoàn Kiếm Lake and cross the red bridge to Ngoc Son Temple. Stop by the Temple of Literature and the Ho Chi Minh Museum. If you want to say hello to “Uncle Ho”, stop by his mausoleum. Be warned – he’s been preserved and is on full display in typical communist fashion. For more details on the city, check out my Hanoi guide.
How to get to Hanoi
Hanoi is home to the second busiest airport in the Vietnam and connected by bus or train easily to major destinations across the country. While Ho Chi Minh City has more international flights, Hanoi is also easy to get to.
Central Vietnam
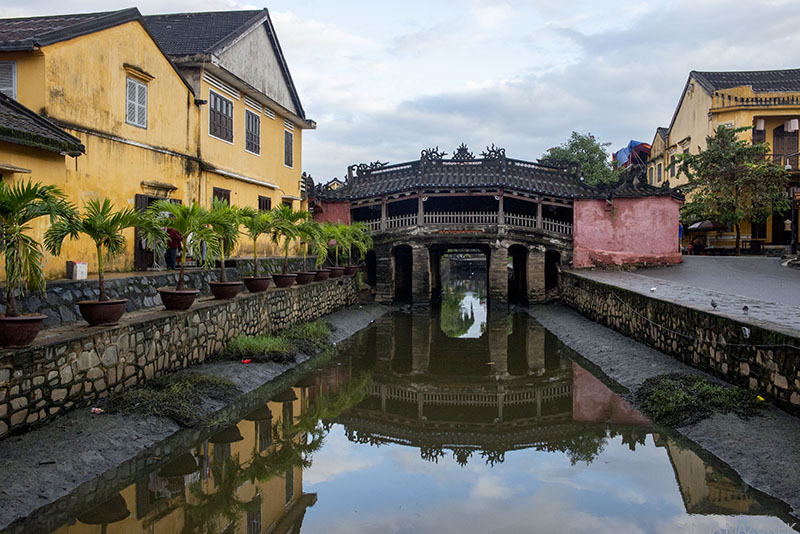 The Japanese Covered Bridge is one of the top sights in Hoi An. After a week of rain, this is the first time I saw blue sky!
5. Hoi An
Hoi An is my favorite city in Vietnam. The UNESCO site is one of Southeast Asia’s major seaports and reminds me a bit of Charleston—the same quaint historic charm, old colonial buildings and an overload of tourists. As per usual, I got up at sunrise every morning to photograph the city and did the same at sunset. Highlights include the Japanese Covered Bridge, the Assembly Hall of Cantonese Chine Congregation, which has cool dragon carvings, and the Assembly Hall of the Fujian Chinese Congregation.
The best Banh Mi spots in town are Banh Mi Queen (I loved the chicken!) and Banh Mi Phuong (Anthony Bourdain loved this spot). Streets Restaurant Café had the best Cau Lau I had on the whole trip. It’s also a nonprofit that trains underprivileged youth to work in culinary and hospitality fields.
How to get to Hoi An
The closest airport is Da Nang, which is roughly a 30-minute drive. I booked a direct transfer to Hoi A from Da Nang on Klook for around $10, but there are even cheaper group transfers. Read reviews before booking!
 I highly recommend visiting the ruins of My Son, a Hindu temple complex built between the 4th and 14th Century to honor the god Shiva. It’s easily assessable from Hoi An or Da Nang by tour, car or motorbike. I did the sunrise tour to avoid the crowds in my photos.
Day Trips from Hoi An
Hoi An is a great hub to do a few day trips including visiting My Son, the ruins of a Hindu temple complex. (Consider booking one of the sunrise tours I loved being there so early!) You can do it on your own if you have a motorbike. I also recommend renting a bicycle and heading over to the coconut village for a boat ride on one of the circular boats. It’s a very touristy thing but such a fun experience. Check out my Vietnam Instagram story for videos from the trip!
Traveling to Southeast Asia?
Read my guides to Thailand, Chiang Mai, Bangkok and Singapore!
 Left: Pongour Waterfalls outside of Da Lat. Right: Crazy House, a Gaudi-inspired tourist site that is also a hotel mixed in the site.
6. Da Lat
Da Lat is the Medellin of Vietnam. The French fled to this mountainous region to escape the heat. It’s now the adventure capital—trekking, canyoning, white water rafting and mountain biking are all options. The vibe is much more laid back than the rest of Vietnam, which I loved. I spent most of my time here visiting waterfalls. My favorite was Pongour, but the roller coaster at Datanla waterfall is a must. (It’s a one-car self-controlled system so it’s super fun!) I recommend checking out the Hang Nga Crazy House, which was built by a Vietnamese architect inspired by Gaudi. You can visit and also book a room for the night! Don’t miss the 100 Roofs Bar that resembles the set of a Lord of the Rings movie.
How to get to Da Lat
The closest airport is Lien Khuong Airport, roughly 18 miles south of the city. There are sleeper buses from Hanoi (7 hours) and vans/buses from Nha Trang (4 hours) and Mui Ne (5 hours). I took a long-haul sleeper bus from Hoi An (14 hours).
Southern Vietnam
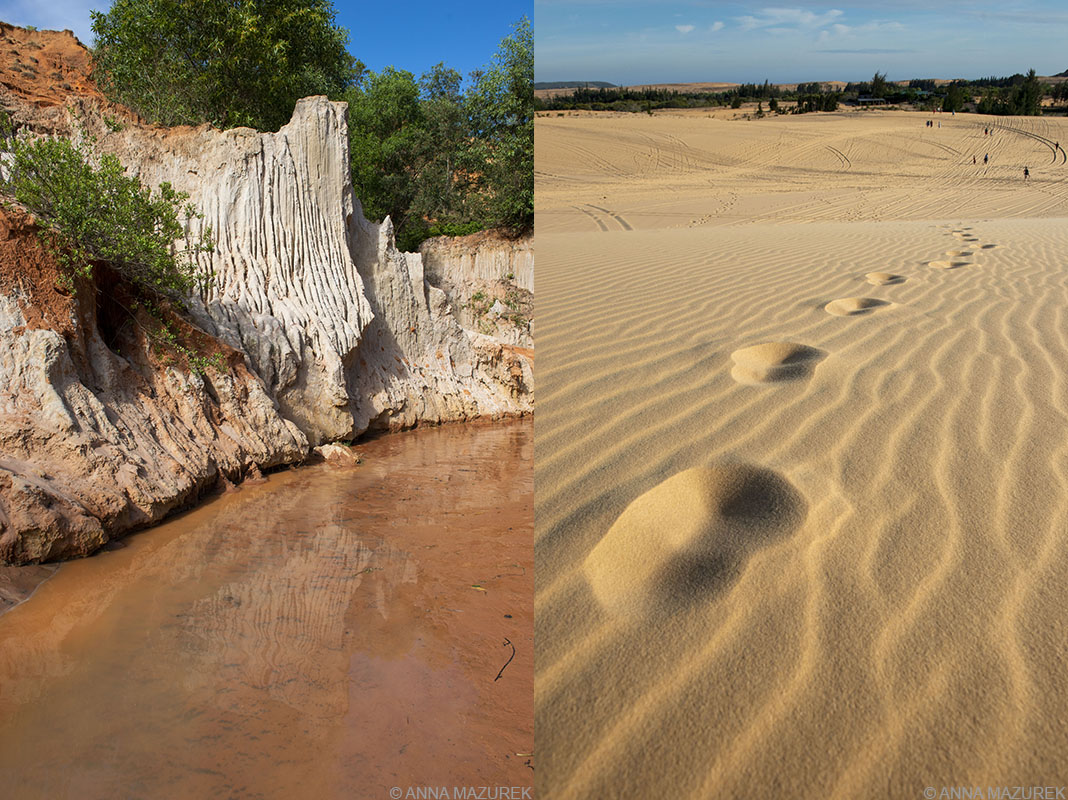 Left: Fairy Spring in Mui Ne, Vietnam. Right: The “white” sand dunes that are 24 km from town.
7. Mui Ne
Mui Ne is the kitesurfing capital of Vietnam. The town itself doesn’t have the best beach but the town is close to some cool attractions. For $5, you can take a jeep tour to the red sand dunes near town and the white sand dunes (24 km from town). The tours also take you to Fairy Spring, a stream that flows through some cool rock formations and sand dunes. (It’s easily accessible from town by foot.)
The best place to eat in town is a Mediterranean spot called Sindbad and Dong Vui Food Court, an open-air food court with independently run stalls that range from German sausages to paella. There are also loads of Vietnamese options and tons of beer.
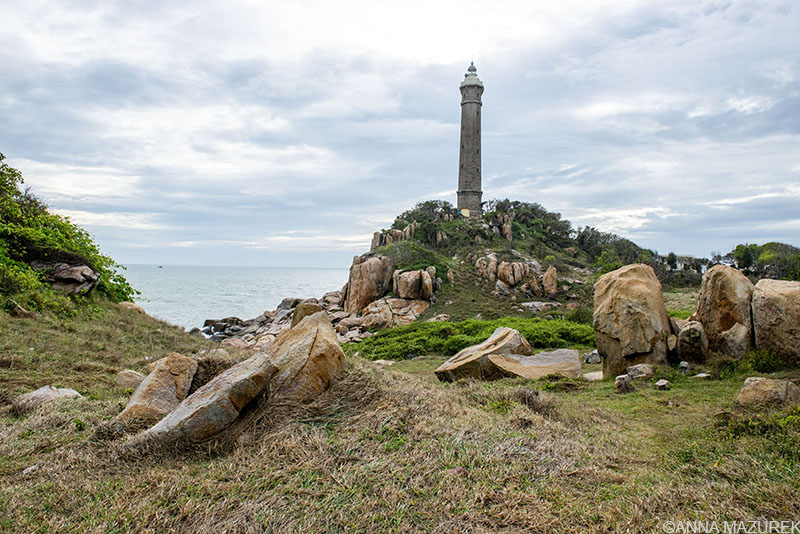 Ke Ga Lighthouse was one of my favorite spots in Central Vietnam! Very few people visit so I totally recommend it. I had the island to myself!
The main reason I went to Mui Ne was to visit the Ke Ga Lighthouse, a remote lighthouse built by the French in 1899 that lies on a rocky islet 300 meters from the coast. I’m obsessed with lighthouses so I had to go. To get to the lighthouse, you need a scooter or a car. Then, you have to take a ferry to the island ($6 USD in 2019). I had the island mostly to myself except for a few officials working on the island.
For the best photos of the lighthouse, take the dirt paths that lead off to the side and shoot back toward the lighthouse. The lighthouse is right by a fishing village, so the sea is lined with boats to the right of the islet, which is also great for photos.
How to get to Mui Ne
I took a bus from Da Lat to Mui Ne (5 hours) then I took a bus to Ho Chi Minh (3 hours). There is no train station in Mui Ne and the nearest airport is Ho Chi Minh. You can book group and private car transfers on Klook to Ho Chi Minh and other cities.
 Banh Mi from L’Usine cafe in Ho Chi Minh.
8. Ho Chi Minh City (Saigon)
Ho Chi Minh City (HCMC) is another epicenter of the motorbike madness. This city is worth a visit for a few days just to witness the chaos and visit the war museum and other war-era sights. The view from Bitexco Financial Tower ($9 USD) really helps put into perspective the expansive size of the city. (I suggest buying tickets advance through Klook for your preferred time slot because it’s same price as buying in person without any lines.) Surprisingly, HCMC is the craft beer capital of Southeast Asia. My favorite breweries were Pasteur Street Brewing Company (great IPA & tap room) and Heart of Darkness. BiaCraft and Belgo (Belgian brewery) also have good brews and food.
My favorite cafes and sandwich spots to eat are The Old Compass, L’Usine, The Vintage Emporium, and Banh Mi 3362. ABC Bakery Café was a great spot to grab a fast and cheap breakfast to go!
Au Lac Charner ($73/night plus taxes) is my favorite hotel with a rooftop pool in Ho Chin Minh City. It also has free breakfast and is located by the Bitexco Financial Tower. (My favorite hostel closed during the pandemic so I don’t have any hostel suggestions, unfortunately.) If you’re looking to splurge, the Park Hyatt Saigon ($289) is the nicest hotel in town with an amazing pool, gym and a mind-blowing breakfast! (I stay at the Park Hyatt for work but at the Au Lac Charner otherwise.)
How to get to Ho Chi Minh City
Ho Chi Minh is home to the busiest airport in Vietnam and the main transport hub. (I always fly through Ho Chi Minh when I’m flying back to the U.S. from Southeast Asia because I fly through Japan because of my successful points hacking with American Airlines/ oneworld alliance.) You can take buses, vans and the train anywhere in Vietnam from there. Keep in mind that Hanoi and Ho Chi Minh are on opposite ends of the country and a 30-hour train ride apart.
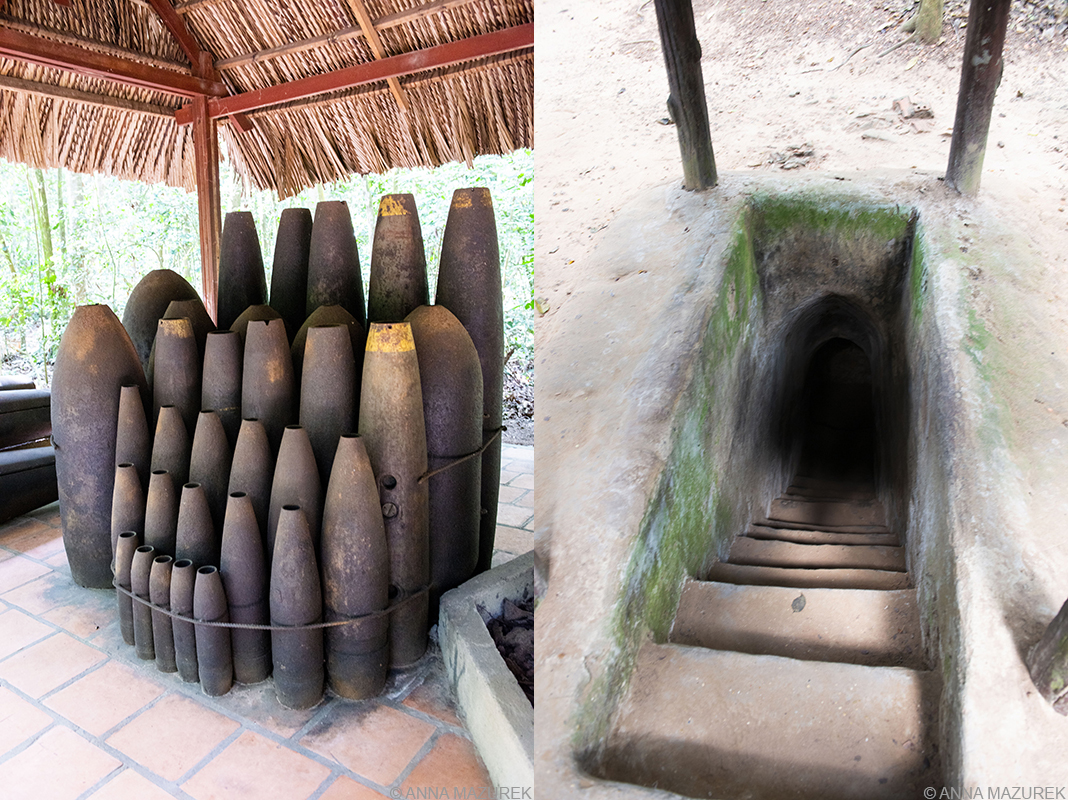 Left: Artillery left over after the Vietnam War is on display at the Ben Douc tunnels, part of the Cu Chi Tunnels. Right: The entrance to one of the tunnels.
9. Cu Chi Tunnels
Cu Chi is a rural area about 30 to 40 km from Ho Chi Min that’s famous for a legendary spiderweb of tunnels used in the 1960s by the Viet Cong to control the area. There are two sets of tunnels: Ben Dinh and Ben Duoc. Ben Dinh is the most touristy one because it’s easier for tour buses to reach it. Ben Duoc is the best one in my opinion because it’s not touristy. (Trust me, I’ve been to both!) There was only a handful of people when we went. (We went by public bus from Ho Chi Minh City, which was one of my favorite days in Vietnam. I wrote a post about how to get to the Ben Douc tunnels by public bus.)
I’ve found conflicting sources that state that Ben Dinh was constructed only for tourists and Ben Douc is part of the real tunnel network. I can’t find a reliable source to verify this. Lonely Planet says that Ben Douc was widened for tourists but is less touristy. (There’s a set of stairs leading into the tunnels, which clearly can’t be original. Honestly, they probably both were widened at the entrances, but they are still tiny.)
How to get to the Cu Chi Tunnels
While it’s easy to find tours to visit Ben Dinh, I recommend taking the public buses (they have air conditioning!) to Ben Douc using my step-by-step guide!
Read my guide on how to get to the Cu Chi Tunnels (Ben Douc) by public bus!
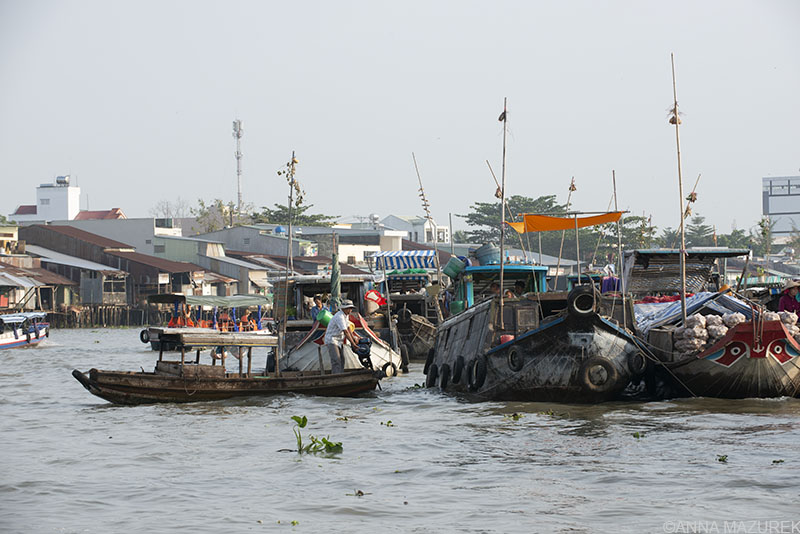 Vendors tie what they are selling to poles at the Cai Rang Floating Market in the Mekong Delta near Can Tho.
10. Mekong Delta
Can Tho is the main hub in the Mekong Delta that’s filled with large gardens and bustling markets. It’s the jumping-off point for visiting the famous Cai Rang Floating Market, the biggest one in the Delta. Vendors tie what they are selling to a pole so you can shop easily. There are also boats that serve coffee.
Tours are available, but I recommend showing up at the dock at 5 a.m. to negotiate for your own boat. I went with a friend and we met three cool Australians who joined us. We paid about $4.30 USD each in 2019. One of the highlights was stopping by a fruit orchard. We got to paddle around in little boats in the orchard and sample the fruits. This town is also memorable because it’s how I ended up in a van with a rooster for five hours. I’m also a huge fan of the market town of Chau Doc, which has a wet market that’s really cool to photograph.
How to get to Can Tho, Mekong Delta
Can Tho is a four-hour bus ride from Ho Chi Minh, which is what I’ve done. Can Tho International Airport is only a few miles from the city.
Vietnam FAQ
 SafetyWing travel medical insurance covers travelers in Vietnam and over 180 countries.
Do you need travel medical insurance for Vietnam?
Yes, travel medical insurance is one of the most important things to purchase for any trip abroad, especially Vietnam. It covers all the things that could go wrong from injuries to travel delays so that you don’t have to worry and can focus on traveling!
SafetyWing’s Nomad Insurance offers $0 deductible travel medical insurance coverage for over 180 countries for people aged 69 and under when traveling outside their home country. The best part is that it only costs a few dollars a day! If you get sick or injured abroad, you can visit any hospital or doctor. Other benefits of Nomad Insurance include coverage for lost checked luggage, travel delays over 12 hours, motor accidents (if properly licensed, wearing all safety equipment and not intoxicated) and injuries from sports or leisure activities. You can even add adventure sports, electronics theft and U.S. coverage (for non-residents) to your policy.
One of the best things about SafetyWing is that you can buy policies abroad and speak to a REAL human from the 24/7 customer support team if you have questions! (I can vouch that they are excellent at assisting and will follow up with you afterward.) Pay in full or choose an auto-renewing plan that can be canceled anytime.
If you’re abroad for 90 days, you can get 30 days of home-country coverage. (For the U.S. residents, it’s 15 days.) Plus, every single part of the process from purchasing a policy to filing a claim is easy, which is why SafetyWing has been the best travel medical insurance policy for me. Read my review of using SafetyWing in Southeast Asia.
Where’s the best place to buy a SIM card in Vietnam?
The easiest thing to do is buy a Vietnam-specific eSIM card from Airalo that will work instantly when you arrive. (Airalo partners with Viettel, the fastest network in Vietnam.) For more details, read my review of Airalo eSIM cards in Southeast Asia.
If you are traveling to multiple countries in Southeast Asia on a short trip, then consider one of their Asia Regional eSIM cards. (Both the country-specific and regional eSIMs have worked wonderfully for me and even have a mobile hotspot option that’s critical for me because I’m always working remotely.) Keep in mind it’s always cheaper to buy a country-specific eSIM than a regional one.
Promo Codes: New customers save 15% off with NEWTOAIRALO15 and existing users save 10% with AIRALOESIM10.
Be sure to join the free Airalo Loyalty Program to earn 5% cash back for every purchase, which can be redeemed on future purchases. For more about eSIM cards, check out this post!!
Where is the best place to get clothes made in Vietnam?
While Ho Ani is the most popular spot in Vietnam to get clothes made, I was unimpressed because every tailor shop I visited only seemed to only have material to make winter suits or wedding dresses. I was looking for wrinkle-resistant fabric for summer dresses and tanks. I tried again in Ho Chi Minh City but didn’t have any luck until a friend introduced me to Elegant Silk, the best place to get clothes made in Ho Chi Minh. This tailor had a wide variety of fabric options. She had silk blend fabric that was fairly wrinkle-resistant. In early 2024, I had her copy an existing tank and dress while also making a new wrap-around skirt for $70 USD.
In Hoi An, I have friends who raved about Blue Chic for men’s suits and Two Ladies for summer dresses.
Where is the best craft beer in Vietnam?
Vietnam has the best craft beer in Asia. Trust me, I’m a craft beer connoisseur and have traveled and lived all over Asia. While Ho Chi Minh is the epicenter, there are also taprooms in Hanoi. The two biggest brands—Pasteur Street Brewing and Heart of Darkness—have multiple tap rooms in HCMC while Pasteur has one in Hanoi. Both do a great job of incorporating local flavors like jasmine and pomelo. (Pasteur Street’s signature Jasmine IPA and Pomelo IPA are my two favorites.) BiaCraft and Belgo (Belgian brewery) also have good brews and food in Ho Chi Minh City. In Da Nang, stop by the Heart of Darkness taproom.
What about the caves in Vietnam?
Phong Nha-Ke Bang National Park, a UNESCO site, is filled with hundreds of caves including the world’s biggest cave, Hang Son Doong. (Two of my friends went to Hang Son Doong and loved it. It’s not cheap and you have to book months if not a year in advance.) I was in the area during the rainy season so I didn’t visit any of the caves. (Water levels are a huge safety issue during the rainy season. ) April to August is the best time to go.
How are the beaches in Vietnam?
I’m not a fan of the beaches in Vietnam. I’ve been on a quest to find the best beaches in the world, and they aren’t in Vietnam or even Southeast Asia for that matter. To be brutally honest, every beach I went to in Vietnam was polluted. I even went to Phu Quoc island, one of the main attractions. I went to all the prime snorkeling spots and there was trash and beer cans in the coral. This part of the world is notorious for plastic pollution, and I was there at the end of the rainy season, which tends to kick up more of the pollution.
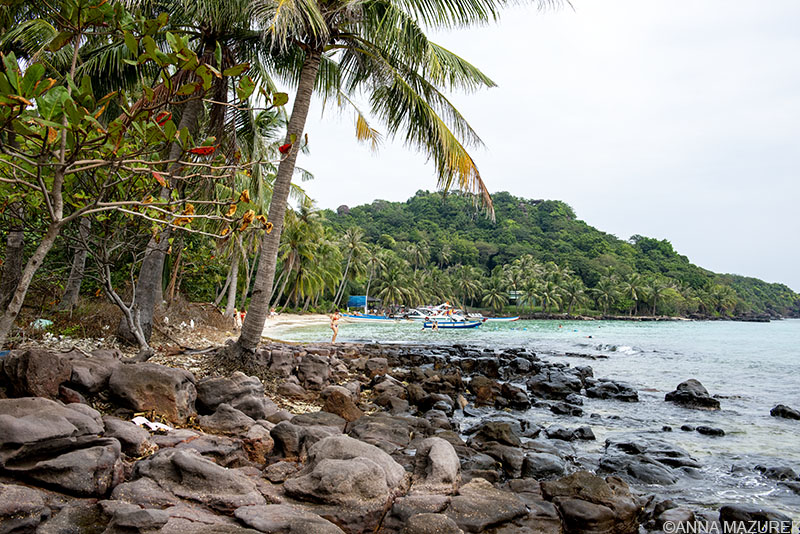 This is a shot from one of the islands near Phu Quoc that’s part of all the snorkeling tours. All the debris you see on the left side of the frame under the trees is some kind of trash or plastic. Aside from the main small bit of beach, the sides of the island were covered with trash like this.
I visited three beaches in Vietnam—Mui Ne, Na Trang and Phu Quoc—on a 2019 trip and never wanted to go back to them. They were mostly polluted or overrun with tourists. If you stay at a resort then, it’s nice because they clean the beaches, but the snorkeling will still be polluted. (In my opinion, the best beaches in the world are in the Caribbean. Anguilla and Costa Rica are hard to beat. Maldives (resort islands) and Fiji are nice, too.)
Please be kind to the environment and avoid single-use plastics in this part of the world. Read this post about how to be a better eco-friendly traveler.
Vietnam 101: Logistics, Costs & Safety
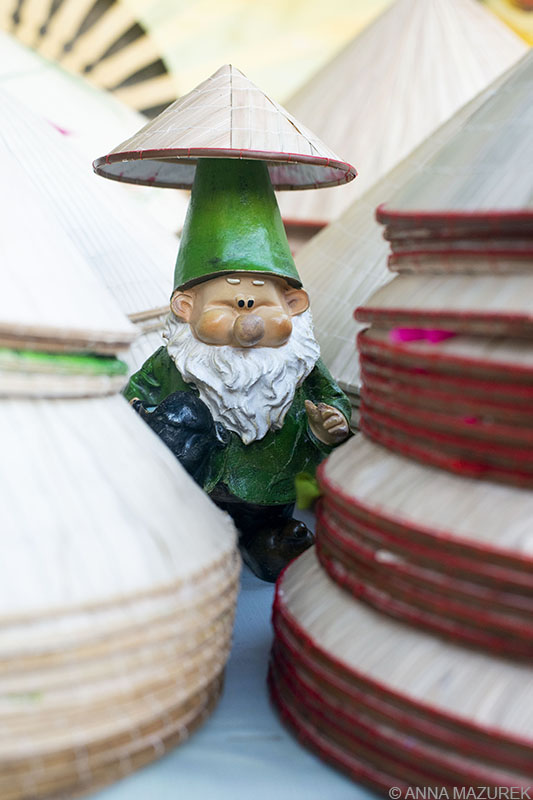 Alfred the Gnome did a bit of hat shopping in Hoi An. Clearly, this hat was meant for a gnome.
When to Go To Vietnam
Hanoi, Sapa & Northern Vietnam: March – May & September – November
Central Vietnam (Hoi An, Mui Ne, Da Lat): March – September
Ho Chi Minh & South: November to February
July and August are high season. Monsoon rains are common. It’s really cold in Hanoi and northern Vietnam during January so avoid those months especially if you want to swim in Ha Long Bay.
The Cost of Traveling in Vietnam for a Month
In 2019, I spent a month in Vietnam and spent $991 in total. If you look through my Vietnam Instagram story, you’ll find a saved story highlight on Vietnam with a detailed breakdown. This includes my $156 flight from Thailand.
Average Transport Costs: overnight buses ($15); overnight trains ($30) and the ferry roundtrip to Phu Quoc was $20.
Accommodation: Hostels cost about $4-9/night.
Food: Street food ranges from $1.40-2/meal. Restaurants start at $3 and up. Craft beer is $5 in the big cities.
Splurges: I splurged on a $32 snorkeling trip in Phu Quoc (not worth it), $45 lighthouse tour (Ke Ga Lighthouse – totally amazing) and $50 Ba Na Hills visit (only good if the weather is nice).
 A round boat anchored to the island where Ke Ga Lighthouse is located outside of Mui Ne in Central Vietnam.
How to Get a Vietnam Visa
Americans need a visa before entry into Vietnam, and an e-visa is the easiest option that I always use. (I visit every year.) E-visas are available for up to 90 days with single or multiple entries. I applied online for a 30-day e-visa, which was approved really quickly. The normal turnaround time is three “working” days in Vietnam. Please note these are only valid if you arrive at one of their main ports, which is most of the major airports and major land borders. Be sure to check the list in advance.
As of 2024, the cost is $25 for single entry and $50 for multiple entry. Apply online at https://evisa.gov.vn/. Make sure to apply early. I made a mistake on my recent multi-entry application, and it took them three days to tell me it was wrong. I had to start over again from scratch and wait another three days to get it approved.
Is Vietnam Safe?
Overall, Vietnam is a really safe place to travel. There are a lot of scams in Hanoi, Ho Chi Min and Na Trang. I honestly felt like taxi drivers were always trying to scam me. (Never take a street taxi by meter because the meters are often rigged. Agree on a price in advance or take a Grab, a rideshare app that’s similar to Uber and used all over Asia.)
Keep a steady hand on your phone, wallet or purse in the Hanoi and Ho Chi Minh. Thieves on motorbikes are a real concern. I met people who narrowly avoided losing their phones this way. I use a phone case with a finger loop so I always have a stronger grip on my phone.
There’s still a large amount of unexploded landmines. Be on high alert in rural areas and abide by all signs. For example, the My Son ruins had signs warning you to stay on the trails.
 The short boat ride to Ke Ga Lighthouse was a little sketchy but thankfully, the rest of the transit in Vietnam was reliable and felt a lot safer! (I was really close to the coast, so I knew I was safe.)
Vietnam Transit Options
Buses are the cheapest way to travel. Overall, the sleeping buses are fairly nice. You’ve got a lot of space, and they are air-conditioned. I suggest a bottom bunk if you have a lot of luggage. (You have to take off your shoes and put them in a bag, which I find annoying when you stop at rest stops. They give you communal flip-flops but that grosses me out.)
Trains are okay but pricier. In 2019, it was about $30 for me to go from Da Nang to Na Trang. (There were definitely roaches in my cabin so take a sleep sack to sleep in!) In big cities, I used Grab, a rideshare app that’s popular all over Asia. The app also offers motorbike taxis, which I used a few times. Helmets are provided.
I took a ferry to Phu Quoc island, which was really nice. It was $20 roundtrip. Buy tickets for all transit from the station if possible. It’s always cheaper this way. Domestic flights are fairly cheap but always connect through big cities. In 2019, I traveled by land my entire month-long trip.
Overall, thoughts on Vietnam:
I always enjoy visiting Vietnam. It’s a bit more intense than the rest of Southeast Asia. There is some stunning scenery and the food was amazing. I highly recommend it but just avoid the beaches during the rainy season.
Affiliate links are used in this post. If you make a purchase, I earn a small commission at no cost to you, which goes toward the cost of maintaining this blog.
For more about Southeast Asia, check out these posts:
What to do in Chiang Mai, Thailand
 Left: Wat Doi Suthep; Right: Wat Phantao during the lantern festival in Chiang Mai
I fell in love with Thailand in 2009 when I was running photo trips for a student travel company in Southeast Asia. While the Chiang Mai has changed a bit over the years, it’s still the city I love so much. I now spend every winter in Chiang Mai for a few months and decided it was finally time to write a guide about the best things to do in Chiang Mai!
Chiang Mai is the smaller laid-back sister to chaotic madness of Bangkok. It has a population of 200,000 and centers around the old city, which is lined by a moat and the crumbling remains of the wall from its 13th century heyday as the capital of the Lanna Kingdom. It’s a foodie town filled with temples and a great base for day trips for waterfalls, trekking and elephants.
Outside of the old city walls, the eastern area (Tha Phae Gate) along the Ping River is the commercial hub filled with markets. The western part is the trendy, hip area along Nimmanhaemin Road (known as Nimman) that’s popular with both the digital nomad community and Chinese tourists for the shopping, cool cafes and coworking spaces.
Whether you’re here for two days or two months, this guide will answer ALL your questions about the best things to do in Chiang Mai, including day trips and the best hotels and hostels.
Affiliate links are used in this post. If you make a purchase, I earn a small commission at no cost to you, which goes toward the cost of maintaining this blog.
Plan Your Trip
Currency: Thai Baht (THB)
When to Go: October to January has the best weather. Avoid the smokey season from February to April.
Travel Insurance: Protect yourself with SafetyWing travel medical insurance to cover accidents and travel delays.
Mobile eSIM Card: Get seamless connectivity worldwide with Airalo minus the hassle of physical SIM card. (Save 10% with code AIRALOESIM10!)
The Best Chiang Mai Temples
 Wat Chiang Man in Chiang Mai’s old city
There’s literally a temple on every corner in Chiang Mai. Please be sure to dress appropriately when visiting temples—cover your shoulders and knees; remove hats and shoes. Avoiding pointing your feet at anyone or the Buddha statues because it is considered disrespectful. I’ve marked my favorite photogenic temples with asterisks! The famous temples charge 20-30 baht for entry, and the smaller ones are usually free. It’s often free if you go early or late.
I added two asterisks to notate my favorite temples!
Temples Inside Chiang Mai’s Old City Gates
**Wat Phan Tao – This teak temple is one of my favorites and recently just opened about being renovated.
Wat Phra Singh – This is one of the most popular and crowded in town. It’s famous for Lion Buddha Image and golden chedis (a mound-like structure containing relics) with elephants.
Wat Chedi Luang – This is the second most popular and one of tallest structures in town. The brick chedi ruins dates back to 1441 and features a few remaining elephant statues.
**Wat Chiang Man – This is the oldest in town and known for elephant chedi from 1297. It’s one of the best for photography.
**Wat Saen Muang Ma Luang (Wat Hua Khuang) – This small and slightly hidden temple is down a small road near north gate of the city. It’s also stunning for photographs.
Temples Outside the Chiang Mai Old City Gates
Wat Lok Molee – This temple is one of one of city’s older temples. It’s just outside of the north gate to the old city. It’s popular during the lantern festival and always has cool decorations.
Wat Sri Suphan – The silver temple is just south of city walls. It’s stunning except for the fact that women can’t go inside the main temple.
**Wat Buppharam and Wat Mahawan – These are two of the three stunningly beautiful Burmese temples near Tha Phae Gate.
 Left:Chiang Mai Old City; Right: Wat Suan Dok
Temples in Driving Distance of Chiang Mai
Wat Doi Suthep – This is the most important temple in Chiang Mai and home to a Buddha relic. It’s located on top of a mountain just outside of town. It’s accessible by songthaew from the city or by foot via the Monk’s Trail.
Wat Pha Lat – This is a small monk temple on the way to Doi Suthep. It’s accessible by car and foot.
Wat Umong – This cave temple is couple kilometers out of city and one of the most unique ones.
Wat Phra That Doi Kham – You can’t miss this big white buddha temple on hilltop.
Wat Suan Dok – This temple is located in the Nimman area and known for the photogenic white stupas/chedis. They offer one-day and multi-day mediation retreats that I totally recommend and regular monk chats!
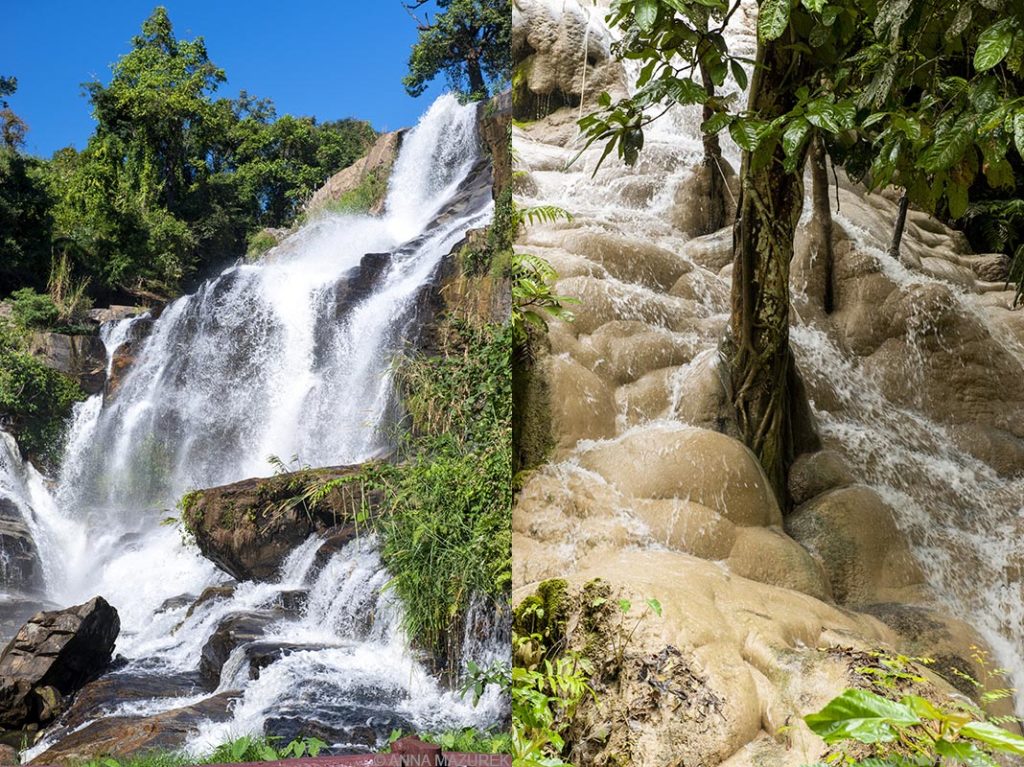 Left: Doi Inthanon National Park; Right: Sticky Waterfalls (Bua Thong)
The Best Day Trips from Chiang Mai
If you don’t have a motorbike or car for day trips, I’d recommend booking transfers or tours through Klook, an online travel agency with the best deals in Asia. You get 5% off your first booking and discounts off future bookings just for leaving reviews!
Cooking Classes – Chiang Mai is a total foodie town so it’s a great place for a cooking class. I really loved the full-day cooking class at Grandma’s Cooking School, which I booked on Klook. We made six dishes, including dessert. They even have a photographer shooting the entire time and give you the photos for free along with the recipes! I’ve also heard good things about Asia Scenic. (1,200-800 baht/$50-65 USD).
Grand Canyon – This former limestone quarry carved out of red clay soil is a stunning place to relax and swim. It’s broken into three separate sections and two appear to be commercial – one waterpark/wake park on the far left of the canyon and a smaller water park in the center. Both have inflatable obstacle courses, cliff jumping and bamboo rafts for floating. Be careful with cliff jumping as deaths have been reported. Entry 300-150 baht depending on which park you visit.
Sticky Waterfall (Bua Thong) – This waterfall is one of my favorites and never crowded! It’s a multi-tiered waterfall made of limestone and mineral deposits. The rocks are easy to walk on without slipping, hence, the name “sticky waterfalls.” It’s fed by a natural spring that’s connected to the parking lot by a path. There’s a series of ropes and wooden railings to assist with climbing. Entry is currently free. It a 90-minute drive from town so a day tour through Klook, motorbike, rental car or Grab (ride share app) are your best options.
Monk’s Trail – This hiking trail leads up to the city’s most famous temple – Doi Suthep and passes a smaller temple Wat Pha Lat. The first portion of the trail is easy but after the first temple, it gets steep. You can take a songthaew down after the end of the hike. Depending on your fitness level, it can take roughly 90 minutes one-way.
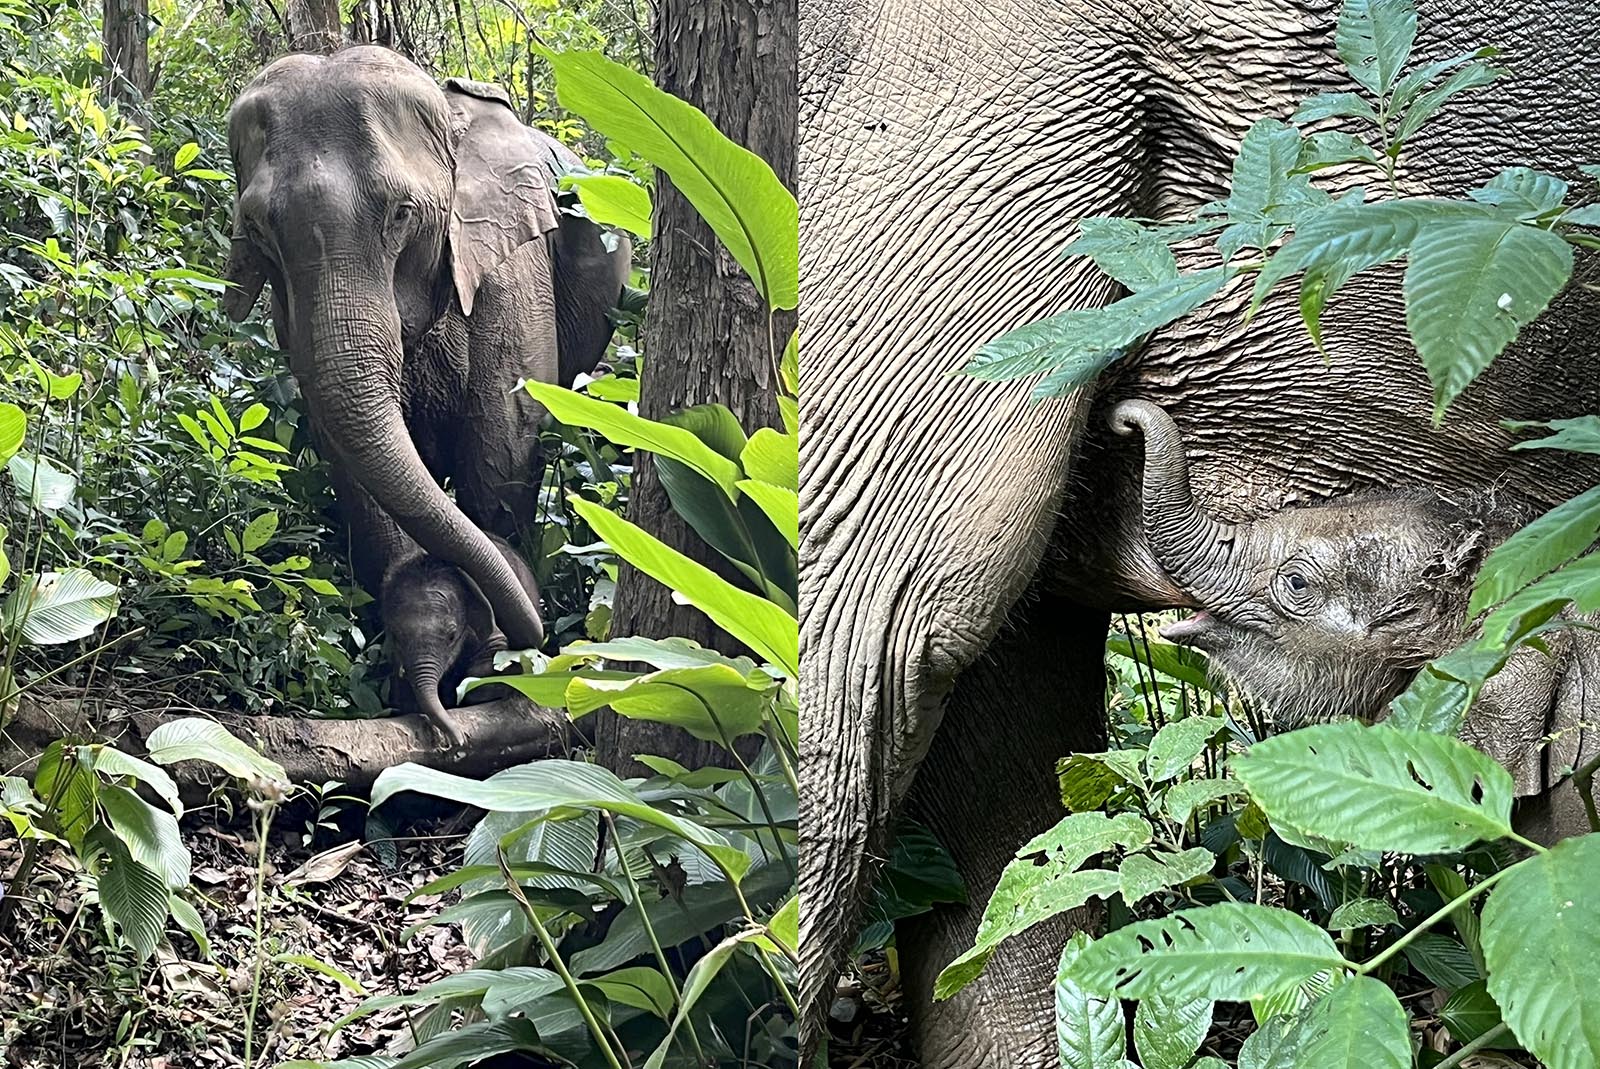 A two-week old baby elephant and her mother at Journey to Freedom, an ethically-run elephant experience near Chiang Mai. Photos by Chris Rufflo.
Ethical Elephant Sanctuaries – While there’s no shortage of elephant activities around Chiang Mai, only book with ethical companies that don’t allow riding like Elephant Nature Park, an elephant rescue and rehabilitation center that offers half, full and overnight tours along with volunteer opportunities. For an intimate wilderness adventure experience with jungle treks and volunteering, consider the four- or seven-day overnight programs at Journey to Freedom.
Meditation Retreat – Wat Suan Dok offers weekly meditation retreats ranging from a one-day retreat on Monday and Fridays; weekly two-day retreats Tuesday to Wednesday and monthly four-day retreats. The one-day retreats are free but donations are appreciated. Two-day retreats are 800 baht. For more information, visit monkchat.net or stop by the monk chat office at the temple. (I personally LOVED the one-day retreat!)
Monk Chat – Wat Suan Dok offer chats on weekdays from 5-7 p.m. and Wat Chedi Luang in the old city offers it weekdays from 9 a.m. – 6 p.m. Both are organized by Wat Suan Dok’s Buddhist university, monkchat.net.
Doi Inthanon National Park– This national park is home to Thailand’s tallest peak at 8,415 feet! It’s also filled with hiking trails and waterfalls. It’s popular with cyclists as well. It’s located 70 kilometers from Chiang Mai, but there’s no public transport unfortunately. (I usually rent a car or hire a Grab driver for the day and split it with friends for day trips.) If you don’t feel comfortable renting a car, consider booking a day trip through Klook.
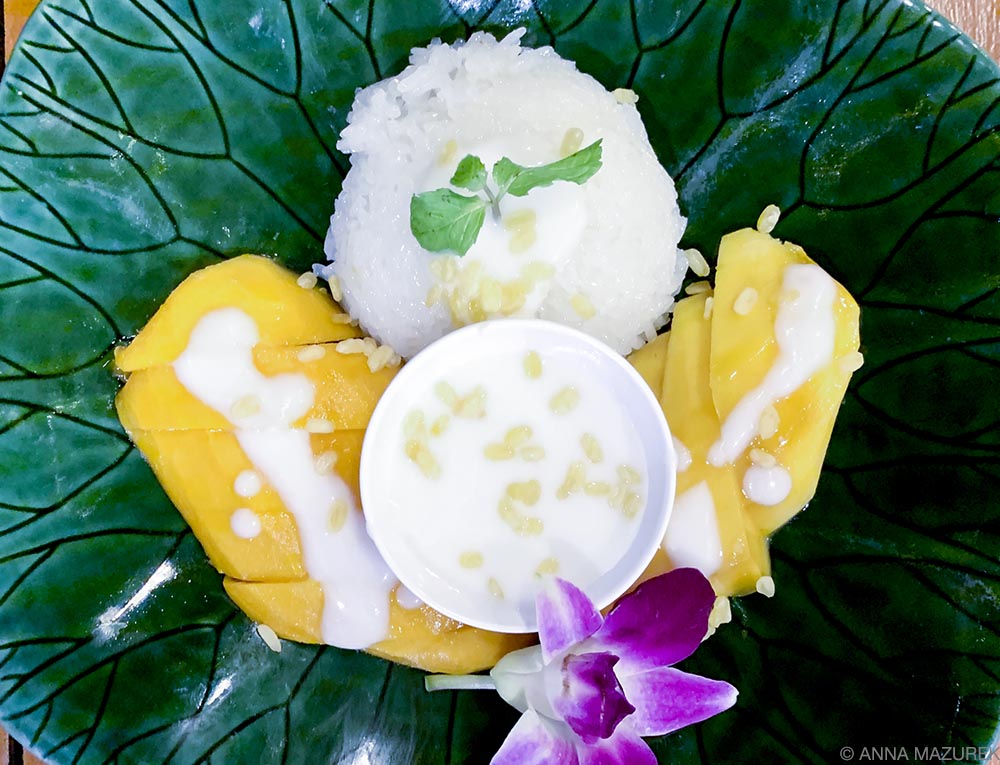 Mango and sticky rice
The Best Places to Eat in Chiang Mai
Budget Meals in Chiang Mai Under 100 Baht / $3 USD
Moo Ping Khun Por – This breakfast and lunch spot in Nimman serves up one of my favorite Thai dishes — moo ping (grilled pork usually in coconut milk) and khao niew (sticky rice). They also have chicken as well. This was a post-pandemic discovery that I’m obsessed with. 27 Nimmana Haeminda Rd Lane 11
Anchan Noodle – This local spot is famous for blue noodles, which get their color from butterfly pea tea. The noodles are served with a variety of meat choices and spicy dipping sauce. Only open for breakfast and lunch. 19/1 Siri Mangkalajarn Rd Lane 9.
Ming Kwan Vegetarian Restaurant – The vegan khao soi might just be my favorite khao soi in town (and I’m not vegan!)! This spot is budget-friendly and super tasty. I also recommend the veggie Northern Thai sausage! 98 Rachadamnoen Rd Soi 4 (Near Wat Phra Sing)
Mall Food Courts – All malls in Thailand have cheap (and super tasty) food courts with local stalls serving fresh food. The basement level of the Maya Mall and Central Festival are two good ones. The 4th floor of Central Festival is nice as well. I usually eat a meal for 50-60 baht ($2 USD).
Khao Tom Baht Diao – This is the cheapest spot in town for both food and beer with the most convenient hours. Portions are small, but it’s so cheap it doesn’t matter so just order a second dish. It’s open from 5 p.m. to 2 a.m. daily so it’s good any time of day!
Ploen Ruedee Night Market – This hip food truck market is located right beside the sprawling night market. It’s filled with tons of options for eating and small shops. There’s usually live music and cold beer readily available. 28/3-4 Changklan Rd.
Chang Phueak (North Gate) Market – Every night there’s a sprawling local food market located outside the walls of the old city across from the north gate. It winds down around 9 p.m. Highlights are the pork rice lady who wears a cowboy hat at Chang Phueak Pork Leg Rice, which was onAnthony Bourdain, and the sukiyaki spot (Suki Changphuak) that’s just over a few stalls from her. (The sukiyaki spot was on a Netflix show so it’s always got a line. Get a number when you arrive and expect a wait!) I also love the roti pancake guy by the stoplight.
 Left: French toast at Gallery Seescape; Right: Granola and fruit from Good Souls Kitchen (I eat Thai food for every meal except breakfast! I love all the tropical fruits!)
Meals from 100 baht/$3 USD and higher
(Most of these spots are around 200-250 baht ($7 USD) depending on what you order.)
Good Souls Kitchen – This vegan spot is my go-to breakfast spot. (I’m far from vegan but love their fruit bowl and homemade coconut yogurt and granola.) Their dinner options and mains are also delicious. I dream of this place when I’m not in Thailand. 52/2 Singharat Rd.
Khao Soi Nimman (Michelin-Guide listed)– This is my next favorite khao soi spot in town. It’s open much later than the others. The northern Thai sausage is the best and spiciest option, but the fried pork is also good. 22 Nimmana Haeminda Rd Lane 7.
Goodneighbor Cafe – This hidden breakfast spot is one of the best in town for bagels and coffee. The chill vibe is also great. 149, 49 M.2 Soi. Ban Pae, Chang Phueak, Muang, Chiang Mai 50300, Thailand
SP Chicken – Rotisserie chicken, sticky rice and spicy stir-fried morning glory are my favorite meal at this local spot in the old city near Wat Phra Singh. Only open for breakfast and lunch.
Night & Day Resturant – For craft beer and northern Thai food, there’s not better place than this local favorite. This is off the tourist trail, which is why I love it. The hang lay curry is amazing, too. 34, 13, Suthep.
Khao Soy Maesai (Michelin-Guide listed) – This local spot serves up the best khao soi (northern Thai soup curry) in town. It’s only open from 8 a.m. to 4 p.m. Go late in the afternoon or there will be a long line. I recommend the chicken and get extra pickled veggies to add in! 29, 1 Ratchaphuek Alley
Klay Cafe, Groon Bread & Brunch Cafe and The Moon Eatery are three of my favorite brunch spots in Nimman area. They all open around 8:30 a.m., which is early for the neighborhood! They each have homemade bread or bagels!
Dinky’s BBQ – That’s right Chiang Mai has authentic Texas barbecue made by an Austinite! The side dishes (slaw, potato salad and fried okra) are tasty just like their homemade tortillas for their tacos. There are several sauces choices but the mustard is my favorite, which is crazy because I normally hate mustard.
Huen Muan Jai (Michelin-Guide listed) – Located diagonally from Khao Soy Maesai, this is another popular restaurant specializing in Northern Thai food. I recommend their sampler platter and the hung lay curry with pork. 24 Ratchaphuek Alley.
Cherng Doi Roast Chicken (Michelin-Guide listed) – There will be a line at this hole-in-the-wall spot. The roast chicken with tamarind sauce is amazing! The menu offers a lot of other chicken dishes along with creative somtam (green papaya salad) options. 2/8 Suk Kasame Rd.
Tong Tem Toh (Michelin-Guide listed) – There’s always a line at this Nimman spot that serves up traditional northern Thai dish like Hang Lay curry and red ant dishes. The chicken wings are perfection. 11 13 Nimmanahaeminda Road.
The Salad Concept – If you’re missing your veggies or are sick, this is the best spot in town. There’s a massive selection of build-your-own salads and wraps. The portions are huge and range from 100-150 baht/$4-5 USD for a main. There are two locations.
Free Bird Café – This vegan spot has delicious coconut and banana pancakes. All proceeds go to the owner’s charity for migrant workers. There’s a zero waste store and second-hand shop inside. They host a weekly women’s nomad lunch on Wednesdays and other events.
The FACES Gallery & Gastro Bar – Hidden in the southern corner of the old city, this fancy spot serves up tasty Thai food in a beautiful setting. Terracotta carvings line the walls. The atmosphere of this spot is 10/10! 33 ถนน Ratchamanka Soi 6.
The Hide Out – With homemade bagels, this is one of the best western breakfast and brunch spots in Chiang Mai. It’s not far from Tha Phae Gate.
Where to Stay in Chiang Mai
 A view of the pools at Green Hill Place
For a few nights…
HOTELS: For the best hotels in Chiang Mai’s Nimman neighborhood, I recommend Hotel YaYee ($38 USD/night), which has a great rooftop bar with excellent view of mountains, or Akyra Manor ($138 USD/night) has an equally amazing rooftop bar with cool infinity pool. Both hotels bars are open to the public if you decide to stay elsewhere. In Chiang Mai’s Old City, Baan Hanibah ($82/night) is a lovely family-run guesthouse with comfortable rooms. Hotel rates vary by season.
HOSTELS: For the best hostels in Chiang Mai’s old city, try the sleek rooms at The Common Hostel ($10 USD/night) or Pakping Hostel, which have private bunks with curtains and individual plugs. In Nimman, the highest rated hostels with the best location are Ray Hostel and Bed Addict Hostel. Both are around $13-14 USD/night. (Things are always slightly pricer in Nimman than the old city.)
For a few months….
There’s no shortage of monthly rentals in town. The best ones book out in advance. I’ve included several locations to show the wide variety of options. I prefer to pay $300-400/month personally depending on if I get a studio or a one-bedroom. Electric and water is usually not included. (I’ve never paid more than $30/month total for both before 2019 but now, prices are more than double post-pandemic.) A one-month deposit is also required.
Mirror Chiang Mai – These newly built apartments are family-owned with both one- and two-bedroom units ranging from $540-840 USD/month. The same company owns PT Residences next door, which offers clean but dated apartments starting at $300/month. Weekly cleanings are included.
Huay Kaew Residence – This is the most budget friendly and centrally located spot in town for both the old city and Nimman. The good news: there’s a pool and the complex is huge so there’s always availability. The bad news: the beds are literally like sleeping on a wooden board. Studios start around 3,500 baht/$117 USD per month for 24 square meters.
Liv@Nimman – This modern condo building is swanky and includes a stunning pool. It’s located in the heart of Nimman near Maya Mall. One bedroom apartments start at $672/month.
Green Hill Place – This modern apartment building has two NICE pools and a gym. It’s located by Maya Mall. One bedroom units start at 10,000 baht/$336 USD.
Live Music & Free Events in Chiang Mai
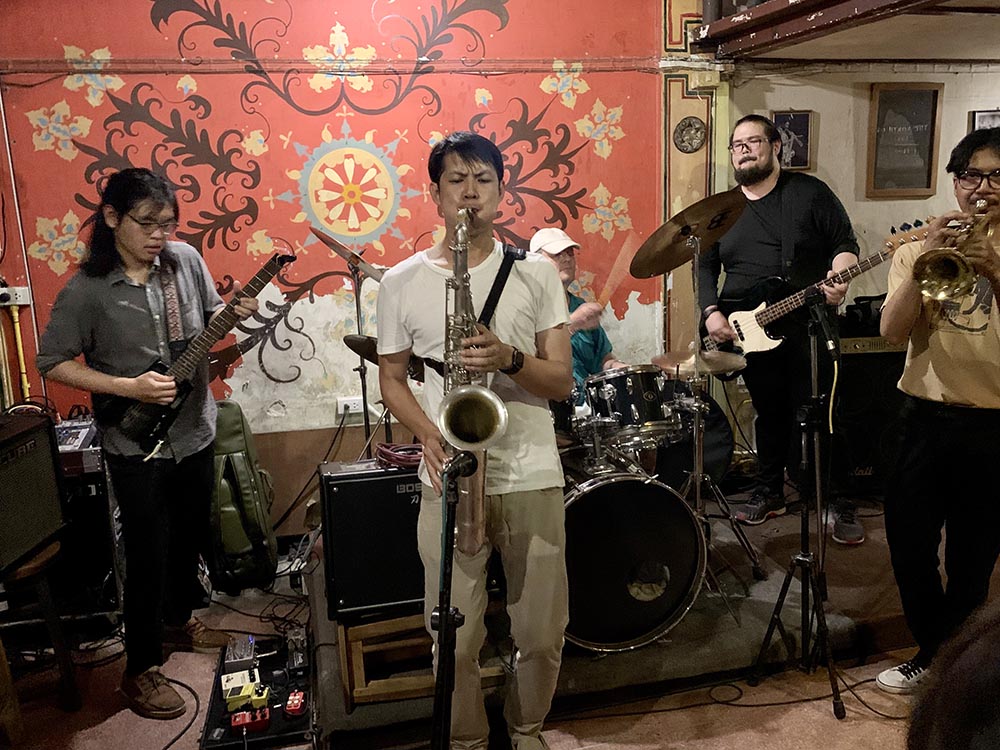 North Gate Jazz
There’s no shortage of live music spots and open mic nights in Chiang Mai. My two favorite live music spots are North Gate Jazz Co-op (open mic night is Tuesdays) and Boy Blues Bar in the Night Bazaar.
One Nimman – This huge shopping complex offers free events including salsa classes on Sunday nights, yoga and swing dance lessons on Saturday nights. Check timings before visiting as this can change often.
Jing Jai Farmer’s Market – This weekly farmer’s market is a must-visit! Aside from fresh produce, there’s a whole section of food stalls ranging from freshly baked banana bread to dumplings. The vendors are also really unique artists and not touristy at all. Open every Saturday and Sunday from roughly 6:30 a.m. to 2 p.m.
The Best Coworking Spaces in Chiang Mai
 Left: Punspace Nimman is closed but their Wiang Kaew location is great.; Right: Coco Kala coworking in Chiang Mai.
There’s new coworking spaces opening all the time, and it’s best to choose a place based on where you live. Cafes are always a great backup option. I’ve always gone to Punspace, which has only two locations in town because their Nimman branch closed during the pandemic. (Wiang Kaew is the most social of their three branches.)
CAMP is a 24-hour café in Maya Mall that many people like to work from. Coco Kala is the one of the newest additions that literally just opened at the start of the pandemic but is temporarily closed! It’s a stunning co-living and coworking space with a pool.
Other options include Hub53 (offers unlimited and hourly plans). A monthly membership runs around $100-130 USD depending on the space. Yellow is a new coworking hub in Chiang Mai in the Nimman area that’s huge and always packed.
The Best Gyms in Chiang Mai

Playground Innovative Training Club in the Nimman area of Chiang Mai.
These gyms are located around the Nimman area and I’ve tried them all! (I am picky about gyms when it comes to equipment and air conditioning.) Prices can change frequently so be sure to check with the gyms directly!
Maxx Fitness – This is the nicest gym in the Nimman area and the priciest. It’s located in the Maya Mall and has excellent air circulation and climate control. The equipment is all new and classes are offered. I talked them out of their joining fees and only paid the monthly membership fee of 1,699 baht ($50 USD).
Jett Fitness – This chain gym is located in the One Nimman shopping complex. It’s actually a fairly small and awkward space so I decided to stick to Maxx Fitness instead. They have a good amount of equipment but Maxx is still best in my opinion.
Playground Innovative Training Club – This gym was brand new in late 2019 and located off a side street. The equipment is all really nice, but the space is very small. The main floor area is used for classes in the morning and night so it can only be used from 10 a.m. – 4 p.m. The airflow is awful since they don’t turn on the air conditioning until the afternoons some days and open the windows instead. The small size and lack of airflow is why I didn’t join this gym long-term. Their “opening special offer” is a month with unlimited classes for 1,750 baht/ $51 USD. Sai 26 Road Suthep.
Harris Fitness Center – This is one of the most budget options in town located in the Lotus Hotel. It’s a cramped space with older equipment but lots of options. Classes are also included for free. The staff is really friendly. It doesn’t have great airflow or a/c. Rates are 1,250 baht/month ($42 USD) and 600 baht weekly ($20). 21 Huaykaew Rd.
Gold Hillside Gym & Fitness – (1,100 baht/$37 USD month) This gym is located in the bottom of Hillside Condo 3. It’s a nice-sized space but a bit dated. It’s got good airflow but just didn’t have the equipment I wanted. 25 Huaykaew Rd.
The Wall Fitness Studio – (1,600 baht/$50 USD month or 200 baht/$6 USD day) This new modern gym is located behind the Maya Mall. It’s a large space filled with lots of equipment. Daily and monthly passes are available. (This is the only one I haven’t tried yet because I just love Maxx so much.) 49/22 Huay Kaew Rd.
Vira Yoga Home – My friend Wee has a great yoga studio that I recommend. Class schedules can be found online. He also teaches the 8:30 a.m. class Maxx Fitness on Wednesdays, too.
Best Muay Thai Gyms in Chiang Mai
I’ve been trying out three different Muay Thai gyms and found a good routine splitting between two of them for training. Bear Fight Club Chiang Mai in the old city is one of the best because of the trainers. Classes are roughly 2.5 hours and 300 baht. It’s the most intense and also the most crowded, which is intimidating if you’re new.
Another favorite is Heavy Hit Boxing Gym located southeast of the city. This gym is only pad work and by appointment only (1.5 hours, 300 baht) so it feels like more one-on-one training. There’s never more than a handful of people here. I feel like there’s more individual instruction here to help me improve my form and that combined with Bear Fight Club is a great combination. I’d recommend Heavy Hit first if you’re new to Muay Thai.
The other option I’ve tired is Chiang Mai Muay Thai, which has the most frequent class times. Classes are shorter (1.5 hours) for 390 baht. It’s located in the old city and can also get slammed with people.
The Best Shopping & Markets in Chiang Mai
 The art galleries of Baan Kan Wat are just a few miles from Chiang Mai’s old city.
Baan Kan Wat – An adorable artist village just a few miles from Chiang Mai’s old town filled with galleries and cute cafes. Many spots offer workshops and classes. The village is a winding pathway through some cool building designs. It’s a lovely way to spend a few hours. Open Tuesday to Sunday 10 a.m. to 6 p.m.
Jing Jai Farmer’s Market – The best place for shopping for unique items is Chiang Mai’s weekly farmer’s market! It’s a must-visit spot. There are no elephant pants or tourist trinkets here, which is part of the appeal. Most of the clothing is homemade. There’s an entire food court serving up everything from popsicles to dumplings. Open every Saturday and Sunday from roughly 6:30 a.m. to 2 p.m.
Chiang Mai Night Bazaar – This is the main night market in town and runs every night from 6 -11:30 p.m. It’s a good place for food, souvenirs, clothing, luggage, etc. Intersection of Chang Khlan Road and Loi Khro Road.
Talat Warorot – This is where all the locals go to shop – a sprawling complex with food, cheap (not quality) suitcases, clothes, etc. Cnr Th Chang Moi & Th Praisani
Sunday Walking Street – This is a haven for street food and souvenirs, but it’s so crowded you feel like you’re at a music festival smashed against the person in front of you. Rachadamnoen Rd.
Ploen Ruedee Night Market – This food truck market is located near/in the night bazaar. It’s got a wide variety of food options, alcohol, live music and clothing vendors. It’s my favorite spot in the night bazaar. 28/3-4 Changklan Rd
The Best Shopping Malls in Chiang Mai
The largest mall in town is Central Festival, which is outside the city center. Maya Mall in Nimman and Central Chiang Mai Airport, largest mall in Northern Thailand.
All three have movie theaters and pharmacies – the British chains Boots and Watsons along with a Pharmacare Plus (usually the cheapest). From a shopping standpoint, there’s every chain from H&M to Zara to Uniqlo in at least one of these malls. Each mall has a food court with cheap and tasty eats (all homecooked Thai food), which I always frequent. Maya and Central Festival have a Daiso, the Japanese dollar store which is the most useful store on the planet.
Where to get a haircut in Chiang Mai
While there’s plenty of places around to get a haircut, I like New York New York in Nimman. It’s an Aveda salon, and they do a good job. (I’ve had so many terrible haircuts abroad that I’m really picky about places since I have short hair!) Prices range from 550-850 baht ($18-28 USD) for a wash and cut.
Best Thai Massage in Chiang Mai
Oasis Spa is hands down the best and nicest place to get a massage in Chiang Mai but also one of the priciest. Book an appointment before 1 p.m. to save 20 percent! (I got a 60-minute hot oil massage there last week for roughly $1,200 Baht after the discount.)There are two locations (Nimman and Old City).
The runner up is Fah Lanna Spa with three locations in the Old City, Night Market and Nimman. It’s about 25 percent cheaper than Oasis but the facilities aren’t as nice. (Don’t get me wrong—they are really nice but nothing compared to Oasis.) A 90-minute Thai massage is 1,150 Baht. Check Klook for massage deals at both Fah Lanna and Oasis!
The nicest budget-friendly spot is Sense Massage & Spa, which has multiple locations, and charges 450 Baht for a 60-minute Thai massage. I went to Lantana, which has three locations in Nimman, for a years because a 60-minute Thai massage is 350 Baht.
Chiang Mai FAQ
 SafetyWing travel medical insurance covers Thailand and over 180 countries
Do you need travel medical insurance for Thailand?
Yes, travel medical insurance is one of the most important things to purchase for any trip abroad, especially Thailand. It covers all the things that could go wrong from injuries to travel delays so that you don’t have to worry and can focus on traveling!
SafetyWing’s Nomad Insurance offers $0 deductible travel medical insurance coverage for over 180 countries for people aged 69 and under when traveling outside their home country. The best part is that it only costs a few dollars a day! If you get sick or injured abroad, you can visit any hospital or doctor. Other benefits of Nomad Insurance include coverage for lost checked luggage, travel delays over 12 hours, motor accidents (if properly licensed, wearing all safety equipment and not intoxicated) and injuries from sports or leisure activities. You can even add adventure sports, electronics theft and U.S. coverage (for non-residents) to your policy.
One of the best things about SafetyWing is that you can buy policies abroad and speak to a REAL human from the 24/7 customer support team if you have questions! (I can vouch that they are excellent at assisting and will follow up with you afterward.) Pay in full or choose an auto-renewing plan that can be canceled anytime.
If you’re abroad for 90 days, you can get 30 days of home-country coverage. (For the U.S. residents, it’s 15 days.) Plus, every single part of the process from purchasing a policy to filing a claim is easy, which is why SafetyWing has been the best travel medical insurance policy for me. Read my review of using SafetyWing in Thailand.
 Wat Doi Suthep, Chiang Mai, Thailand
When to Go to Chiang Mai
The best time to visit Chiang Mai is in the dry, cooler months from November to February. Temperatures are in the 70s/80s with lows in 60s. Beware of the burning season when the fields in the north are burned and the smoke heavily pollutes the city to unsafe air quality levels, which is normally February and March. (Download the free Air Visual app to check air quality levels!) It can start as early as late December. April and May are steaming hot. The monsoon rains arrive in June but peak in August/September.
How to get to Chiang Mai
The easiest way to get to Chiang Mai is to fly! International flight options are expanding with direct routes to Singapore on Scoot Airways (love this airline!) and Hong Kong via Cathy Pacific. Domestic flights are available from Bangkok and other large cities. There’s a train to Bangkok that takes roughly 12 hours and is always late. (I love the sleeper car. A bottom bunk is roughly $50.) Buses are the cheapest ($20ish) and take about 10 hours from Bangkok.
Local Transport in Chiang Mai
The local transport in Chiang Mai revolves around a system of songthaews—pickup trucks with two benches in the back—that are constantly on the prowl for business. There’s a few different color truck lines (yellow, red, etc.) but the red ones will take you just about anywhere in the city for 30 baht ($1). I use these a lot and find it’s best to tell the driver a large landmark near where I want to go like Maya Mall or Tha Phae Gate.
The rideshare app Grab is the next best option. The company is partially owned by Uber and operates the same way and also included food delivery options in the app. There’s also an option to get a bike taxi instead of a car, which is cheaper. Helmets are provided. Maxim is a new rideshare app that’s a bit cheaper than Grab.
Tuk tuks are a total tourist trap and outrageously expensive. Avoid them. India is the only place they are a good deal.
Car & Motorbike Rentals in Chiang Mai
Motorbikes can be rented just about anywhere in town for roughly 200 baht/day ($6.60 USD). There’s several places along Huay Kaew Road. SAFETY ALERT: If you don’t have a Thai license or an international motorcycle license, most travel insurance companies will NOT cover you if there’s an accident. The police also set up regular check points around the city and fines are 500 baht ($16.50 USD) if you don’t have a proper license.
I’ve rented a car from Budgetcatcher Car and Scooter Rental in Nimman and had a great experience. It was roughly $30/day.
Where’s the best place to buy a SIM card in Chiang Mai?
The easiest thing to do is buy a Thailand specific eSIM card from Airalo that will work instantly when you arrive. If you are traveling to multiple countries in Southeast Asia on a short trip, then consider one of their Asia Regional eSIM cards. (Both the country-specific and regional eSIMs have worked wonderfully for me and even have a mobile hotspot option that’s critical for me because I’m always working remotely.) Keep in mind it’s always cheaper to buy a country specific eSIM than a regional one. For more details, read my Airalo review for Southeast Asia.
Be sure to join the free Airalo Loyalty Program to earn 5% cash back for every purchase, which can be redeemed on future purchases. For more about eSIM cards, check out this post!! Airalo Promo Codes: New customers save 15% off with NEWTOAIRALO15 and existing users save 10% with AIRALOESIM10.
If you’re going to be traveling in Thailand for while, then buying a local SIM or eSIM when you arrive will offer the best value and maximum data. The main carriers are AIS, DTAC and TrueMove. I’ve always used AIS so that’s my preference since coverage is good everywhere I’ve been in the country. You have to show your passport to get a SIM card, which is pretty common in most countries. It’s always more expensive to buy it at the airport.
When I arrived in Thailand, I bought a 30-day plan with 6 GB from AIS in airport for $19 USD. When I topped it up at the AIS in Maya Mall, they offered me a new sim card with a better plan with unlimited data for $8.28 USD. You can top up at machines at 7Elevens or at the retail stores for all the main carriers.
The Chiang Mai Lantern Festival
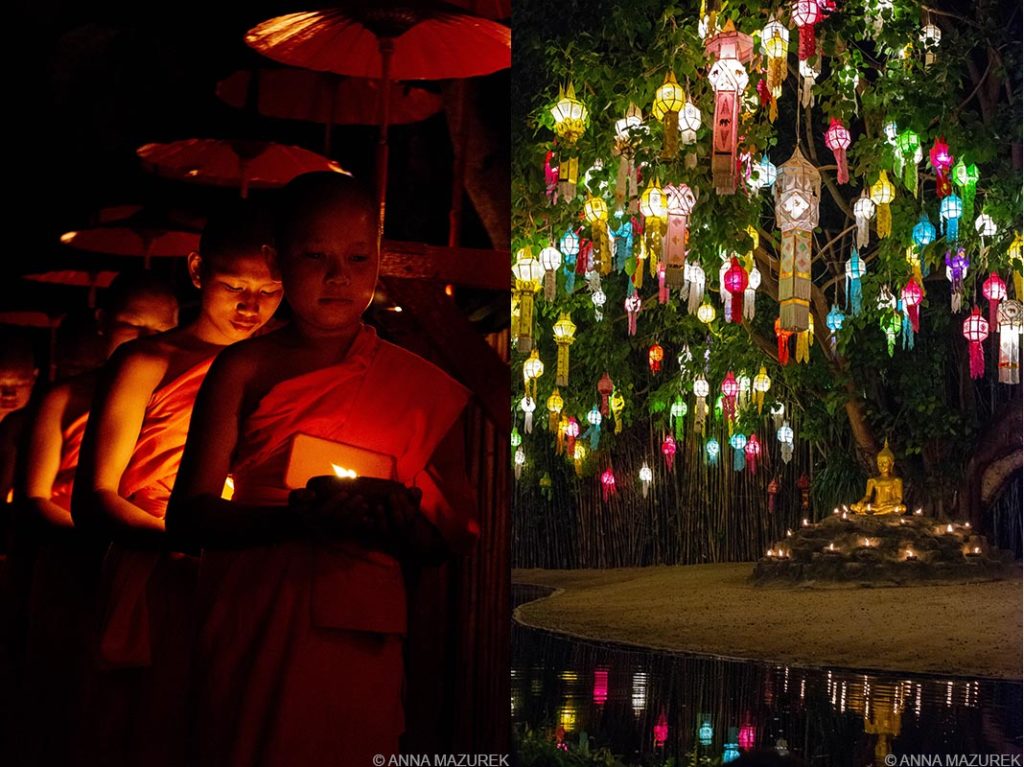 The monk ceremony during Yee Peng Festival at Wat Phaotao in Chiang Mai. (During the panedmic, this temple was remodeled and this pond no longer exists sadly.
 One of the big festivals in Chiang Mai is the Yee Peng (also spelled Yi Peng) Festival that’s held during the full moon of the twelfth lunar month every year (usually in November). This festival of lights is known as the lantern festival and also coincides with Loy Krathong. The best locations for the festival are the Three Kings Monument, Ping River to launch the krathongs (small floats made from banana leaves and flowers) and the bridge over the Ping River.
Events vary every year. Many temples like Wat Phantao and Wat Chedi Luang will have ceremonies. In 2022 and 2024, Wat Chedi Lunag had a cool light show reflected on the temple. There’s always a parade by Tha Phae Gate one night.
Before COVID, people were releasing lanterns everywhere, which was a real fire hazard. I’ve literally seen them catch a roof on fire by Tha Phae gate. The city seems to be cracking down on the lanterns for safety reasons. In 2022, there were no lanterns being released by the Ping River near Tha Phae gate except for a rouge one or two.
Last year (2023), there were a lot people releasing lanterns across the Ping River from Tha Phae gate. The main “lantern” release is an overpriced event outside of the city that sells out months in advance. It’s a nightmare to get to because it’s far from the city and you have to take shuttles. When you see photos online of a mass lantern release with no buildings in the background, this is what you are seeing photos of, not central Chiang Mai.
Where to get Medical Care in Chiang Mai
The medical care in Thailand’s private hospitals is FANTASTIC, efficient and affordable. In Chiang Mai, Chiang Mai RAM near the old city and Bangkok Hospital Chiang Mai near Central Festival mall are the two main hospitals. I’ve been to Bangkok Hospital many times and the facilities are really nice. (I get all of my routine annual health checks done in Thailand every year, which I’ve written about in this blog post with a full cost breakdown. I even get travel vaccines in Thailand because it’s easier and cheaper than the U.S.
For medicine, Dara Pharmacy near Central Festival Mall will have any medication you need and it will be at least half the price of Bangkok Hospital.
How to get Thailand Visa Extensions in Chiang Mai
On July 15, 2024, Thailand implemented at 60-day visa upon entry for Americans and 92 other countries. Previously, a 30-day stamp was issued on arrival. After 60 days, you can extend your visa for 30 days at an immigration office. If you need more than 60 days, you’ll have to do a visa run, which I talk about below. There is also a new online system for applying for the extension.
How to do a 30-Day Visa Extension in Chiang Mai (In-Person)
These instructions apply to people who need to extend their 60-day visa stamp for another 30 days.
The main Chiang Mai Immigration Office is located near the airport. (Address: 71 ถนนสนามบิน Mueang Chiang Mai District, Chiang Mai 50200) Hours are 8:30 a.m. – 4:30 p.m. There is also an immigration office at Central Festival mall.
When you arrive, grab a number at the booth by the entrance. You’ll have to fill out the applications forms in the outdoor area to the left. For 30-day visa extensions, you’ll need bring following documents with you: a copy of your passport photo page, a copy of your entry stamp in your passport, a copy of where your accommodation listed you in the government registry, a passport-sized photo and the correct application form (TM.7 form provided at the entrance).
If you forget copies or the photo, the gas station across the street has a booth set up to help. The cost for a 30-day extension is 1,900 baht cash. (Don’t worry – they give change if you don’t have exact change!) There are volunteer staff at a table to help make sure you have the correct paperwork, so be sure to have them look over your papers.
When your number is called, you’ll go up to a window outside, and they’ll check your paperwork. You’ll be given a new number for the inside. Unless you arrive when they open, you’ll likely have to come back after lunch for the inside portion. They will give you the timing to come back when they give you your inside number.
When they call your second number, you go inside, you’ll hand your forms to the main counter. They will give you a ticket with a number and barcode then you’ll be called up to the counter. Your number shows up on a screen. They will take your picture and get any other information they need. They’ll call your name a few minutes later to give you your passport with a blue receipt, which you need to show when you exit the country. The second part is really quick. It’s just the first part that’s so long. Set aside a whole day just to be safe and arrive when they open! The last time I did this it took almost the whole day. Please check their website for holiday closings.
How to do an 30-Day Visa Extension in Chiang Mai Online
As of January 2025, you can now apply for an electronic extension for tourist visas. Book an appointment online, upload the required documents (same as above), book an appointment and pay online. Once your extension is approved, you still have to physically go to immigration to get the extension stamp. The visa fee is 1,900 Baht. There are additional service fees: Regular (7 business days) 500 Baht; Express (3 business days) 1,500 Baht; and Urgent (next day but only if next day is a business day) 5,000 Baht. (I physically got this information off the sign at immigration.)
How to do a Border Visa Run from Chiang Mai
If you need more than the 30-day extension or you have already done a 30-day extension, you’ll need to do a visa run to a land border or fly to another country. I recently did this and wanted to share my experience.
IMPORTANT NOTE: Since the 60-day stamp was implemented in July, land borders to Laos (closest crossing to Chiang Mai) require you spend two nights in Laos before reentering Thailand unless you go through an agency. (If you arrive at any Laos land border by yourself, you’ll likely have to spend two nights in Laos.) I saw signs at the Huay Xai crossing on my recent trip.
I used Chiang Mai Visa Run to take a full-day trip to the border and retuned the same day with a new 60-day stamp. I was picked up at Maya Mall at 6:30 a.m. and we returned around 5:30 p.m. The drive was close to five hours each way with one toilet stop. You send roughly an hour at the border. A immigration official mets the group and escorted us through the entire process, which took about an hour. Traffic getting back into Chiang Mai slowed things down a bit but otherwise it was pretty efficient. There were seven people on my trip total. Many people used this service to transfer to other visas like the Digital Nomad Visa, etc. The company screens all customers to make sure the visa run will work for your visa.
The cost of the visa run is 4,300 baht ($127 USD) and an additional 2,000 baht ($59.14) for the Laos visa. You also have to pay 25 baht (74 cents USD) each way for the bus shuttle to cross the border bridge. (I booked through PayPal so there were some extra fees. In PayPal, make sure to select the option to let your bank do the currency conversion to save a few dollars.)
Due to the visa change, it’s best to use an agency if you’re doing a visa run to the Cambodia border as well or fly out of the country.
For more about Southeast Asia, check out these posts:
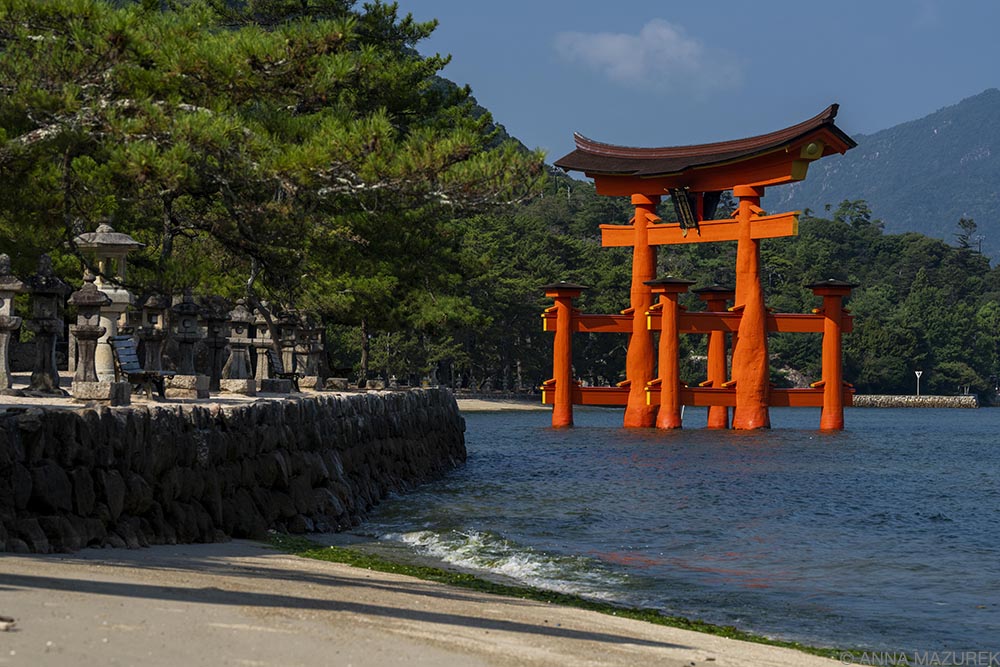
Airalo International eSim Review for iPhone
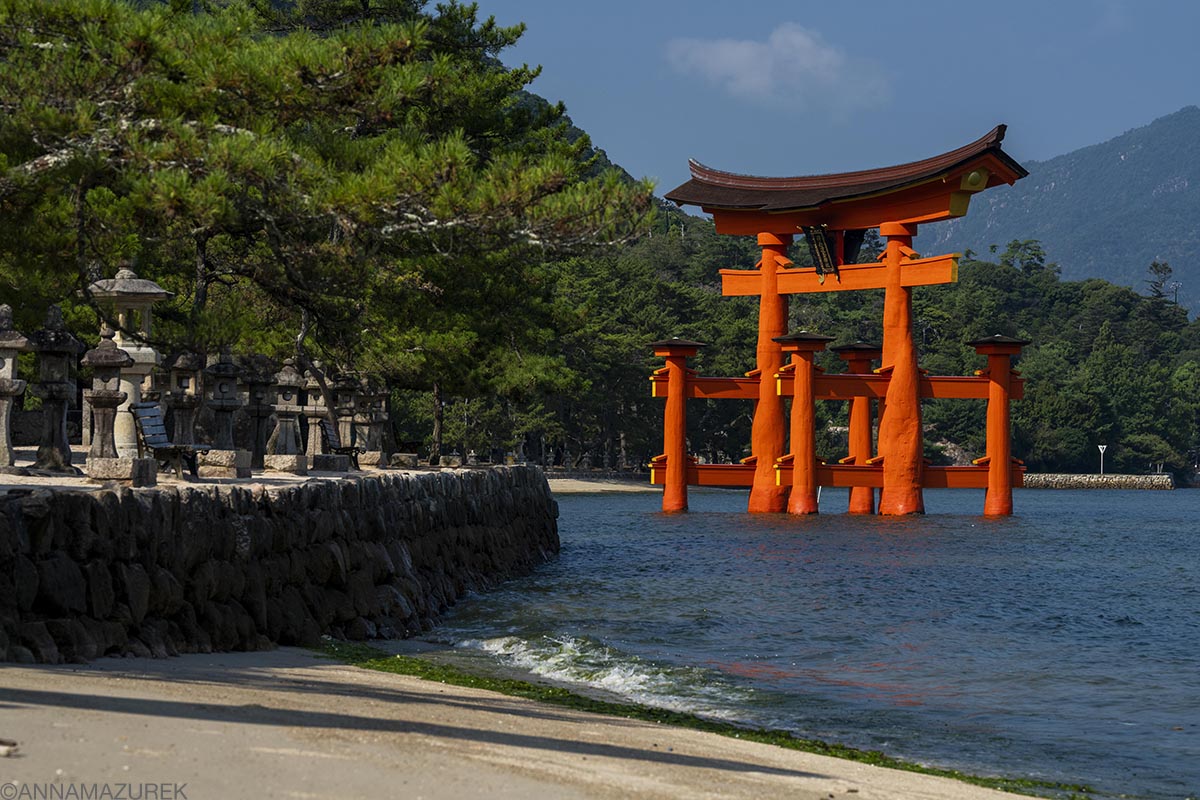 Miyajima, Japan // On my recent trip to Japan and Southeast Asia, I used Airalo’s eSIM cards for my iPhone 15 Pro and it worked perfectly with no issues.
Since I spend most of the year abroad working remotely, having cell service with mobile hotspot capacity is crucial for me. For years, I just bought local SIM cards because they were inexpensive and worked instantly. Then, Apple nixed the SIM tray on their new iPhone models creating quite a conundrum for me because I spend a lot of time in Southeast Asia where the WIFI is often too slow for Zoom so I need cellular data to work. Cellular data has always been my backup plan.
I recently tried out Airalo’s regional and country-specific eSIMs and have been impressed. Airalo is a great international eSIM for iPhone. While I talk about the pros and cons of eSIMs in another post, this post is simply my Airalo eSIM review for a trip in Asia with an iPhone.
(AFFILIATE DISCLOSURE: Please note that some affiliate links are used in this post. If you make a purchase, I earn a small commission at no cost to you, which goes toward blog maintenance costs. I only recommend products and companies I truly love and use.)
First of all, what is an eSIM card?
It’s essentially a digital version of a SIM card that connects your phone to the cellular network. It’s more convenient since people no longer have to buy a physical SIM card and find a tool or paper clip to open the SIM tray! It’s also easier to switch your service off if your phone gets lost or stolen.
What type of eSIMs does Airalo sell?
Airalo sells local (country-specific), regional and global eSIMs. Keep in mind that country-specific eSIM cards are always cheaper than regional or global ones. And, all three are cheaper than paying $10/day for Verizon or other U.S. carrier fees to have international service. Most eSIM cards are data only. If you want to call from abroad, use Skype or Google Voice. I talk about this in my post on traveling and two-step verification. (If you decide to use Airalo, use promo code NEWTOAIRALO15 for 15% off your first purchase!)
Airalo eSIM Card Review for Asia Travel
I’ve included two mini reviews below of my experience using Airalo eSIMs in different parts of Asia.
Japan, Thailand, Indonesia and Malaysia
I reluctantly upgraded to an iPhone 15 Pro recently but still travel with my old iPhone 13 Pro as a backup for SIM card reasons. Airalo had worked previously with my iPhone 13 Pro, but I had some issues initially using eSIMs that I had to call Verizon to solve. My iPhone 15 Pro worked instantly with no issues.
ESIM cards are sold with a set amount of data for a set time frame, which doesn’t start until you activate the eSIM. You can install it and activate it in the future. (I like to buy them in advance in case I don’t have WIFI when I arrive in a new place or as a safety net in case one eSIM expires then I can simply switch to the other.)
In August, I was on a work trip to four countries in Southeast Asia (Thailand, Indonesia, Malaysia and Singapore) so I bought an Airalo regional eSIM card for Asia that was 10GB of data for 30 days for $37. Again, country-specific eSIMs are a better value. For example, my 30-day Japan eSIM was only $24.15 for 30 days for 20GB, which is a much better value for a lower price than my regional Asia eSIM.
When I left Singapore, I flew to Japan for a month-long trip and used up the leftover data on my regional Asia eSIM before switching to a Japan-only eSIM. I spent part of my work trip in Japan on a ship traveling around Japan and knew we were going to Busan, Korea for one day so I bought a 5GB regional Asia eSIM ($18.55 for 30 days) to use there. (They also offer cheaper 7-day plans with less data, but I always need to maximize my data so I usually buy the 30-day ones.)
iPhones allow two eSIMs to be activated at once. I bought and installed all the eSIMs in advance but didn’t activate them until I needed them. I had 5G in most places and didn’t have any service issues despite being in some rural spots. The personal hotspot worked like a dream. (For safety, I turned off cellular data for Instagram because I’m guilty of using too much data on it.)
Cambodia, Laos and Vietnam eSIMs
In early 2025, I traveled to Laos, Cambodia and Vietnam using Airalo using country-specific eSIM cards for each place, but they are all covered on Airalo’s regional Asia eSIM plans. First of all, Airalo is the only eSIM company with coverage in Laos from my research. You can buy a Laos-only eSIM (limited options and pricey—$9.50 for 1 GB) and it’s included in the regional Asia eSIM (better value).
In Cambodia, Airalo partners with the Metfone network, which has better coverage in rural areas compared to using the Smart network. (All networks work in big cities.) It even worked well enough to do voice-calls on the remote island of Koh Rong Sanloem, which is a bit of a cellular dead zone. I was able to hotspot to my computer with no issues when the WIFI was dragging. (I used the Cambodia eSIM with 5GB for 30 days for $13 USD.)
In Vietnam, Airalo is the only option that I’ve found that partners with Viettel, the fastest network in Vietnam.I’ve tried other networks, and they only get LTE, even in Hanoi and Ho Chi Minh. This is the fastest data in Vietnam by far. If you need to do Zoom calls or work, don’t risk it with any other network. (Since I just had a short two-night layover, I did the 1GB for 7 days plan for $4.50 USD.)
The Airalo app makes it easy to check your data usage and eSIM expiration date. You can even set the eSIMs to auto-renew! Airalo will send a notification when you get low on data or when it’s about to expire.
Overall, Airalo is fast and convenient. I recommend downloading the eSIMs before you travel so you can simply switch it on the instant your flight lands. It’s cheaper than paying for international service on your U.S. plan (unless you get it for free with your plan) and a no-brainer if you are country hopping on a short trip. For me, it’s my go-to if I’m not staying in a country long term and don’t have time to buy an eSIM from a storefront in the city. I really like the cashback feature of their loyalty program, too. Again, country-specific eSIMs are much better value than regional ones. (Use promo code NEWTOAIRALO15 for 15% off your first purchase or existing users can save 10% with AIRALOESIM10.)
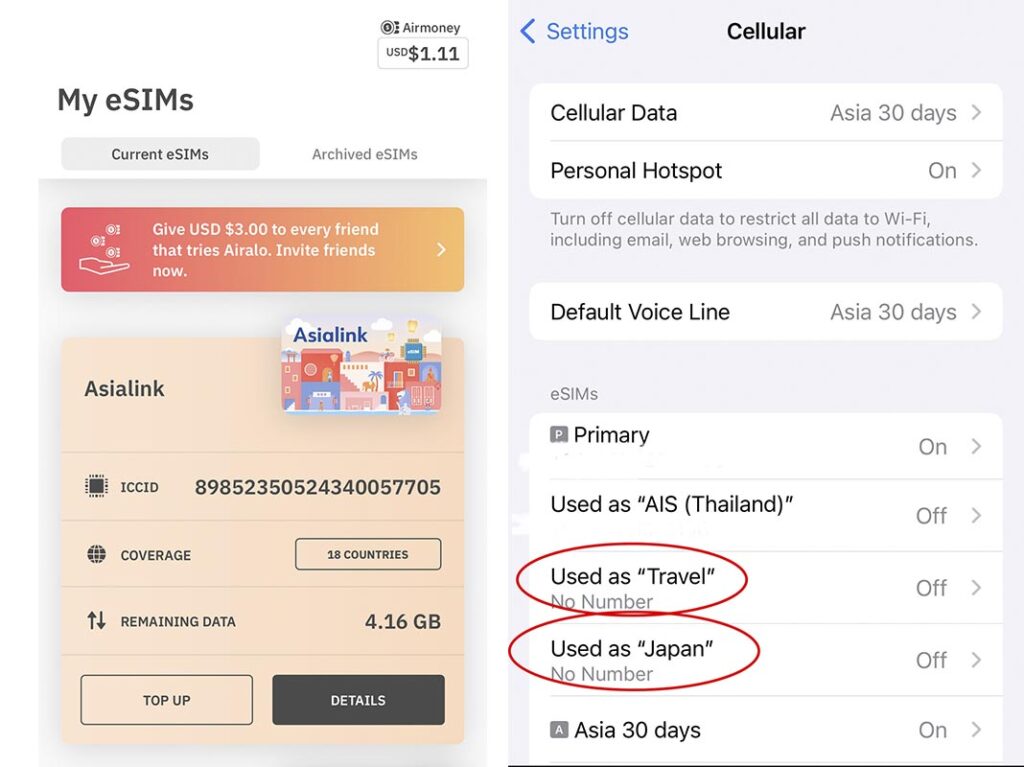 Left: The Airalo app makes it easy to check your data balance of your eSIM cards. Right: If you’re buying multiple eSIM cards, be sure to label them so they are easy to differeniate and only turn on the ones you want to use. (This menu is under Setting > Cellular on the iPhone.)
How does Airalo’s Loyalty Program work?
For every new eSIM purchase, Airalo gives you cashback as part of their Airmoney Rewards Program that can be redeemed on your next purchase.
Here are the tiers:
-
- Traveler: New users get 5% Airmoney Rewards
- Silver Traveler: After spending $20 USD, the reward increases to 6%
- Gold Traveler: After spending $70 USD, the reward increases to 7%
- Platinum Traveler: After spending $200 USD, the reward increases to 10%.
Important Note: You can’t redeem your rewards AND use a promo discount code. You can only do one or the other. I normally see what is cheaper—redeeming my rewards or saving 10% with code AIRALOESIM10.
How to Install Airalo on your Phone:
Airalo makes it easy to install—simply follow the on-screen instructions in the Airalo app.
Tap on My eSIMS in the app, tap the Details button on the eSIM you want to use, tap “View Instructions, tap“Direct” and then, tap “Install eSIM” and follow the on-screen guide. For step-by-step instructions with screenshots, check out this page.
Afterward, a screen will appear saying it’s activated then you can name your eSIM anything you’d like. If you have multiple ones, I recommend labeling them so it’s easy to differentiate between them. In your cellular settings on your phone, make sure the ones you aren’t using are turned off.
How to know if an eSIM work with your phone?
Airalo will tell you before the purchasing process whether or not an eSIM will work with your phone so you aren’t wasting money, which I really respect. This happened to me when I first tried to set one up on my old iPhone 13 Pro. I ended up having to call Verizon to get a few things sorted because I have a pre-paid plan. Afterward, it worked fine and I’ve had no issues on my iPhone 15 Pro.
For more about the pros and cons of eSIM cards, check out this post.
Pros & Cons of eSIM Cards for Travel
Bonifacio, Corsica // I used an EU SIM card I bought in Italy for a trip to three different countries in the Mediterranean with success.
One of my biggest travel pet peeves is finding affordable cellular data plans abroad. Historically, I’ve always bought local SIM cards because they are significantly cheaper than paying $10/day for my normal U.S. plan (Verizon) to work abroad. (Also, it’s absurd that both Verizon and AT&T charge $10/day on top of your regular phone plan for international coverage.) Keep reading for more details on eSIM cards for international travel!
Affiliate links are used in this post. If you make a purchase, I earn a small commission at no cost to you, which goes toward blog maintenance costs. I only recommend products and companies I truly love and use.
What is an eSim card?
It’s essentially a digital SIM card included in many newer phones. (Apple nixed the SIM card tray on U.S. models with the iPhone 14 so eSIMs are the only option for those models and newer ones going forward.) It makes things more convenient since people no longer have to go to a store to get a physical SIM card and find a tool or paper clip to open the SIM tray!
In certain parts of the world, you can still buy the newest iPhone model with a physical SIM tray, especially in Asia. The only negative side to buying an iPhone abroad is that the AppleCare plan doesn’t include the theft option.
What are the cons of an eSIM card for travel?
They can be tricker to activate and aren’t compatible with all phones or phone plans. For example, my previous phone (iPhone 13 Pro) was capable of using an eSIM, but I had trouble activating it and had to call Verizon for it to finally work. I’ve had zero issues with my new iPhone 15 Pro.
The biggest problem with eSIM cards is that they don’t work in some remote parts of the world, like Laos in Southeast Asia. This can vary by brand. If you’re buying a regional or global eSIM card, be sure to check that every country on your trip is covered by your plan.
Are eSIMs cheaper than buying a regular SIM card for travel?
It depends. While they are cheaper than paying for a U.S. international plan, they are not cheaper than buying a local physical SIM card in most places. In Thailand, I pay roughly $10/month for an unlimited plan and in Laos, I paid $4 for 30 GB a few months ago. With companies like Airalo or Saily, it’s $16-20 for 5GB in various regions of the world, which is a good deal and more convenient if you’re country-hopping. If you’re staying in one place long-term, it’s still cheaper to buy a local SIM card.
Always avoid buying one in an airport—everything is usually half-price outside the airport! In Singapore in February, I spent roughly $10.75 at a 7-Eleven for a SIM card with data when they were over $30 at the airport. When I noticed the airport’s high prices, I had tried to buy an eSIM on my phone using the airport WiFi, but the Airalo app said they were sold out. Yes, they were “sold out” of a digital product – it’s so hilarious that I can’t even make that up! I suspect they want to sell more of their regional plans, which I didn’t think to check.
Do eSIMs work for travel in the U.S.?
Yes, Airalo, especially, has plans in the U.S. A friend tried it last year and said it worked well. This is great for people traveling in the U.S. or expats returning for a short visit. Here is a list of their U.S. plan options.
Do eSIMs support personal hotspots?
The short answer is yes but not all do! This is a dealbreaker for me because I work while I’m traveling and most of the time I find that WiFi networks are terrible. I rely heavily on my personal hotspot for WiFi on my computer for Zoom calls.
I’ve had great success using my personal hotspot with both country-specific and regional Airalo eSIMs in Asia recently in Japan, Korea and Southeast Asia. (However, a friend recently used Airalo in Southeast Asia and didn’t have the hotspot option on her iPhone.) Airalo says it’s available if the carrier supports it so it’s hard to say if it will work every time, but it’s always worked for me.
Read my reviews of Airalo eSIMs & Saily eSIMs in Southeast Asia & Japan!
Are eSIMs safe? Are there privacy concerns with eSIMs?
eSIM providers require you to use their app to activate and use the service, which means you can be tracked. Apple users should turn on the “ask app not to track” setting to avoid this. I’m sure Android devices have a similar setting. In some ways, eSIMs are safer. If your phone is stolen, you can easily switch the service off your phone to prevent your number from being stolen. If you’re really concerned, you can also use a VPN for added security. I personally use NordVPN. For more about VPNs, check out my recent post about two-step verification and traveling.
What is the best eSIM card?
All eSIM brands have a similar pricing structure, but eSIM cards are only as good as the local network they partner with. I’ve had great experiences with Airalo eSIMs for my iPhone, which you can read about in my Airalo review post. To save money, use these promo codes: New customers save 15% off with NEWTOAIRALO15 and existing users save 10% with AIRALOESIM10.
The team behind NordVPN recently launched Saily, which has a wide variety of pricing options. (Use promo ANNA5 for 5% discount on Saily.) I had an overall good experience with Saily, which I review in this post.
Other brands include Nomad (which the New York Times writes about), GigSky Holafly and Flexiroam are others, but I can’t vouch for any of these. Apple also has a webpage with a list of wireless carriers worldwide that offer eSIM services.
What I do for phone data when I travel long-term
I’ve had the same U.S. phone number since I was 16. It’s the only consistent thing in my life. I’ve changed addresses so many times that I literally had to type up a Word document with all my previous addresses so I could apply for Global Entry! Since I’m often abroad for months at a time, it’s a waste of money to pay my U.S. phone bill while I’m gone since it’s worthless. And, paying $10/day for the international plan is outrageous and should be a crime! Verizon previously had a policy where you could suspend your service without billing for six months a year, but they did away with it. The only workaround that I could find was a prepaid plan. As long as I pay my bill every 60 days, I keep my number.
For example, I only paid for two months on my recent six-month trip abroad. Plus, I always downgrade to the cheapest plan. If I’m in a country for a long time, I buy a local SIM card at the mall because airport kiosks are too expensive. For the last six weeks in Asia, I’ve used strictly Airalo eSIMs, a regional Asia plan for Southeast Asia and Japan/Korea, and a country-specific Japan plan, which has been great.
Final eSIM Takeaways
Overall, eSIMs are the future—ready or not. They are very convenient and cheaper than paying for an international plan for your American phone plan unless you have T-Mobile. Regional eSIM plans are excellent for short trips to multiple countries. Currently, Airalo is one of the best options and is worth trying out. Saily is comparable with a great built-in virtual location feature.
If you’re going to be traveling long-term in a country or region, I still think getting an eSIM or regular SIM card from a local cellular provider are a better deal, especially in places like Southeast Asia. Certain parts of the world will take longer than others to catch up to this new technology so that’s my concern.
After much hesitation, I upgraded to the iPhone 15 Pro this year, but kept my iPhone 13 as a backup in case I need a physical SIM card to use the hotspot to work while I’m traveling. It’s too risky for me otherwise with work to not have that feature. (Since the iPhones sold in Southeast Asia still have SIM trays, I’m considering buying my phones abroad to keep this as an option going forward.)
Happy travels!
How to Visit Moo Deng from Bangkok Without a Car
 Moo Deng napping after a big breakfast and fighting off all the monkey’s trying to steal her food.
Today, I went to visit Moo Deng, a baby pigmy hippo was born on July 10, 2024 in Thailand. She’s achieved international fame on social media for her quirky antics and playful personality. She’s the best thing on the internet right now with a 24/7 live stream!
It’s no easy feat to visit Moo Deng and takes a bit of planning to get good photographs of her. Here’s how my friend and I visited Moo Deng from Bangkok without a car and timed our trip to get the best photos. (I made another blog post of my favorite photos I took of Moo Deng!)
Affiliate links are used in this post. If you make a purchase, I earn a small commission at no cost to you, which goes toward the cost of maintaining this blog.
Where does Moo Deng live?
Moo Deng lives at Khao Kheow Open Zoo in Si Racha, Chonburi, Thailand. The zoo is roughly a two-hour drive from Bangkok (114 km) and an hour’s drive from Pattaya (48 km).
How to Visit Moo Deng from Bangkok without a Car
The easiest way to visit Moo Deng from Bangkok is to drive or hire a car with a driver. We hired a car with a driver through our Airbnb for 3,000 baht ($88 USD) for the day and got a swanky van with nice reclining seats. GetYourGuide offers private transfers. Klook also offers day tours from Bangkok and Pattaya.
If you want to take public transport, you can take a shared van to Si Racha from Bangkok and then, take a Grab or taxi from there.
The zoo sent me Moo Deng’s schedule, which I used Google translate to tranlate to English on the right.
When is the best time to visit Moo Deng?
The zoo posts a rough schedule of Moo Deng’s day, but it’s hard to predict what she’ll feel like doing. She does sleep quite a lot. I recommend visiting at 8 a.m. right after the zoo opens when it’s less crowded. Moo Deng and her mom, Jona, wake up at this time and her mom eats so she’s active. This is also when the caretaker was cleaning their enclosure making for fun moments of those two interacting.
The caretaker was splashing water on her and taking Instagram photos. We also lucked out and got some interaction between Moo Deng and the troublesome monkeys trying to steal their food. Around 9 a.m., they went to sleep and were still sleeping at noon when we checked again. Late afternoon seems to be another active time for them.
Due to overcrowding, the zoo implemented a system where people only get five minutes to watch Moo Deng. Thankfully, it wasn’t crowded when we went on a weekday morning, so we spent about an hour with her. (The five-minute rule only seems to apply when it’s crowded because there was no enforcement when we were there.) There were only a handful of people when we arrived and roughly 30 max. A large tour group showed up at 9 a.m. making it close to 50 people.
I highly recommend visiting early on a weekday. The zoo was busy after 10 a.m. but never overly crowded by Moo Deng’s enclosure when we’d drive by in our golf cart. If you have questions about visiting, I found the zoo to be very responsive to Facebook messages.
Where to Buy Tickets for Moo Deng
Foreigners must buy tickets at a little building on the left before they reach the main entrance gate. Thais can buy tickets at the gate.
Prices: For foreigners, it’s 350 baht ($10.32 USD) for adults and 120 baht ($3.54) for kids. Parking passes are 40 baht ($1.18 USD) for a motorcycle and 80 ($2.36 USD) for a car.
You can buy tickets online through Klook for a slightly discounted rate to save time when you arrive. (We didn’t realize this was an option or we’d have done it!)
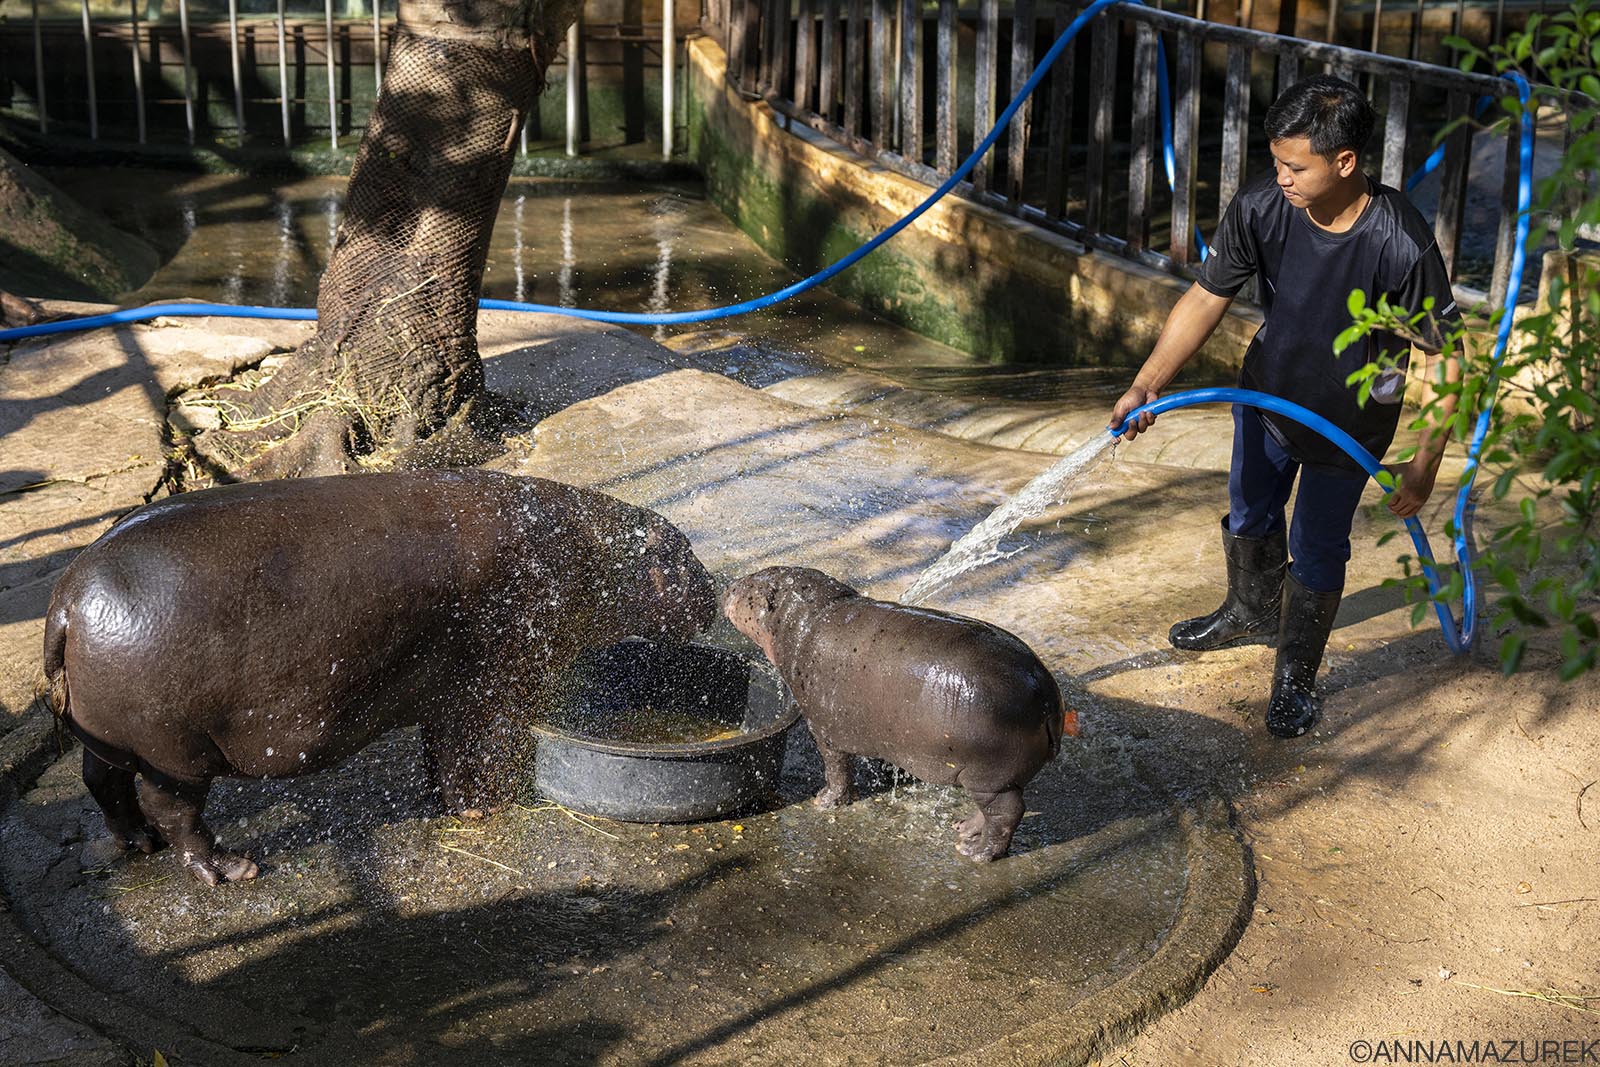 Moo Deng getting hosed down by her caretaker early on a weekeday morning. She and her mother are active and eating between 8 a.m. and 9 a.m.
Where is Moo Deng at the Zoo?
No cars are allowed in Zone 1, so you have to walk inside to the zoo. Moo Deng’s enclosure is easy to find – take a left once you walk through the entrance and follow the hippo signs with arrows. It’s roughly a 10-minute walk. You’ll walk across a boardwalk by other hippos until you reach their enclosure. There’s always Moo Deng music playing so it’s hard to miss!
The best photo angles of Moo Deng are from the elevated far end of the enclosure. Unless you are tall, the bottom end has a glass wall and fence wire that gets in the way of photos. In the morning, it’s best to shoot from the top due to the angle of the sun.
 On weekends and holidays, the public can feed Capybara’s at Khao Kheow Open Zoo.
What else is there to do at the zoo?
The zoo is divided into two zones and is too big to walk on foot—it’s 2,000 acres. We rented a golf cart for 500 baht ($14.75 USD) for two hours. We basically spent the rest of the time driving around, which was so fun!
Cars are allowed in Zone 2 for a fee. If you don’t feel comfortable driving a golf cart, there is a tram that makes the main stops.
Zone 1 is the busiest area with the main attractions, while Zone 2 is more rural and feels a bit like being in Jurassic Park because you drive by some dilapidated exhibits and enclosures that are no longer used. There are no crowds in this section.
I’m not much of a zoo fan but did enjoy this experience. (I literally flew to Bangkok from Chiang Mai for Moo Deng! My friend and I brought matching t-shirts to wear.)
The other main attractions are the penguin parade where they march out to be fed and an elephant swimming show along with opportunities to feed elephants and giraffes. We didn’t do any of these.
Where can I buy Moo Deng merchandise?
You can’t buy Moo Deng shirts at the zoo sadly. There are plenty of Moo Deng stuffed animals but that’s about it. The zoo trademarked and patented Moo Deng and is supposed to sell licensed t-shirts. I’ve yet to figure out where they are sold but it’s not listed on their website. We bought bootleg ones online and from an artist in Chiang Mai. It’s honestly really hard to buy Moo Deng merchandise anywhere in Thailand!